To use SSH on a Raspberry Pi, first enable SSH in the Raspberry Pi Configuration under Preferences or by running ‘sudo raspi-config’. Then, find your Pi’s IP address with the ‘ifconfig’ command. Connect via SSH using a terminal or a tool like PuTTY, entering ‘ssh pi@’. Consider configuring SSH for key-based authentication for more security and ease of use. With these basics covered, you’ll discover even more advanced techniques to enhance your setup.
Key Takeaways
- Enable SSH on your Raspberry Pi through the GUI or by creating a file named ‘ssh’ in the ‘/boot’ directory for headless setups.
- Connect to your Raspberry Pi using an SSH client like PuTTY on Windows or the terminal on macOS/Linux.
- Secure your SSH connection by generating a key pair and disabling password authentication in the ‘sshd_config’ file.
- Regularly monitor and update your Raspberry Pi’s software to protect against security vulnerabilities and unauthorized access.
- Use firewall settings to control incoming connections and implement two-factor authentication for additional security measures.
Enabling SSH on Your Raspberry Pi
Enabling SSH on your Raspberry Pi is a straightforward process that can be done in several ways. You can utilize various SSH configuration methods, such as using the GUI or the command line. For the GUI, navigate to ‘Preferences’, access ‘Raspberry Pi Configuration’, and enable SSH in the ‘Interfaces’ tab. If you prefer the command line, run ‘sudo raspi-config’, select ‘Interfacing Options’, and enable SSH.
If you’re in headless mode, create an empty file named ‘ssh’ in the ‘/boot’ directory to activate SSH upon reboot. The service is pre-installed but disabled for security reasons. Regularly updating your OS helps address potential security vulnerabilities that could affect SSH connections. Regardless of the method, always check your SSH access permissions to guarantee security when connecting remotely.
Connecting to Your Raspberry Pi via SSH

Once SSH is enabled on your Raspberry Pi, the next step is to connect to it remotely. First, find your Pi’s IP address by entering the ‘ifconfig’ command in the terminal, noting whether you’re on WiFi or Ethernet. For Windows, download PuTTY, enter the IP address, and keep the port set to 22. For macOS or Linux, use the command ‘ssh pi@192.168.X.XX’. After hitting Enter, input your username and password. Enabling SSH allows you to access your Raspberry Pi securely over the network. Additionally, ensure that your Raspberry Pi is connected to the local network to avoid connection issues.
To ensure a stable connection, configure your network settings correctly using tools like ‘sudo raspi-config’ for WiFi configuration. It is also important to manage user permissions properly, similar to how you would manage Bluetooth permissions, to maintain security and functionality. Enjoy the SSH benefits—like remote access and command execution—without the need for physical interaction. If you’re considering SSH alternatives, remember options like VNC or TeamViewer, but keep in mind SSH offers more security for command-line tasks.
Configuring SSH Without a Password
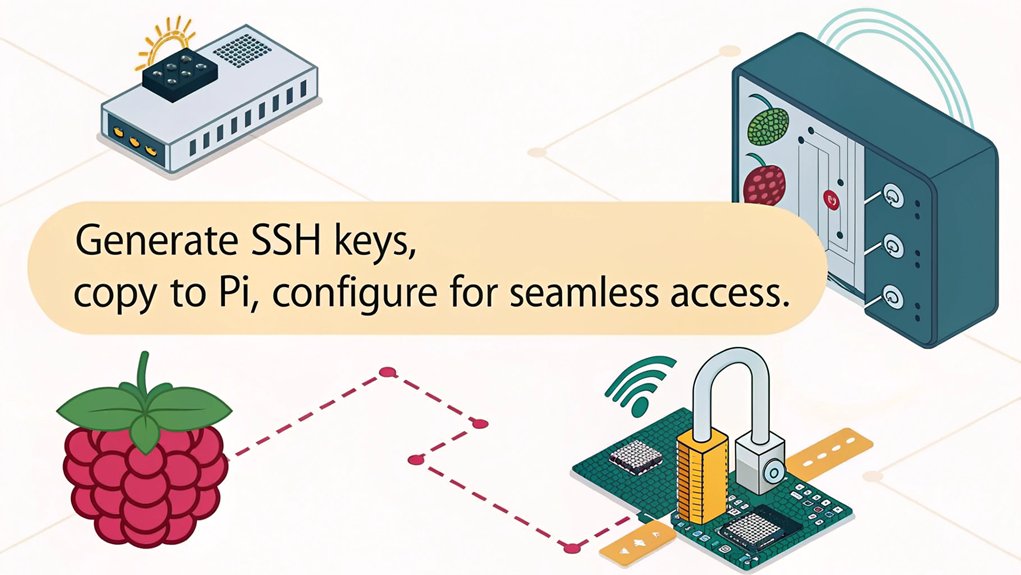
To configure SSH on your Raspberry Pi without a password, start by generating an SSH key pair. Use the command ‘ssh-keygen -t rsa -b 2048’ and specify a file path or accept the default. After generating your keys, copy the public key to the Raspberry Pi using ‘ssh-copy-id’. Edit the ‘sshd_config’ file to disable password authentication and test your connection.
Here’s why this is essential:
- Enhanced security: Protects against brute-force attacks, as SSH keys are harder to intercept and brute-force compared to passwords.
- Convenience: Connect effortlessly without typing a password.
- Efficiency: Perfect for automated processes.
- Flexibility: Easily manage SSH keys with regular rotation. Additionally, adding your SSH key to Raspberry Pi streamlines access and enhances security.
Embrace public key authentication for a seamless, innovative experience in SSH key management!
Enhancing SSH Security
Enhancing the security of your SSH setup is essential for protecting your Raspberry Pi from unauthorized access.
Start with effective SSH key management, utilizing key pairs for secure connections. Pair this with two-factor authentication, requiring both a key and a time-based code for access. Additionally, consider using SSH to facilitate secure communication between devices on a network. Regularly monitoring login attempts can also help identify patterns of attack and bolster your security strategy.
Establish firewall rules to control traffic, using UFW to limit incoming connections strategically. Consider changing to non-standard ports and implementing port knocking to obscure your SSH service.
Don’t forget to monitor attempts and set up intrusion detection to catch unusual activity. Always maintain secure permissions for your SSH directories and rotate keys regularly as part of solid access control.
These steps create a robust layer of protection for your Raspberry Pi.
Troubleshooting SSH Connections
If you’re having trouble connecting via SSH, common connection errors and firewall configuration issues might be the culprits. Start by checking your firewall settings to guarantee SSH traffic is allowed and look for error messages that could indicate a connection problem. Additionally, rebooting the router can often resolve SSH connectivity issues related to network hardware. Troubleshooting these areas can help you regain access to your Raspberry Pi quickly. Furthermore, consider clearing existing SSH keys to eliminate potential conflicts that may prevent successful connections.
Common Connection Errors
When troubleshooting SSH connections to your Raspberry Pi, several common errors can arise that may hinder your remote access. These issues often stem from network misconfigurations, authentication failures, or host key issues. To help you identify the problem, consider the following:
- IP conflicts with another device on the network
- SSH timeouts due to incorrect credentials or settings
- Accessibility issues with port 22 being blocked
- Misconfigured SSH keys leading to connection resets. Additionally, ensure that the “ssh” file is correctly placed in the root directory of the FAT32 partition on the SD card, as this is crucial for enabling SSH on boot. Connection attempts made over both eth0 and wlan0 may also lead to complications if there are underlying routing problems with your network configuration.
Firewall Configuration Issues
Firewall configuration issues can often be a barrier to successful SSH connections on your Raspberry Pi.
To troubleshoot, start by checking your firewall rules with commands like ‘sudo ufw status’ or ‘sudo systemctl status nftables.service’. Make sure you’ve allowed SSH traffic on port 22 with ‘sudo ufw allow 22’ for UFW or ‘sudo iptables -A INPUT -p tcp –dport 22 -j ACCEPT’ for iptables. Firewalls control network traffic, so ensuring proper rules are in place is vital for SSH access. Note that Raspberry Pi 10 and newer use nftables by default, which may affect how you configure your firewall settings.
Additionally, ensure that your device does not exceed the maximum current draw per pin, avoiding potential hardware issues such as those related to GPIO pin management. It is also important to use a reliable power supply, such as the 27W PD Type-C power supply included in some kits like the Vemico Kit.
If connections are still failing, you might temporarily disable the firewall using ‘sudo ufw disable’ or ‘sudo systemctl stop nftables.service’.
Finally, review the firewall logs to identify any denied connections, giving you valuable insights for resolving issues effectively.
Implementing these troubleshooting tips can pave the way for smoother SSH access.
Advanced SSH Features

In this section, you’ll learn how to leverage advanced SSH features to enhance your Raspberry Pi experience. We’ll cover X11 forwarding for remote GUI access, remote command execution for streamlined tasks, and configuring SSH permissions for added security. These tools can greatly improve your efficiency and protect your connections, as SSH secures network services over unsecured networks, providing a robust foundation for remote control of Raspberry Pi from anywhere.
X11 Forwarding Setup
To make the most of your Raspberry Pi experience, setting up X11 forwarding allows you to run graphical applications remotely, displaying their interfaces on your local machine.
Here’s what you’ll need to guarantee a seamless setup:
- Guarantee X11 compatibility with your SSH client.
- Check X11 security settings for maximum safety.
- Install the right X server on your local machine.
- Be aware of potential X11 performance issues over networks, especially when using X11 port forwarding. Additionally, this process enables you to leverage the X11 window system’s client-server architecture for enhanced graphical application performance.
Start by editing the SSH configuration file to enable X11 forwarding.
When you connect using SSH, simply add the ‘-X’ or ‘-Y’ flag.
Running X11 applications like ‘xclock’ will bring their interfaces to your screen, giving you a powerful way to leverage your Raspberry Pi remotely.
Remote Command Execution
While working with SSH on your Raspberry Pi, you might find the need to execute commands remotely without establishing a persistent connection. This allows for effective command automation and remote execution. You can run single commands like ‘ssh user@host “command”‘ or multiple commands separated by semicolons. SSH enables secure data transfer and access when executing these commands. Additionally, enabling interactive shell for commands requiring sudo can enhance your ability to perform administrative tasks remotely.
Here’s a helpful overview:
| Command Type | Example Command | |
|---|---|---|
| Single Command | ‘ssh user@host “dpkg -l | grep package_name”‘ |
| Multi-Line Command | ‘ssh -T host << EOSSH; ls; pwd; EOSSH’ | |
| Local Script | ‘cat script.sh | ssh host sh’ |
Using SSH with variables and heredoc enhances your control over command execution, making it seamless and efficient.
Configuring SSH Permissions
Configuring SSH permissions is crucial for guaranteeing secure and efficient access to your Raspberry Pi. Proper SSH permissions management safeguards your device, so prioritize these key elements:
- Maintain strong file permission settings to prevent unauthorized access.
- Safeguard your private key with a robust passphrase for extra security.
- Implement authorized keys configuration to streamline secure file transfer.
- Disable password authentication to thwart brute-force attacks.
To set this up, generate your SSH keys with ‘ssh-keygen’, then copy your public key to the Raspberry Pi’s ‘~/.ssh/authorized_keys’.
Confirm the permissions are correct by using ‘chmod 644’ and ‘chown’, and remember to restart the SSH service.
These steps empower you to innovate with confidence, knowing your Raspberry Pi is well-protected.
Common SSH Commands for Raspberry Pi
Mastering SSH commands on your Raspberry Pi can streamline your remote management tasks considerably. Familiarize yourself with essential commands for improved connection speed and security measures.
Start with connecting via ‘ssh pi@raspberry’, tweaking the port with ‘ssh pi@raspberry -p 3344’ if needed. For robust authentication methods, consider using key files with ‘ssh -i /path/file.pem admin@192.168.1.1’.
Once connected, manage files using commands like ‘mkdir’ for creating directories or ‘rm’ for removing them. Keep your system updated and secure with ‘apt-get update’ and ‘apt-get upgrade’. Ensure you have a stable network connection, similar to what is required for VNC connections, to avoid any connectivity issues.
Ensure you have enabled SSH correctly using the raspi-config tool to avoid any connectivity issues. Avoid common pitfalls by referring to ‘raspi-config’ for configuration tips. Embrace the command line for effective remote access and enhanced performance of your Raspberry Pi.
Managing SSH Keys
SSH keys enhance your Raspberry Pi security and streamline the authentication process. By managing your SSH keys effectively, you can bolster your setup against various threats.
Here are essential elements to take into account:
- Implement key expiration to limit access duration.
- Regularly perform key rotation to mitigate security risks.
- Secure your private keys with strong passphrases.
- Utilize public keys for safe authentication.
These practices elevate your Raspberry Pi’s security and enhance your overall experience.
With effective SSH key management, you gain not just protection but also an innovative way to automate connections. Emphasizing key expiration and rotation guarantees your system adapts to evolving security requirements.
Make your SSH keys a priority, and enjoy a robust, efficient approach to remote access.
Monitoring SSH Activity

To keep your Raspberry Pi secure, it’s crucial to monitor SSH activity effectively.
Regularly analyzing log files can help you identify unusual connection attempts and track any suspicious behavior.
Log File Analysis
Monitoring SSH activity through log file analysis is essential for maintaining the security of your Raspberry Pi. By regularly reviewing logs, you can perform effective security audits and guarantee log retention.
Identify repeated authentication failures to detect threats.
Look for unauthorized access attempts from unknown IPs.
Watch for changes in SSH configurations that may indicate breaches.
Analyze patterns of malicious activity for proactive measures.
Ensure your system uses secure boot mechanisms to prevent unauthorized code execution.
You can access SSH logs using the ‘journalctl’ command, filtering for priority notices or recent entries.
Understanding these logs not only enhances your Raspberry Pi’s security but also empowers you to innovate confidently within your projects.
Stay vigilant
Connection Attempts Tracking
Tracking connection attempts is an essential step in securing your Raspberry Pi against unauthorized access. By implementing effective connection tracking, you enhance your security auditing efforts. Regular software updates and updated antivirus software are also crucial in preventing malware and ransomware attacks, which can compromise system performance and data integrity. Ensuring effective VM isolation strategies can further mitigate malware threats.
| Method | Description | Tools/Locations |
|---|---|---|
| Check SSH Logs | Investigate ‘/var/log/auth.log’ for authentication failures. | auth.log |
| Monitor Network Traffic | Use firewall settings to control and analyze SSH traffic. | UFW, iptables, netstat |
| Implement Security Measures | Change default ports, use key pairs, disable passwords. | SSH config, firewall settings |
| Automate Monitoring | Use scripts for real-time alerts on failed attempts. | Custom scripts, GPIO outputs as indicators |
These practices help you stay on top of unusual activity and mitigate potential threats. Ensuring that your system is not running on unpatched software further strengthens your security posture.
Best Practices for Using SSH
Although securing your Raspberry Pi with SSH might seem straightforward, implementing best practices can greatly enhance your system’s safety. Embrace these SSH best practices to fortify your setup:
- Use key pair security instead of traditional passwords.
- Set user restrictions to limit access.
- Enable firewall settings to block unauthorized connections.
- Implement two-factor authentication for added security.
Regularly update your system, change default passwords, and disable root login to patch vulnerabilities.
Consider adjusting SSH protocol security by changing default ports and enforcing idle timeouts. Monitor your logging configurations and limit authentication attempts to thwart intrusion attempts.
Frequently Asked Questions
What Is the Default Username and Password for Raspberry Pi SSH?
Imagine sailing smoothly into secure waters. In older Raspberry Pi versions, the default credentials were ‘pi’ and ‘raspberry’ for SSH access. Newer versions require custom usernames and passwords, enhancing your secure access experience. You should never keep default passwords, as that is a security hole! Always change them.
Can I Use SSH on Raspberry Pi Without an Internet Connection?
Yes, you can use SSH on your Raspberry Pi without an internet connection by connecting both devices on a local network. This setup allows for remote access as long as IP addresses are correctly configured.
How Do I Change the Default SSH Port on Raspberry Pi?
To change the default SSH port on your Raspberry Pi, edit the ‘sshd_config’ file, update the port, and restart the service. Don’t forget to adjust port forwarding and enhance SSH security by implementing best practices.
Is It Safe to Use SSH on Public Wi-Fi Networks?
Using SSH on public Wi-Fi might feel like walking a tightrope. While SSH security protects against interception, public network risks remain. Data encryption guarantees connection safety, but consider adding a VPN for extra protection.
Can I Use SSH to Restart My Raspberry Pi Remotely?
Yes, you can restart your Raspberry Pi remotely using SSH. Just access the command line and execute ‘ssh pi@Raspberry_Pi_IP sudo reboot’. This method offers efficient remote access and control without needing physical presence at the device.
Conclusion
With SSH on your Raspberry Pi, you’re opening up a world of remote access and control. Picture yourself effortlessly managing your projects from anywhere, whether you’re sitting in a cozy café or lounging at home. By securing your connection and using best practices, you’re ensuring a safe journey into your Raspberry Pi’s depths. So plunge into it, explore, and let your creativity flow, knowing that the power of SSH is right at your fingertips, ready to transform your ideas into reality.

I am a retired software engineer with experience in a multitude of areas including managing AWS and VMWare development environments. I bought a relative a mini-PC a year ago and have become passionate about the technology and its potential to change how we deploy software.

