Why Build a Raspberry Pi Home Security Camera?
Creating your own Raspberry Pi home security camera offers an affordable alternative to commercial systems while giving you complete control over features and data privacy. You’ll need a Raspberry Pi board, camera module, storage, and appropriate software to build a fully functional surveillance system. The process involves hardware assembly, OS installation, software configuration, and strategic placement. With basic technical skills, you can establish a customized security solution that monitors your property and sends alerts when motion is detected.
Key Takeaways
- Choose the right Raspberry Pi model based on your needs: Zero W for basic monitoring or Pi 4 for high-resolution streams.
- Install Raspberry Pi OS using the Raspberry Pi Imager tool and perform initial setup including Wi-Fi configuration.
- Connect the camera module to the CSI port and test functionality using Python’s Picamera library.
- Install software like MotionEyeOS or Motion for video capture, then configure motion detection settings and alerts.
- Set up remote viewing access through port forwarding and implement storage solutions with weatherproofing for outdoor installations.
Selecting the Right Raspberry Pi Model and Components
A successful Raspberyy Pi home security camera system begins with selecting appropriate hardware components. When choosing between Raspberry Pi models, consider your project requirements. The Pi Zero offers minimal power consumption and compact form factor, while the Pi 4 delivers superior processing capabilities for handling high-resolution video streams. The Pi Zero W provides essential Wi-Fi connectivity for remote access.
Camera module selection considerably impacts system performance. The 8MP Raspberry Pi Camera V2 delivers 1080p30 video with excellent image quality, while its Noir variant enables night vision capabilities. The Waveshare RPi Camera (J) is optimal for surveillance applications requiring wide field-of-view coverage.
Budget considerations might lead you toward cost-effective alternatives like the Arducam 5MP. Verify component compatibility between your chosen Pi model and camera module.
Additionally, account for proper power supply, appropriate housing for weather protection, and secure mounting hardware to complete your system foundation. The Pi 3A+ offers an excellent balance of performance and cost-effectiveness while still supporting pan-tilt capabilities for comprehensive monitoring. For optimal video processing, choose a model with hardware video decode capabilities that can handle high-definition streaming. The Raspberry Pi 5 with its quad-core processor provides exceptional performance for handling multiple camera feeds simultaneously.
Preparing Your MicroSD Card With Raspberry Pi OS
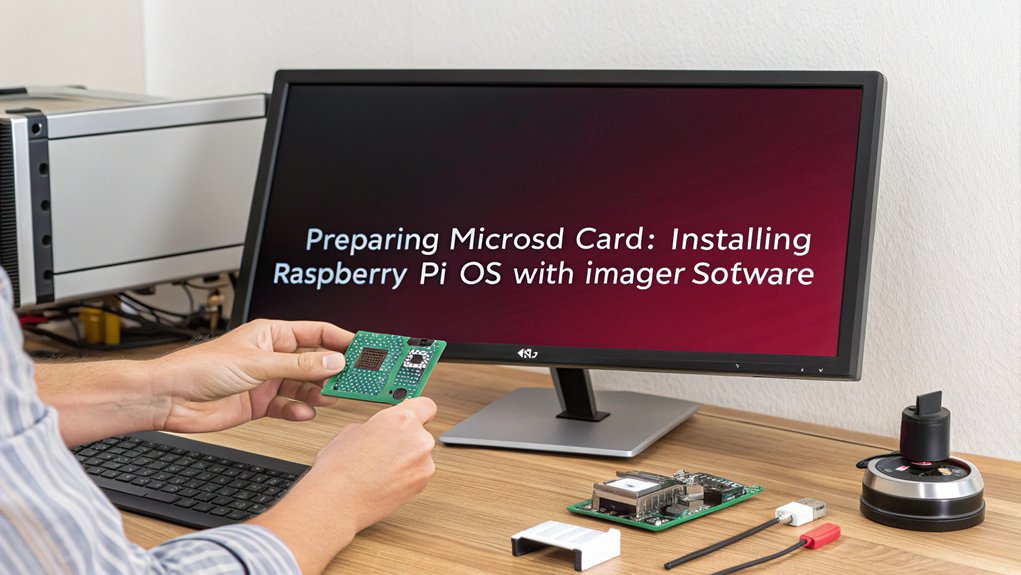
Selecting an appropriate microSD card with at least 32GB capacity and good read/write speeds will guarantee your Raspberry Pi home security camera operates at peak performance.
You’ll need to download the Raspberry Pi OS (preferably Lite version for headless operation) from the official website or using Raspberry Pi Imager tool.
After downloading the OS image, flash it to your microSD card using Raspberry Pi Imager or balenaEtcher, making sure the process completes without interruption. When writing the image, you’ll have the opportunity to customize settings including Wi-Fi credentials for your Raspberry Pi Home security camera’s network connectivity. Your login information will be securely maintained through visitor credentials stored in encrypted cookies by the Raspberry Pi system. The Raspberry Pi OS offers strong community support with extensive documentation that will help you troubleshoot any issues during setup. Choose a Class 10 UHS-I microSD card for optimal performance and reliability in your Raspberry Pi Home security camera system.
SD Card Selection
The cornerstone of your Raspberry Pi home security camera project lies in choosing the right microSD card, which will serve as both the boot drive and storage medium for your surveillance footage.
For peak performance, select microSDHC or microSDXC SD card types with Class 10, UHS-1, or UHS-3 speed ratings to handle continuous video recording. The Silicon Power 3D NAND offers exceptional performance for security applications with its superior 4K random write speeds. Official microSD cards come pre-programmed with Raspberry Pi OS, saving you setup time.
Capacity requirements depend on your surveillance needs: 32GB works for basic monitoring, while 64GB-128GB accommodates longer retention periods and higher resolution footage.
Reputable SD card brands like SanDisk, Samsung, and Kingston offer reliability essential for 24/7 operation. The SanDisk Extreme Pro stands out for consistently high performance in continuous recording scenarios despite its higher price point.
Look for cards supporting A2 speed class and U3/V30 ratings to guarantee smooth performance with high IOPS capabilities.
The latest Raspberry Pi models can utilize this storage effectively with their quad-core processors enabling smooth video processing for security applications.
Remember that your camera’s reliability directly correlates with your SD card’s quality—don’t compromise on this vital component.
Installing OS Image
Installing your Raspberry Pi OS requires precise preparation of the microSD card, which serves as the foundation for your entire security camera system. Download the official Raspberry Pi Imager tool from the Raspberry Pi website for your operating system and launch it after installation. The installation process is quick and straightforward for immediate use in your Raspberry Pi Home security camera project.
While the Raspberry Pi Imager is recommended, you could alternatively use command line tools for manual installation if you prefer greater control. Raspberry Pi OS, formerly known as Raspbian, is optimized for all Pi models with ARMv7 feature sets ensuring compatibility with your security camera hardware. Before proceeding with installation, run ‘sudo apt update’ and ‘sudo apt upgrade’ commands to ensure your system has latest package information.
| Step | Action | Purpose |
|---|---|---|
| 1 | Select Pi model | Guarantees compatible OS options |
| 2 | Choose OS variant | Match to hardware capabilities (32/64-bit) |
| 3 | Configure OS customization | Pre-set hostname, enable SSH access |
After selecting your storage device, utilize the OS customization feature to configure SSH access—critical for remote camera management. Enable password authentication for simplicity or SSH keys for enhanced security. Once configured, click “Next” to begin flashing. When complete, safely eject the microSD card, which is now ready for your Raspberry Pi Home security camera project.
Connecting and Testing the Camera Module
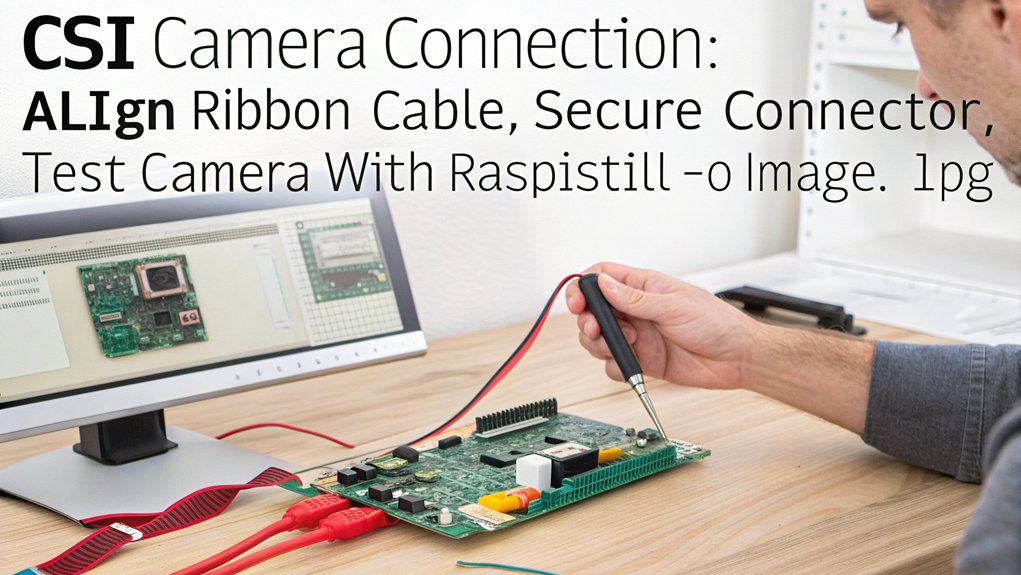
Once you’ve acquired your chosen camera module, connecting it properly to your Raspberry Pi is essential for guaranteeing ideal functionality of your home security system.
Locate the CSI interface adjacent to the HDMI port (or on the side for Pi Zero and Compute Module). Gently lift the connector’s tab, insert the flex cable with silver contacts facing down, and secure it firmly. Ensure the camera module is properly oriented with pins facing HDMI.
For camera module testing, use the Picamera library in Python to capture test images or video. Install it with:
“`
pip install picamera
“`
Then run a simple test script to verify functionality:
“`python
import picamera
from time import sleep
with picamera.PiCamera() as camera:
camera.start_preview()
sleep(2)
camera.capture(‘test.jpg’)
“`
Adjust camera positioning to optimize your field of view and guarantee proper focus for your monitoring area. Your Pi will store temporary camera data in session cookies to improve performance during video streaming operations.
When configuring your camera code, remember to use GPIO.cleanup() at the end of your scripts to properly release resources and prevent pin conflicts in your security system.
Make sure you’re using the official power adapter for your Raspberry Pi to ensure stable performance during continuous camera operation.
Installing Security Camera Software Options
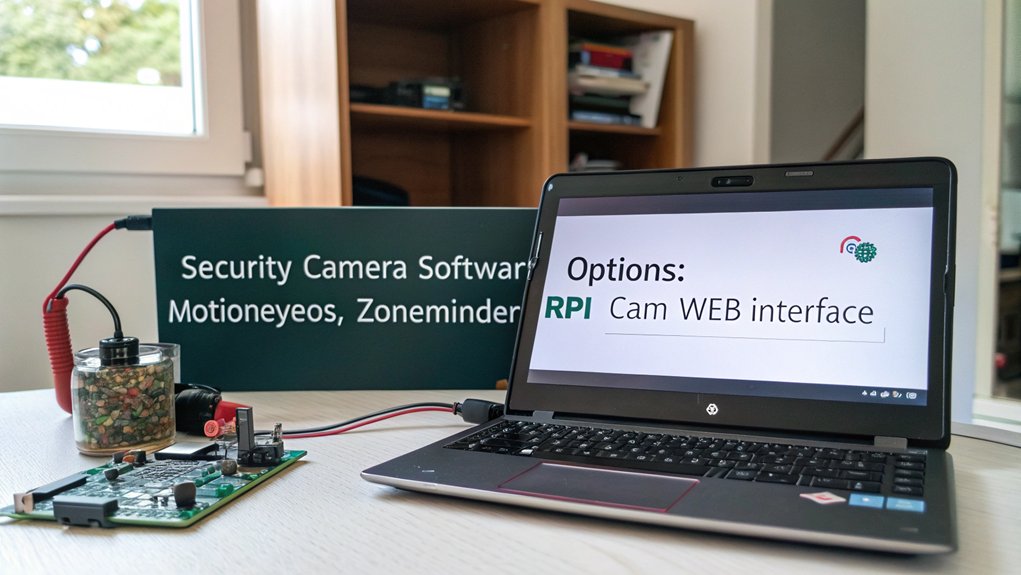
After connecting your camera module, selecting the appropriate software becomes the critical next step in creating an effective Raspberry Pi home security camera system.
You’ll find several tailored options, each with distinct capabilities matching different surveillance needs. MotionEyeOS benefits include dedicated optimization for security applications and multi-camera management through a single hub, ideal for extensive coverage. You can also leverage rpicam-apps for custom video capture capabilities with various encoding options. MotionEyeOS offers a user-friendly interface for configuration, making it accessible to beginners and experienced users alike.
Consider implementing tamper detection features to protect against physical security breaches that software solutions alone cannot address. Hardware selection is crucial, with options ranging from the powerful Raspberry Pi 4 Model B to the compact Pi Zero W, depending on your surveillance requirements and GPIO pins availability.
- MotionEyeOS: Flash directly to microSD for a purpose-built solution that allows browser-based access to all connected cameras.
- Motion Software: Install via `sudo apt install motion -y` for lightweight, single-camera setups without requiring a dedicated OS.
- Frigate AI: Implement advanced object recognition to distinguish between humans, vehicles, and other objects, dramatically reducing false positives while integrating with home automation platforms.
Configuring Motion Detection Settings
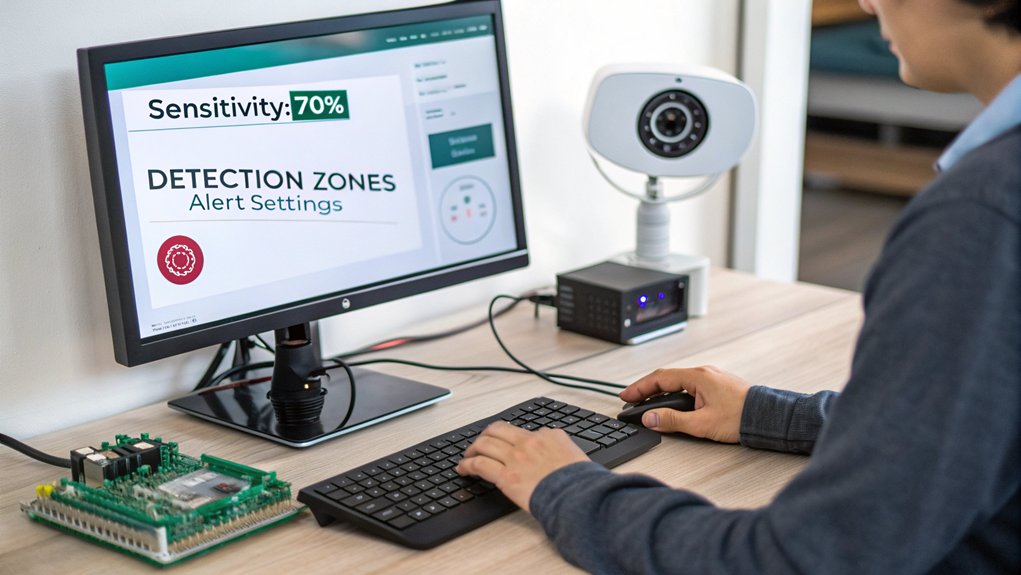
You’ll need to fine-tune your motion detection sensitivity thresholds to balance between capturing genuine security events and minimizing false alarms.
Configure your `threshold` parameter in motion.conf with lower values for higher sensitivity or higher values to reduce false positives triggered by environmental conditions like changing light.
For more precise monitoring, implement zone-based detection by creating masks that focus only on critical areas like doorways while ignoring high-traffic or irrelevant sections of your camera’s view.
The default configuration uses a threshold of 1500 changed pixels to trigger motion detection events, which provides a good starting point for most home security setups.
You can also set up automated email alerts to receive notifications with video attachments whenever motion is detected by your Raspberry Pi camera.
Sensitivity Threshold Configuration
Configuring the sensitivity threshold is a critical step in fine-tuning your Raspberry Pi home security camera’s motion detection capabilities. Start with the default 4% frame change setting in MotionEyeOS, then adjust based on your environment’s specific needs. Proper sensitivity adjustment techniques prevent false triggers from clouds or shadows while guaranteeing genuine motion is captured.
- Implement a trial-and-error approach—start high and gradually decrease until you achieve ideal motion detection optimization.
- Combine sensitivity adjustments with noise filtering methods like masking to improve accuracy.
- Monitor system performance regularly, as higher sensitivity settings increase resource usage and storage requirements.
This balancing act between capturing relevant motion and eliminating false positives ultimately determines your Raspberry Pi Home security camera’s efficiency and effectiveness.
Regular calibration guarantees your system remains refined as environmental conditions change.
When editing configuration files, you’ll find the most important sensitivity parameters in the /etc/motion/motion.conf file where threshold values can be precisely customized.
For advanced setups, access the Frame Change Threshold settings through the MotionEye interface to make fine-grained adjustments based on lighting conditions and camera positioning.
Consider implementing SSH key-based authentication for remote access to your Raspberry Pi camera system to prevent unauthorized configuration changes while maintaining your ability to adjust sensitivity settings remotely.
Zone-Based Detection Setup
Zone-based detection represents a powerful refinement to your Raspberry Pi home security camera system, enabling precise monitoring of specific areas while minimizing false alarms.
Using MotionEyeOS or Motion software, draw polygons directly on your camera’s live preview to establish detection zones around doorways, windows, or valuables.
Create multiple zones with customized notification settings—higher sensitivity for entry points, lower for high-traffic areas. You can also define mask zones to exclude nuisance triggers like swaying trees or pet pathways. Consider implementing the gpiozero library for effective sensor calibration to complement your camera-based detection. This flexible approach works with virtually any USB camera compatibility connected to your Raspberry Pi system, including the highly recommended Raspberry Pi Camera Module V2 for optimal performance.
Conduct thorough zone testing after setup by walking through each area to verify proper operation. Configure your system to send alert notifications when motion is detected for timely updates on security breaches. Adjust sensitivity thresholds per zone until you achieve ideal balance between security and false alarm reduction.
Remember to recalibrate zones seasonally as environmental conditions change, ensuring your system maintains vigilance where it matters most.
Setting Up Remote Viewing Access
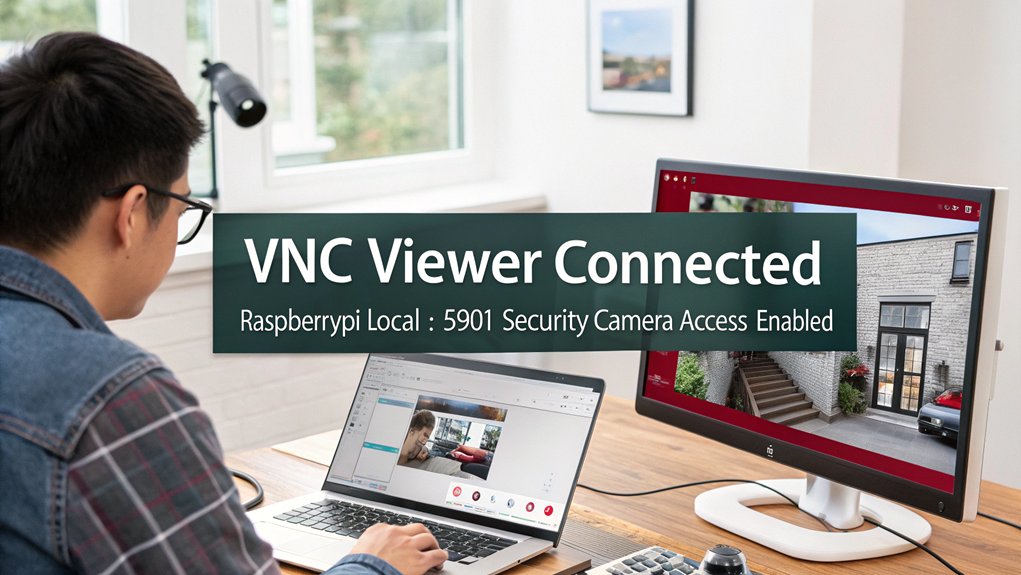
Once your Raspberry Pi camera system is properly set up with the necessary hardware and software, establishing remote viewing access becomes essential for monitoring your home from anywhere.
Configure port forwarding on your router to allow external access to your camera’s interface. Then, secure your remote access by setting up a strong username and password combination to protect your camera security system.
For reliable remote viewing, you’ll need to:
- Configure your Raspberry Pi’s static IP address and enable RTSP streaming for consistent connectivity
- Implement HTTPS encryption and secure network protocols to safeguard your video feed from unauthorized access
- Install a compatible interface like MotionEyeOS or RPI-Cam-Web-Interface for browser-based monitoring across multiple devices
You can access the stream through a web browser by navigating to your Pi’s IP address with port 5000 appended to the URL.
Installing VLC Media Player is recommended as it supports IP cameras using RTSP URLs for both main and sub streams.
Consider setting up user profiles with parental controls if multiple family members will be accessing your security system.
Verify connectivity by testing your setup both within your local network and via external internet connection.
Check your Apache error logs regularly to troubleshoot any connectivity issues that might arise with your Raspberry Pi home security camera system.
Establishing Storage Solutions for Footage
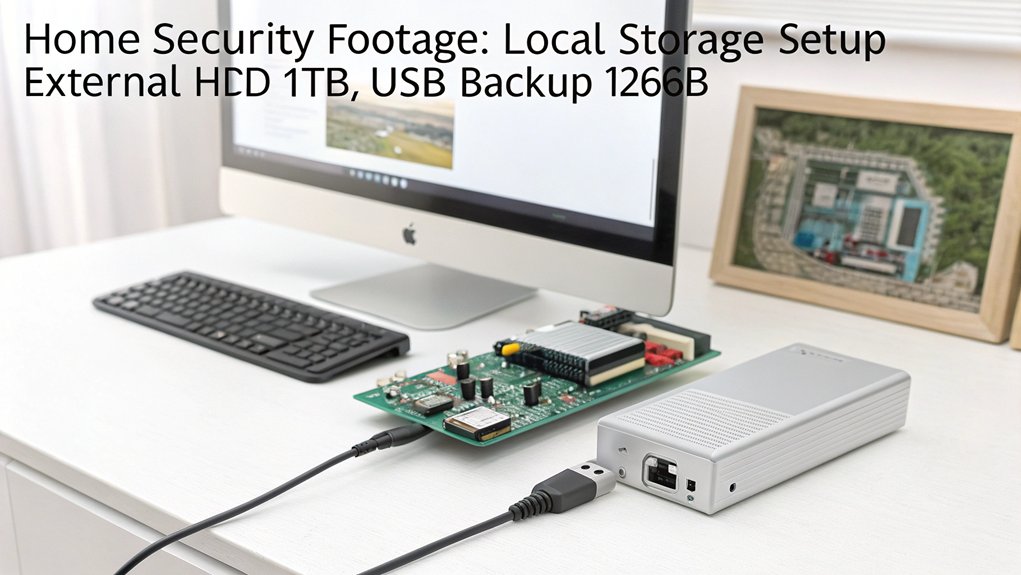
Proper storage solutions for your security footage represent a critical component of any effective Raspberry Pi surveillance system. You’ll need to implement external storage using either USB hard drives (1TB+) or SATA drives connected to your Pi.
For multi-camera setups, configure your Pi as a centralized hub for streamlined data organization. MotionEyeOS simplifies integration with external devices while establishing structured directories for efficient video retrieval. You can leverage the low power consumption of Raspberry Pi to ensure your surveillance system remains cost-effective even when running 24/7.
Implement automated backups through file management settings that purge older footage to preserve space. Your system can differentiate between continuous recording and motion-triggered events, appropriately timestamping files for easy reference.
Consider scalability options by selecting storage capacity that accommodates future expansion. For additional flexibility, explore cloud integration through services like NextcloudPi, enabling remote access to your security recordings alongside traditional local storage.
For long-term footage preservation, implement incremental backups using rsync to efficiently save only changes since the previous backup operation.
Adding Night Vision Capabilities

Transforming your Raspberry Pi home security camera into a 24-hour surveillance solution requires implementing night vision capabilities. Select a Pi No-IR camera module and connect it via the ribbon cable, making sure the metal leads face away from the Ethernet port.
Install MotionEye or Motion software after enabling the camera interface through `raspi-config` for continuous monitoring.
- Add external IR illuminators to extend night vision range and improve image clarity
- Configure camera settings specifically for low-light conditions in your software interface
- Install camera in a weatherproof enclosure to protect against environmental factors
For night vision enhancements, consider integrating additional IR lights positioned strategically around monitoring areas.
When troubleshooting night vision problems, first check IR illumination adequacy, then verify software settings are optimized for low-light detection.
Regular system testing guarantees reliable performance during darkness.
Consider implementing adaptive LED control based on environmental data to automatically adjust illumination based on ambient light conditions.
Integrating With Home Automation Systems

You can easily integrate your Raspberry Pi home security camera with Home Assistant, creating a centralized control hub for extensive home automation and monitoring.
Connect your camera system to Home Assistant using MQTT protocol, which enables efficient communication between your security camera and other smart devices in your network.
Once integrated, you’ll gain access to powerful automation capabilities such as triggering lights when motion is detected, sending notifications to your phone, or incorporating camera feeds into customized dashboards.
Home Assistant Integration
Integrating your Raspberry Pi security camera with Home Assistant opens up powerful automation capabilities for your smart home ecosystem.
Navigate to the Integrations page in Home Assistant and add your camera using either the generic camera integration or specific Raspberry Pi camera integrations. You’ll need to generate an RTSP stream from your Pi Camera Module V2 using tools like `picamera2`, which Home Assistant can then access as it would any IP camera.
- Configure motion detection to trigger smart home actions like turning on lights when movement is detected
- Create custom dashboards that display your camera feeds alongside other home controls
- Implement person detection using AI tools to reduce false positives and enhance security
Remember to implement proper access controls and encryption to maintain privacy and security of your camera system.
MQTT Communication Protocol
Beyond Home Assistant integration, the MQTT (Message Queuing Telemetry Transport) protocol offers a robust communication backbone for your Raspberry Pi home security camera system.
This lightweight messaging protocol excels in resource efficiency, making it perfect for your bandwidth-conscious security setup.
Configure your Pi camera to publish alerts to specific topics on your MQTT broker. When motion is detected, your camera will instantly broadcast notifications, triggering automated responses across your smart home ecosystem.
The MQTT benefits include remarkable low-latency performance and reliable message delivery—critical for real-time security monitoring.
For MQTT security, implement proper encryption and authentication measures on your broker.
The protocol’s publish/subscribe model enables seamless interaction between your camera and other devices, creating a responsive security network that can automatically lock doors or activate lights when threats are detected.
Weatherproofing and Mounting Your Camera
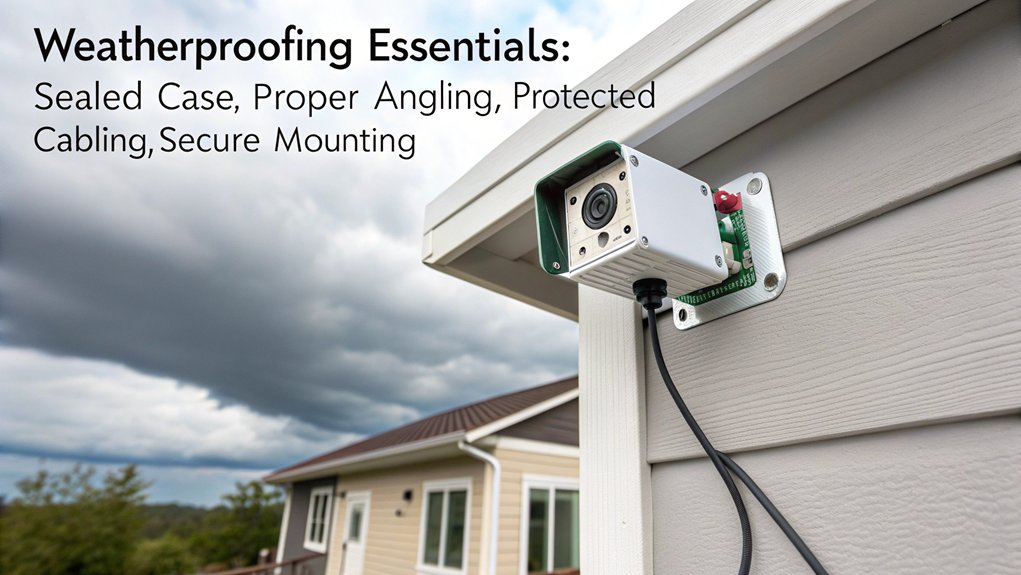
Once you’ve assembled your Raspberry Pi camera system, proper weatherproofing and mounting become critical factors for guaranteeing longevity and peak performance in outdoor environments.
Select weatherproof materials like plastic junction boxes or repurposed CCTV housings, then apply silicone grease around cable entry points and use gaskets for complete moisture protection.
- Mount enclosures at a downward angle to prevent water pooling, and make sure cables exit through downward-facing fittings.
- Utilize adjustable brackets for ideal positioning, paired with secure fasteners to eliminate camera movement.
- Consider solar power options for remote locations where running power cables isn’t practical.
For maximum effectiveness, integrate your weatherproofed camera with motion detection software and implement wireless connectivity solutions to simplify your outdoor installation while maintaining reliable performance in all weather conditions.
Frequently Asked Questions
Can I Use Battery Power for a Completely Wireless Setup?
Yes, you can power your setup with batteries. Consider adding solar charging to extend battery life substantially. You’ll need efficient power management and low-power components for ideal wireless performance.
How Much Bandwidth Does Continuous Streaming Consume on My Network?
Keep your eye on the ball with bandwidth estimation for continuous streaming. You’ll consume 2-4 Mbps per 1080p camera, totaling 60-120 GB daily. Network optimization through H.265 compression reduces this considerably.
Is Facial Recognition Possible With Raspberry Pi Home Security Cameras?
Yes, you’ll achieve facial recognition on your Pi camera using face detection libraries like OpenCV, face_recognition, and dlib. These software options process video streams locally, providing real-time identification of known individuals.
What’s the Legal Requirement for Recording Neighbors or Public Spaces?
Concerned about legal surveillance boundaries? You must adhere to local privacy laws when recording neighbors, ensuring cameras don’t capture private areas. Public spaces generally permit recording, though consent requirements vary by jurisdiction for audio capture.
Can Multiple Users Access the Camera Stream Simultaneously?
Yes, you’ll need to implement stream access controls with properly configured user permissions. Multiple simultaneous viewers require additional server configuration and sufficient network bandwidth to prevent performance degradation.
Conclusion
Your Raspberry Pi home security camera now stands as a digital sentinel, faithfully monitoring your domain. You’ve systematically transformed basic components into a robust security node that extends your awareness beyond physical limitations. Like a lighthouse protecting ships from rocky shores, your camera system illuminates potential threats while you’re away. It’s not just hardware and code—it’s peace of mind, methodically assembled and precisely calibrated to your specifications.

I am a retired software engineer with experience in a multitude of areas including managing AWS and VMWare development environments. I bought a relative a mini-PC a year ago and have become passionate about the technology and its potential to change how we deploy software.