
To achieve amazing digital sound on Raspberry Pi with I2S, start with a high-quality DAC, like the PCM5102 or MAX98357. Make sure you configure the GPIO pins correctly, as improper assignments can lead to subpar audio. You’ll need to edit your ‘/boot/config.txt’ to enable I2S and properly set up ALSA for the best sound output. Test your setup with commands like ‘speaker-test’ to confirm audio quality. Double-check your power supply to avoid interference. As you fine-tune your configuration, you’ll uncover exciting possibilities for enhancing your audio experience markedly.
Key Takeaways
- Choose high-quality DACs like Pimoroni Audio DAC SHIM or HiFiBerry for superior analog audio conversion in your Raspberry Pi setup.
- Ensure stable power supply with a regulated 5V and use low-noise components like the TPS73133 LDO for optimal sound quality.
- Properly configure GPIO pins for I2S connections to ensure accurate signal transmission and compatibility with your chosen DAC model.
- Edit software configuration files like ‘/boot/config.txt’ to enable I2S and install ALSA utilities for managing audio outputs effectively.
- Use testing procedures like ‘speaker-test’ to confirm audio output, ensuring a fantastic digital sound experience on your Raspberry Pi.
Hardware Requirements Overview
To start with digital sound projects on your Raspberry Pi, you’ll need a selection of essential hardware components. The cornerstone of your setup involves DAC selection; you’ll find options like the Pimoroni Audio DAC SHIM and HiFiBerry boards, which are crucial for converting digital signals to analog audio.
Since sound quality is paramount, consider using DAC chips like PCM5102 or MAX98357, which excel in performance. Additionally, utilizing high-resolution audio support in your chosen DAC can significantly enhance your listening experience. To ensure your project runs smoothly, monitor for any network issues that could lead to request failures during setup.
When it comes to power considerations, verify you’re providing a stable 5V supply to both your Raspberry Pi and the I2S board. Incorporate components like the TPS73133 LDO for regulating 3.3V, verifying component compatibility while minimizing noise through proper grounding practices.
Installation practices should include using jumper wires for connectivity and configuring your setup with terminal blocks for speakers. Pay attention to audio formats supported by your chosen DAC; your system integration will depend on this compatibility.
Finally, conduct performance evaluations to analyze the effectiveness of your setup. Through careful selection and integration of the right components, your project will shine in audio fidelity, allowing you to experience impressive sound outputs from your Raspberry Pi.
Connecting GPIO Pins
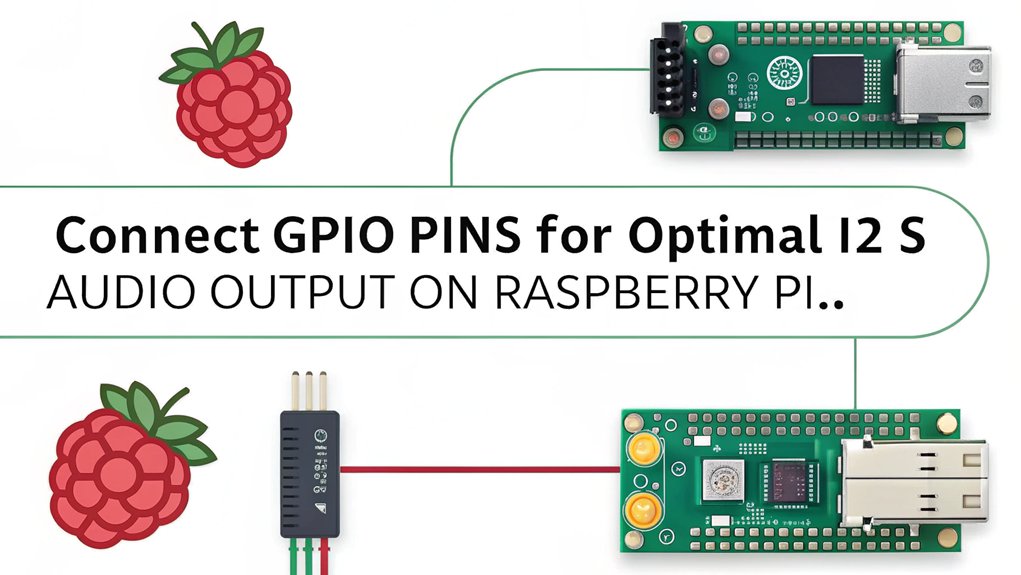
To connect the GPIO pins for I2S, you need to know the specific pin assignments for your Raspberry Pi model. This guarantees that you wire the connections correctly to the DAC or audio device, optimizing functionality and performance. Ensure you correctly configure pin playback modes for the GPIO pins to facilitate proper audio output through the I2S interface. Accurate wiring and proper power connections are essential for successful audio output through the I2S interface, as a Digital to Analog Converter (DAC) is crucial for converting I2S digital signals into analog sound waves.
Pin Assignments Overview
When setting up digital sound on your Raspberry Pi, understanding the pin assignments for connecting the GPIO pins is vital. The pin functionality for I2S protocols varies between models.
For Raspberry Pi V1 Model B+ and beyond, GPIO 18 (PCM_CLK), GPIO 19 (PCM_FS), GPIO 20 (PCM_DIN), and GPIO 21 (PCM_DOUT) handle audio output using ALT0 functions, requiring no additional configuration. In contrast, the V1 Model B Revision 2 uses GPIO pins 28 through 31 with ALT2 functions, necessitating updates for I2S sound device support. I2S technology is designed to eliminate noise associated with analog signals, ensuring cleaner audio output in your projects.
Your GPIO layout is essential for maintaining signal integrity, especially considering hardware limitations—like the unpopulated P5 header on the V1 Model B Revision 2, which may require further wiring. Additionally, selecting the correct DAC model ensures smooth functionality and compatibility with your I2S setup.
Acknowledging these pin differences guarantees model compatibility and peak performance in your audio applications.
Wiring Connections Guide
With a clear understanding of pin assignments, it’s time to establish the wiring connections necessary for facilitating digital sound on your Raspberry Pi. Follow these connection tips to guarantee everything is linked correctly. The wiring diagrams below will guide you through the process.
| I2S Board Pin | Raspberry Pi Pin |
|---|---|
| Power Pin | 3V or 5V Pin |
| Ground Pin | GND Pin |
| DIN (Data In) | GPIO #21 |
| BCLK (Bit Clock) | GPIO #18 |
| LRCLK (Channel Clock) | GPIO #19 |
For specific boards like the MAX98357, PCM5102, or Adafruit I2S decoder, make sure to follow the same five connections. If you’re using a Raspberry Pi Zero or an older model, remember to check for the correct pin layout, especially on the GPIO header. Utilizing I2S audio provides higher quality audio than standard headphone jacks, thus enhancing your overall listening experience. Additionally, it’s important to use amplifiers for speakers to avoid damaging your Raspberry Pi by directly connecting low-impedance loads.
Finally, after making the hardware connections, don’t forget to edit the configuration file on your Pi to enable I2S audio output. This step is essential to guarantee smooth audio playback. You’re now ready to experience amazing digital sound!
Understanding I2S Signal Components

Digital audio systems like I2S play a crucial role in transmitting high-fidelity sound signals efficiently. Understanding the main signal components is essential for effective I2S data transmission.
The basic structure includes three key lines: the Bit Clock (SCK), the Word Select Clock (WS), and the Serial Data Line. The SCK synchronizes individual bits, while the WS differentiates between left and right audio channels. On the low cycle of WS, left channel data transmits, and right channel data follows during the high cycle. Additionally, the protocol has undergone continuous evolution to reflect advancements in digital audio technology.
Clock synchronization is critical in I2S. The WS changes one bit clock period before the most significant bit (MSB) is sent, guaranteeing accurate data alignment. Each clock cycle needs to have a duty cycle of 50%, mirroring the frequency of your sample rate. Data gets latched on the rising edge of the SCK, maintaining continuous data flow.
You must also consider data encoding, which uses two’s complement format, with the MSB transmitted first. To optimize performance, verify the clock frequency complies with your target audio sample rate—typically, it should be double that for many configurations.
These fundamentals lay the groundwork for an innovative digital audio experience.
Configuring Software Settings
To take full advantage of the I2S audio signaling, you need to configure the software settings on your Raspberry Pi correctly. Start by editing the ‘/boot/config.txt’ file to enable I2S by uncommenting ‘dtparam=i2s=on’. Next, disable the onboard ALSA audio devices by commenting out ‘dtparam=audio=on’. Adding I2S overlays, like ‘dtoverlay=hifiberry-dac’, enhances your setup. Don’t forget to reboot your Raspberry Pi to apply these changes. Further enhancing your audio quality can be achieved by using an I2S-based DAC for converting digital signals to analog. Additionally, the RPi supports MEMS microphones for high-quality audio input, making it a versatile platform for audio applications.
Ascertain you’re running the latest version of Raspbian with ‘sudo apt-get update’ and ‘sudo apt-get dist-upgrade’. Install or update ALSA utilities using ‘sudo apt-get install alsa-utils’.
Then, configure ALSA settings by creating or editing the ‘/etc/asound.conf’ file, specifying the proper audio devices for I2S interfaces.
In terms of module management, list necessary kernel modules in ‘/etc/modules’ such as ‘snd_soc_bcm2708’. Ascertain these modules load at boot to maintain I2S functionality.
After adjustments, restart ALSA utilities with ‘sudo /etc/init.d/alsa-utils restart’ to finalize your audio playback setup. This meticulous approach will optimize your Raspberry Pi for superior digital sound experiences.
Essential External Hardware

To achieve high-quality audio output on your Raspberry Pi, integrating an I2S Digital to Analog Converter (DAC) is essential. This hardware converts digital signals to analog, allowing for direct connection to headphones or loudspeakers.
Additionally, consider using an amplifier to enhance speaker performance and guarantee peak volume levels.
I2S Digital to Analog Converter
I2S digital-to-analog converters (DACs) serve as a significant component in enhancing audio output from Raspberry Pi systems. When implementing an I2S DAC, you’ll want to focus on several important factors to guarantee peak performance:
- Signal Integrity: Prioritize high-quality signal paths to minimize distortion and preserve fidelity.
- Compatibility: Choose DACs like the HifiBerry DAC or IQaudIO Pi-DAC that align with your Raspberry Pi model for seamless integration. Ensure compatibility with WM8960 IC technology for reliable audio quality.
- Configuration: Be mindful of specific GPIO connections and make sure you configure software settings appropriately to avoid i2s latency issues. Additionally, you should look into using a 12-bit DAC for improved output precision. This is especially important because I2S connection dramatically reduces audio stuttering, leading to a smoother listening experience.
- Noise Reduction: Implement proper grounding and power management to mitigate i2s noise and enhance audio clarity. Utilize flexible power options to customize your setup effectively.
With these I2S design considerations in mind, you’re more likely to meet i2s quality benchmarks.
Additionally, exploring i2s audio formats will boost your project’s capability, while employing i2s integration tips can streamline the setup process.
Remember, effective power management won’t only enhance performance but extend the lifespan of your components. It is also crucial to ensure adequate amperage from a recommended 5.1V supply for optimal performance.
Moving forward, you’ll find that investing time in selecting and configuring your DAC will yield impressive results in your Raspberry Pi audio endeavors.
Amplifier for Loudspeaker Output
An amplifier plays an essential role in bringing your Raspberry Pi audio projects to life, providing the necessary power to drive loudspeakers effectively. Choosing the right amplifier involves considering power sources and speaker compatibility. Depending on your setup, a high-power amplifier, like the Raspberry Pi DigiAMP+, requires a 12–24V DC supply, while low-power options might utilize 5V or USB bus power. This product is compatible with any Raspberry Pi computer featuring a 40-pin GPIO header, allowing for seamless integration into your projects. Additionally, it features high quality stereo audio output, which ensures an enhanced listening experience.
Guarantee ideal audio amplification by utilizing I2S connections, including bit clock (BCK), LRCK, and data line (DOUT). Typically, you’ll need five jumper wires for these connections. Panel-mounted screw terminals and RCA jacks facilitate the integration of passive stereo speakers, but guarantee your speakers can handle the amplifier’s output—offering up to 35 Watts per channel at peak performance.
When selecting an amplifier, consider its thermal stability, operating within 0°C–50°C, and compatibility with high-definition audio formats, maximizing your sound experience. For higher power requirements, separate amplifier modules are recommended.
With careful selection, you can develop innovative audio systems ranging from kiosks to outdoor setups that harness the full potential of your Raspberry Pi.
Enhancing Sound Quality

Achieving ideal sound quality on a Raspberry Pi involves careful selection of components and configuration settings. To enhance audio fidelity and overall performance, focus on the following aspects:
- DAC Selection: Choose a high-quality DAC, like the PCM5102, designed for superior sound quality and robust clocking technology, guaranteeing signal integrity. GPIO Pins for I2S Output offer a direct output option aimed at enhancing audio quality.
- Power Stability: Utilize an excellent power supply, steering clear of switching-mode power supplies, which can induce noise. A linear power supply provides greater stability and minimizes interference.
- Jitter Reduction: Address jitter issues by considering an external clock source for your I2S setup. This can greatly enhance sound clarity, especially at lower sampling rates, as basic I2S setups underperform compared to traditional CD players regarding jitter.
- Material Choice: Invest in materials that guarantee sound isolation while housing your DAC. Proper screening can mitigate noise pickup, leading to a cleaner audio signal.
Testing Your Setup
To guarantee your sound setup is functioning correctly, begin by verifying all hardware connections and software configurations. Confirm the I2S board is properly connected to the Raspberry Pi using the designated GPIO pins for data, clock, and word select. Check that the power wires are connected to the appropriate power pins to prevent any power-related issues.
Next, confirm that the software setup aligns with your hardware specifications. Edit the ‘/boot/config.txt’ to enable I2S and confirm necessary packages like ‘alsa-utils’ are installed and updated. After making these configurations, reboot your Raspberry Pi to apply the changes.
Now you can proceed with sound testing. Use the ‘speaker-test’ command to initiate output verification—run ‘speaker-test -c2’ for checking white noise on both left and right channels. You can also test with a predefined WAV file to hear specific audio playback. It’s important to note that only stereo audio playback is supported, so ensure any mono files are converted accordingly. Adjustments to I2S configuration may enhance your audio fidelity and overall performance.
Listen carefully for clarity and distortion, adjusting the volume with ‘alsamixer’ if needed.
Finally, run additional checks to confirm both channels are functioning without conflict. This thorough approach will help ensure your I2S setup is fully operational.
Troubleshooting Common Issues
When troubleshooting common issues with your I2S setup on the Raspberry Pi, it’s essential to methodically examine both hardware and software components.
Here are some effective troubleshooting techniques that address frequent performance issues:
- Check Wiring: Confirm that your I2S connections, including clocks and data wires, are properly arranged to avoid common errors caused by incorrect wiring.
- Inspect Power Supply: Verify your I2S board is receiving sufficient power. High-power devices may need a separate supply to prevent undervoltage warnings and related malfunctions.
- Review Configuration: Double-check your ‘/boot/config.txt’ for errors, making sure you’ve enabled the correct overlays and commented out conflicting settings. It’s also important to note that issues have been identified with Buster OS leading to I2S malfunctions.
- Analyze Logs: Utilize ‘dmesg’ logs for device diagnostics, which can reveal hardware failures and binding conflicts.
Projects to Try With I2S

Exploring projects with I2S on the Raspberry Pi opens up a domain of creative possibilities for audio enthusiasts and developers alike.
One innovative project you can tackle is recording stereo audio using I2S MEMS microphones. With the Raspberry Pi, you’ll enable I2S communication, configure an audio port, and leverage Python with the PyAudio library to accurately capture 2-channel audio. You can further explore audio data analysis by applying digital signal processing techniques, such as FFT and noise subtraction.
Another exciting venture is adding I2S sound output via an I2S DAC. This requires setting up a circuit to convert digital signals into analog stereo sounds for amplification and playback through speakers. Experimenting with different DAC models like the Pimoroni Audio DAC SHIM or Adafruit I2S Audio Bonnet can enhance your experience.
For advanced projects, integrating external devices such as Digital Signal Processors (DSP) allows for customizable bit depth and sample rates, offering flexibility in your I2S audio applications.
Expanding Your Raspberry Pi Audio Experience

Enhancing your audio experience with the Raspberry Pi involves selecting the right hardware components and properly configuring them for peak performance. Here are some actionable steps to dramatically elevate your audio setup:
- Choose the Right DAC: Opt for DAC boards like DAC PRO, DAC+, or DigiAMP+ to benefit from full HD audio (192kHz), offering superior sound quality.
- Implement Balanced Outputs: If you’re aiming for professional audio, consider adding an XLR board for a differential output, minimizing interference and enhancing quality.
- Incorporate Headphone Amplifiers: For personal listening, select a setup that includes dedicated headphone amplifiers, compatible with high impedance headphones (80/90Ω).
- Adjust Configuration Files: Edit the ‘/boot/firmware/config.txt’ file to disable onboard audio and enable the I2S interface, ensuring prime performance for your DAC.
Utilizing these components not only expands your audio capabilities but also highlights the DAC benefits, such as improved resolution and noise reduction.
Frequently Asked Questions
Can I Use I2S With Any Raspberry Pi Model?
Yes, you can use I2S with various Raspberry Pi models. However, check specific DAC compatibility and configurations for each model, as compatibility can differ, especially between earlier versions like the B and newer ones, like the 4B.
What Specific Audio Formats Does I2S Support?
Picture crystal-clear sound enveloping you; I2S supports PCM audio with varying sample rates and bit depths. It also accommodates DSD playback, enabling diverse audio codecs and seamless digital output for an innovative audio experience.
How Do I Power My I2S Setup?
To power your I2S setup, confirm your power supply meets voltage requirements between 4.75V and 5.25V. Consider using compatible adapters and high-quality cables to maintain stable voltage for ideal performance and prevent signal degradation.
Are There Any Audio Libraries for I2S on Raspberry Pi?
Nearly 90% of audio developers choose libraries like ALSA or Python’s pyaudio for I2S compatibility. These audio library options enhance your Raspberry Pi’s capabilities, ensuring seamless integration and high-fidelity sound reproduction with I2S configurations.
Can I Connect Multiple I2S Devices Simultaneously?
You can connect multiple I2S devices, but guarantee only one generates I2S data per channel. Use precise I2S clock signals to synchronize data stream timings, allowing multiple receivers to benefit from one input stream efficiently.
Conclusion
With your Raspberry Pi now equipped for amazing digital sound through I2S, you’re stepping into a world reminiscent of high-end audio systems. By harnessing the power of precise configurations and quality external components, you’re not just listening to music; you’re experiencing it in a new dimension. As you explore creative projects, remember that each innovation brings you closer to mastering audio technology. So, release your imagination and elevate your audio journey to extraordinary heights.

I am a retired software engineer with experience in a multitude of areas including managing AWS and VMWare development environments. I bought a relative a mini-PC a year ago and have become passionate about the technology and its potential to change how we deploy software.