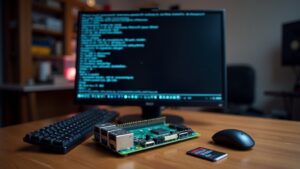
What is FFMpeg?
Many people aren’t aware that FFMpeg on a Raspberry Pi is a powerful tool for processing audio and video files . If you’re looking to enhance your media projects, this step-by-step guide will help you get FFMpeg set up efficiently. From updating your operating system to compiling the source code, each step is essential for peak performance. Let’s explore the installation process and access the full potential of your device.
Key Takeaways
- Update your Raspberry Pi by running ‘sudo apt update’ and ‘sudo apt upgrade’ to ensure all packages are current before installation.
- Install essential libraries using ‘sudo apt install yasm libx264-dev libmp3lame-dev libopus-dev’ to provide the necessary dependencies for FFMpeg.
- Download the FFMpeg source code, navigate to its directory, and compile it with your desired options to optimize performance.
- Verify the installation by executing ‘ffmpeg -version’ in the terminal to check for version and support libraries.
- Configure FFMpeg settings for optimal performance, adjusting parameters like CPU threads and output quality as needed for your projects.
Preparing To Install FFMpeg on a Raspberry Pi
Preparing your Raspberry Pi for installation is a straightforward process that guarantees everything runs smoothly.
Start by gathering essential Raspberry Pi accessories like a high-quality microSD card, power supply, and HDMI cable. These components are vital for peak performance and an efficient setup.
Next, make sure your Raspberry Pi is properly connected to a monitor and keyboard. To achieve performance enhancement, consider using cooling solutions like heatsinks or a fan, especially if you plan to run resource-intensive applications.
Once everything’s connected, double-check your connections and power on the device. This preparation phase is key to setting yourself up for success as you immerse yourself in installing FFMpeg and exploring its capabilities on your Raspberry Pi.
Updating the Raspberry Pi Operating System
To guarantee a smooth installation of FFMpeg on your Raspberry Pi, it’s essential to update the operating system first. This confirms you have the latest features, performance improvements, and security patches.
Begin by opening a terminal window and type ‘sudo apt update’ to refresh the package list. Next, run ‘sudo apt upgrade’ to install any available updates. This process may take a few minutes, depending on your internet speed and the number of updates available.
After that, consider using ‘sudo apt full-upgrade’ to manage dependencies and potential issues. Finally, reboot your Raspberry Pi with ‘sudo reboot’ to apply all changes effectively.
With the operating system updated, you’re set for the next steps in installing FFMpeg!
Installing Required Dependencies
Before diving into the installation of FFMpeg, you’ll need to install some essential dependencies that guarantee everything runs smoothly.
Start by updating your package list to verify you have the latest versions available. You can achieve this with the command ‘sudo apt update’.
Next, focus on dependency management; you’ll want to install libraries that FFMpeg relies on. Use the command ‘sudo apt install yasm libx264-dev libmp3lame-dev libopus-dev’ to handle the necessary package installation in one go.
These libraries are vital for enabling various features within FFMpeg, making your multimedia processing tasks more powerful.
With the dependencies in place, you’re well on your way to a successful FFMpeg installation on your Raspberry Pi.
Downloading FFMpeg Source Code
Once you’ve guaranteed the necessary dependencies are in place, you can move on to downloading the FFMpeg source code. You have several downloading options to choose from, depending on your preferences and goals for source management.
| Download Method | Description | Command |
|---|---|---|
| Git Clone | Clones the latest version | ‘git clone https://git.ffmpeg.org/ffmpeg.git’ |
| Tarball | Downloads a compressed file | ‘wget https://ffmpeg.org/releases/ffmpeg-snapshot.tar.bz2’ |
| Zip Archive | Downloads a ZIP file | ‘wget https://ffmpeg.org/releases/ffmpeg-snapshot.zip’ |
Select the method that best fits your needs so you can streamline your installation process. Happy downloading!
Compiling FFMpeg on Your Raspberry Pi
Compiling FFMpeg on your Raspberry Pi is a straightforward process that allows you to customize the software according to your specific needs.
First, you’ll want to prepare your environment by installing necessary dependencies. Next, navigate to the FFMpeg source directory.
Here, you can explore various compiling options that align with your performance goals. Choosing the right options can considerably enhance the efficiency of your application. Pay particular attention to codecs and filters which can impact performance tuning.
Once you’re satisfied with your selections, initiate the compilation process, ensuring that you monitor for any errors.
This personalized build won’t only optimize resource use but also provide you with a tailored media processing experience tailored to your innovative pursuits.
Installing FFMpeg
Now that you’ve compiled FFMpeg, it’s time to install it properly on your Raspberry Pi.
You’ll need to prepare your system by installing the necessary dependencies first.
Once that’s done, you’ll compile FFMpeg from source to complete the installation process.
Preparing the Raspberry Pi
Before diving into the installation process of FFmpeg on your Raspberry Pi, it’s important to verify your device is prepared for the task.
Guaranteeing a smooth Raspberry Pi setup starts with confirming you meet the necessary software prerequisites.
- A compatible version of Raspberry Pi (preferably Raspberry Pi 3 or newer)
- An up-to-date operating system (Raspbian or Raspberry Pi OS)
- Sufficient storage space for FFmpeg and other media files
- Internet connection for downloading packages
- Basic familiarity with terminal commands
Taking these steps seriously will save you time and frustration later.
Once you’ve confirmed these criteria are met, you’re on your way to seamlessly installing FFmpeg and accessing a world of multimedia processing right on your Raspberry Pi!
Installing Necessary Dependencies
To guarantee FFmpeg installs smoothly on your Raspberry Pi, you’ll need to first install some necessary dependencies.
Start by updating your package management system with the command ‘sudo apt update’. This makes sure you have the latest software information.
Next, install the required libraries with ‘sudo apt install yasm pkg-config git build-essential’. These library requirements are essential for FFmpeg to compile and run effectively.
Depending on your needs, you might also consider additional libraries, such as ‘libx264-dev’ and ‘libv4l-dev’, for enhanced functionality.
Compiling FFMPEG From Source
Once you’ve set up the necessary dependencies, you can begin compiling FFmpeg from source to verify you have the latest features and optimizations specific to your Raspberry Pi.
This process not only verifies your installation is up-to-date but also helps in optimizing performance.
Here’s a brief guide to follow:
- Download the FFmpeg source code
- Configure the build with desired options
- Compile the code using ‘make’
- Install FFmpeg to your system
- Troubleshoot errors that may arise during compilation
Verifying the FFMpeg Installation
How can you be certain that FFMpeg is installed correctly on your Raspberry Pi?
Start by verifying the installation through the command line. Open the terminal and type ‘ffmpeg -version’. This command will display the currently installed version of FFMpeg, confirming that it’s properly set up.
If everything’s in order, you’ll see details about the version number, compilation options, and additional libraries. If you encounter an error, then FFMpeg may not have installed correctly, prompting you to revisit the installation steps.
Checking versions is essential, as it guarantees you’re equipped with the latest capabilities for your projects.
With this simple step, you can confidently move forward, knowing FFMpeg is ready to tackle your media tasks.
Configuring FFMpeg for Optimal Performance
When you configure FFMpeg for ideal performance, you can greatly enhance its efficiency and responsiveness for your media tasks.
By fine-tuning the performance settings, you’ll optimize resource management on your Raspberry Pi, ensuring smoother processing.
Consider these key adjustments:
- Adjust the CPU threads for faster encoding.
- Use lower-resolution previews during editing.
- Set buffering options to minimize lag.
- Choose the appropriate codec for your video type.
- Monitor system resources to prevent overload.
Implementing these strategies won’t only refine FFMpeg’s operation but also help you maximize the capabilities of your Raspberry Pi.
Using FFMpeg for Basic Operations
To get started with FFMpeg, you’ll quickly discover its straightforward command-line interface makes it easy to perform a variety of basic operations.
For video conversion, simply use the command ‘ffmpeg -i input.mp4 output.avi’, which transforms your file from MP4 to AVI format in no time. You can customize this further by adjusting parameters like resolution and bitrate to refine your output.
Audio extraction is also a breeze; to pull audio from a video, use ‘ffmpeg -i input.mp4 -q:a 0 -map a output.mp3’. This command retains quality while converting the audio track to MP3.
With these commands, you’re well on your way to harnessing the power of FFMpeg for innovative multimedia projects.
Troubleshooting Common Installation Issues
Encountering issues during FFMpeg installation on your Raspberry Pi can be frustrating, but troubleshooting is often straightforward. Knowing some common errors can ease your journey.
Here are some quick installation tips to help you:
- Verify your Raspberry Pi’s firmware is updated.
- Check that you have sufficient storage space.
- Confirm that all required dependencies are installed.
- Review error messages for specific guidance.
- Reboot your Raspberry Pi after installation attempts.
If you face persistent issues, consider reinstalling your dependencies or checking online forums for similar problems.
With these insights, you’ll be better equipped to tackle installation hiccups and successfully run FFMpeg, letting you focus on your innovative projects without unnecessary delays.
Frequently Asked Questions
Can FFMPEG Run on Older Raspberry Pi Models?
Yes, FFmpeg can run on older Raspberry Pi models, but you might encounter performance issues. It’s best to manage expectations, as heavy processing could lead to slower speeds and limited functionality on those devices.
What Audio and Video Formats Does FFMPEG Support?
FFmpeg’s support for audio and video formats is as vast as an ocean. You’ll find numerous audio codecs like AAC and MP3, alongside video codecs such as H.264 and VP9, ensuring versatile media handling.
How to Uninstall FFMPEG From My Raspberry Pi?
To uninstall FFmpeg from your Raspberry Pi, use package removal methods like ‘sudo apt-get remove ffmpeg’ or ‘sudo apt purge ffmpeg’. These commands efficiently clear it from your system for a fresh start or alternative installations.
Is There a Graphical User Interface for FFMPEG?
Yes, there are FFmpeg GUIs available that offer a user-friendly interface. These tools simplify video editing and processing tasks, making it easier for you to harness FFmpeg’s powerful capabilities without needing extensive command line knowledge.
Can I Use FFMPEG for Live Streaming?
Yes, you can use FFmpeg for live streaming. It allows you to manage live video efficiently, ensuring high streaming quality. With its extensive features, you can innovate and tailor your streaming experience to your needs.
Conclusion
You’ve successfully installed FFMpeg on your Raspberry Pi, transforming it into a powerful multimedia tool. Like an artist with a freshly sharpened brush, you’re now ready to create and manipulate audio and video with ease. Whether you’re converting formats or editing clips, FFMpeg opens a world of possibilities. If you encounter any bumps along the way, remember that troubleshooting is part of the journey. Embrace the challenge, and let your creativity flow!

I am a retired software engineer with experience in a multitude of areas including managing AWS and VMWare development environments. I bought a relative a mini-PC a year ago and have become passionate about the technology and its potential to change how we deploy software.