
To set up your first Raspberry Pi, start by gathering the necessary hardware: the Raspberry Pi board, a minimum 8 GB Class 10 microSD card, and the correct power supply for your model. Install the operating system using Win32 Disk Imager or Raspberry Pi Imager on the microSD card. Connect peripherals like a keyboard, mouse, and monitor via HDMI. Power on the Pi and access the configuration screen with ‘sudo raspi-config’ to set language, keyboard layout, and network settings. Enable SSH and VNC for remote access. Once configured, you can explore pre-installed software and add additional hardware like cameras or touchscreens. For long-term stability, guarantee a stable power supply and consider cooling solutions. Continue to learn more about optimizing your setup for peak performance and durability.
One recommendation I have is a “training wheels” approach. Start with a kit that has all the pieces you need to get started. A good one like the CanaKit Raspberry Pi 5 PRO will get you past the initial “how do I get to power up” and let you start playing with it right away. Once you figure out you want to do this on your own, it will save you money but also lots of headaches as you already went through an initial setup.
Key Takeaways
- Hardware Preparation: Ensure you have a Raspberry Pi board, a compatible microSD card, the correct power supply, and necessary peripherals like a keyboard, mouse, and monitor.
- Operating System Installation: Use tools like Raspberry Pi Imager to write the OS image to the microSD card and preconfigure network settings and security before booting up.
- Initial Configuration: Access the configuration screen with ‘sudo raspi-config’ to set language, keyboard layout, and network connections, and enable SSH and VNC for remote access.
- Software Updates: Run ‘sudo apt update’ and ‘sudo apt full-upgrade’ in the terminal to update the OS for enhanced security and performance.
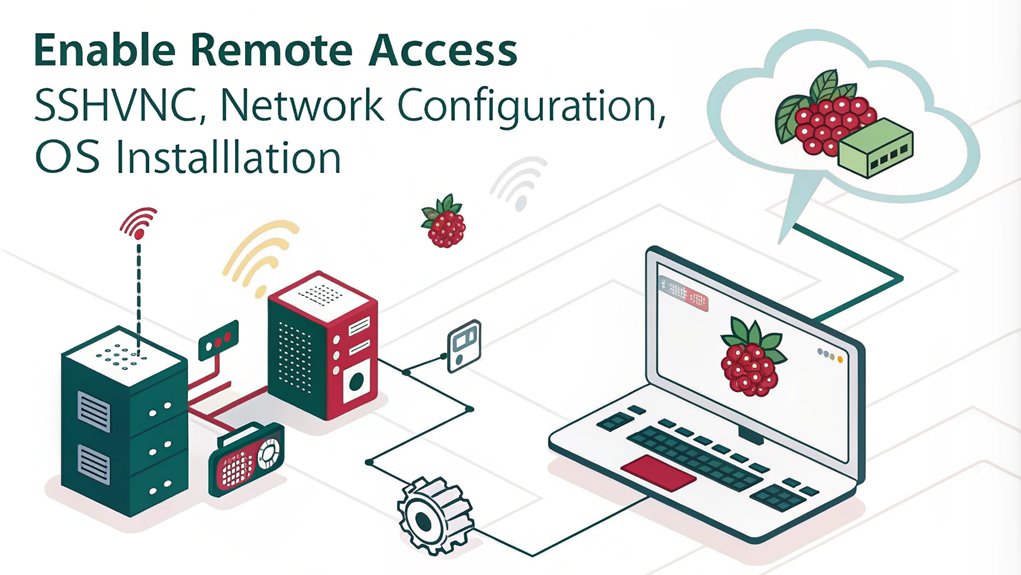
- Remote Access Setup: Enable SSH and VNC through ‘raspi-config’ for secure command-line and graphical remote access, and find your IP address using ‘hostname -I’.
Preparing the Hardware
To kick off your Raspberry Pi journey, you need to prepare the necessary hardware components. The core of your setup is the Raspberry Pi board itself, but you’ll also need a few other essential items.
First, make sure you have a compatible MicroSD card with at least 8 GB of storage, preferably a Class 10 card for ideal performance. Next, select a power supply that matches your Raspberry Pi model’s requirements. For example, the Pi 3 needs a 2.5A micro USB supply, while the Pi 4 and Pi 400 require a 3A USB-C supply, and the Pi 5 needs a 27W USB-C Power Supply.
It is crucial to use an official power supply to ensure compatibility and performance, avoiding potential damage to the micro-SD card or Raspberry Pi board due to underpowering.
Connectivity is vital; you’ll need an HDMI cable to connect your Raspberry Pi to an HDMI-compatible monitor or TV. An Ethernet cable or Wi-Fi dongle will handle your network connection, though some models have built-in Wi-Fi.
Accessory options include a USB keyboard and mouse for user input and a case for protection. Make sure any additional USB peripherals stay within the recommended power draw limits to avoid performance issues.
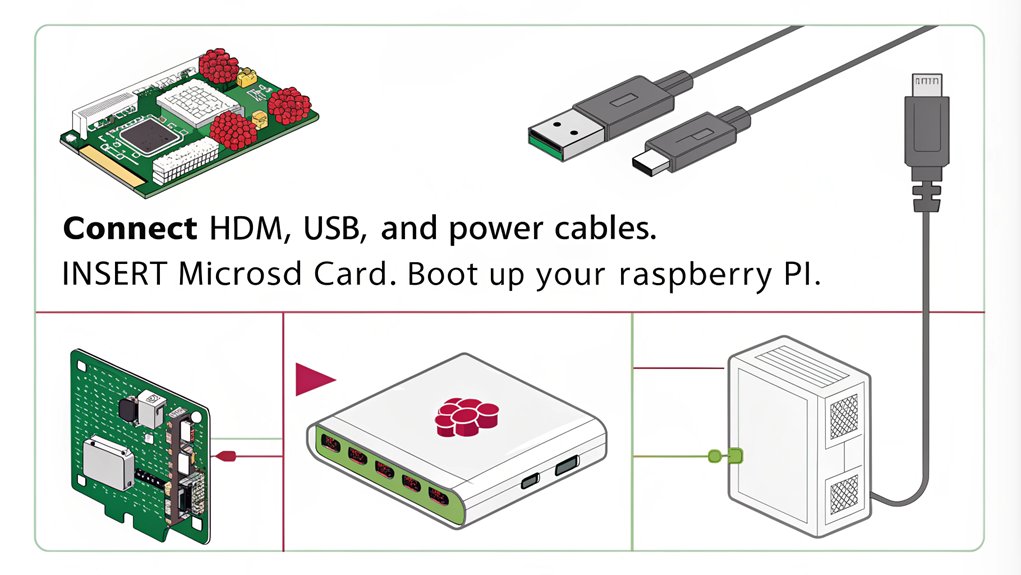
When assembling your setup, insert the MicroSD card into the card slot first, then connect your peripherals such as the keyboard, mouse, and HDMI monitor. Finally, connect the power supply last to prevent any damage during setup. It is also important to ensure that your operating system is correctly installed; for beginners, Raspbian Linux is highly recommended.
If you encounter issues during boot-up, check your connections and make sure all hardware is compatible and properly connected. Proper assembly tips and troubleshooting steps can help enhance performance and prevent overheating, making cooling solutions like cases with ventilation important considerations.
Installing the Operating System
To install the operating system on your Raspberry Pi, you first need to choose the appropriate OS, such as Raspbian, and download it from the official Raspberry Pi website.
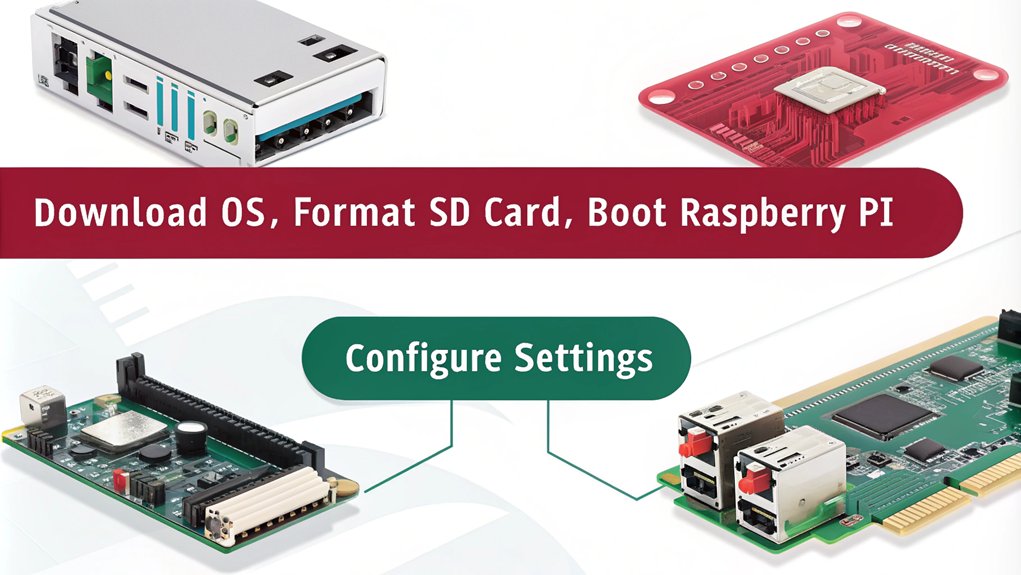
Next, you’ll preconfigure any necessary settings before writing the OS image to your microSD card using tools like Win32 Disk Imager or the official Raspberry Pi Imager.
Ensure you have a compatible 8GB Class 10 microSD card to avoid any issues during the installation process. Verify your microSD card is formatted correctly to avoid any issues during the installation process.
Before proceeding, make sure your SD card is completely erased and formatted; NOOBS requires an empty card for successful installation.
Choosing the Operating System
Choosing the right operating system for your Raspberry Pi is a crucial step in setting up your device. The most straightforward option is the Raspberry Pi OS, which is officially supported by the Raspberry Pi Foundation. Based on Debian, it emphasizes stability and performance, available in Lite, Full, and Full+recommended versions.
It comes with pre-installed applications like Chromium, VLC, and LibreOffice, using the APT package manager for easy package installation.
If you’re looking for alternative distributions, Ubuntu offers a modern interface and the latest software updates. Manjaro, based on Arch Linux, provides various desktop environments such as XFCE, GNOME, and KDE.
For minimal server setups, DietPi is ideal with its easy configuration wizard. Additionally, user-friendly installation guides are often available to help you through the process.
For media enthusiasts, OSMC and LibreELEC are optimized media center OS options known for their simplicity and performance. If you’re into retro gaming, consider Batocera or RecalBox, both pre-configured with various emulators.
Other options include Windows 10 IoT Core for .NET development and Risc OS for a non-Linux experience. For those interested in security-focused distributions, Kali Linux is a strong choice with its penetration testing tools.
For centralized user authentication and file storage, PiNet is a good choice. Finally, multi-boot solutions like NOOBS allow you to install several approved OS images on your Raspberry Pi.
Preconfiguring Settings
With your operating system selected, it’s time to prepare your SD card for installation. Start by downloading and installing the SD Card Formatter from the official SD card website.
Insert the SD card into the card reader and connect it to your computer’s USB port. Open the SD Card Formatter, select the drive where the SD card is mounted, and format it without altering any other options. Click OK once the formatting is complete.
Next, download Win32 Disk Imager from SourceForge or use the Raspberry Pi Imager for ease of use. Verify your computer recognizes the SD card before proceeding.
Use Win32 Disk Imager to browse and select the Raspbian OS image file, then select the correct drive for the SD card. Click Write to start writing the OS to the SD card, ignoring any warnings that pop up during this process.
While writing the OS, you can begin preconfiguring network settings by verifying an Ethernet cable is connected if you plan to use wired internet. For preconfiguring security, make certain you have a secure username and password ready for setup once the OS is installed.
Ensure you also set up your Localization Settings such as language, country, and timezone to reflect your local usage needs. The Raspberry Pi supports various operating systems, including Linux and Windows.
Once the writing process is complete, eject the SD card from the card reader and insert it into your Raspberry Pi board. Connect all necessary peripherals such as a monitor, keyboard, and mouse before booting up your Raspberry Pi for the first time.
Writing to MicroSD Card
Preparing your microSD card for the Raspberry Pi involves a few precise steps to guarantee a smooth installation of the operating system.
First, verify the microSD card is inserted into your computer’s SD card reader or a connected external USB card reader. Launch the Raspberry Pi Imager software and select “Misc utility images,” then choose “SD Card Formatter” to erase all existing data on the microSD card. This step is essential for maintaining data integrity and optimizing microSD performance.
Once the formatting process is complete, open the Raspberry Pi Imager again and click the “CHOOSE OS” button to select your desired operating system. Choose “Raspberry Pi OS (other)” and specify the version, such as “Raspberry Pi OS Full (64-bit).” The Imager may automatically download the selected OS image if it’s not already on your computer.
Next, click the “CHOOSE SD CARD” button and select the prepared microSD card from the list of devices. Double-check that you’ve selected the correct target drive to avoid erasing data from another disk.
Ensure you are using a high-quality microSD card from reputable brands like SanDisk or Samsung for reliability. Additionally, make sure SSH is enabled during setup for future remote access convenience. Click the “WRITE” button to begin writing the OS image to the microSD card. Monitor the progress bar; this process can take up to 10-20 minutes depending on your card reader and SD card speed. Wait for confirmation that the data was written successfully before proceeding.
Connecting Peripherals
When setting up your Raspberry Pi, connecting the right peripherals is vital for a smooth and functional experience. Start by connecting your keyboard and mouse. Use the official Raspberry Pi keyboard, which allows you to connect external devices like USB mice and USB drives via its three host USB ports.
Connect the keyboard to the Raspberry Pi using the micro USB port, making sure the power supply is connected directly to the Raspberry Pi to avoid operational issues. Ensure that the boot process is initiated correctly by using the bootcode.bin file.
For your monitor, use an HDMI cable to connect it to the Raspberry Pi; for the Raspberry Pi 4, use the HDMI port labeled HDMI 0. You can also connect a second screen in the same way. Confirm your monitor is powered on before powering up your Raspberry Pi.
To establish network and internet connections, use an Ethernet cable for initial setup, especially for remote connections via VNC. WiFi can be set up later using the Ethernet connection. The Ethernet port provides internet access and is essential for obtaining the IP address of your Raspberry Pi for remote access.
Ensure you have a minimum of a 4 GB micro SD card for Raspbian Lite or an 8 GB card for Desktop before proceeding with the setup.
Connect other peripherals like USB drives and additional devices via the USB ports. The GPIO pins allow for connecting external devices such as temperature sensors and IR sensors. An audio jack can be used for connecting headphones or speakers.
Verify all peripherals are connected before powering up to avoid detection issues, and periodically check the setup to troubleshoot any hardware problems that may arise, making sure of the best peripheral compatibility and facilitating easy troubleshooting connections.
Powering On the Raspberry Pi

To power on your Raspberry Pi, confirm you have the correct power supply for your specific model. Each Raspberry Pi model has different current requirements and uses distinct power adapters.
| Model | Power Adapter | Current Requirement |
|---|---|---|
| Raspberry Pi 1 A/A+ | Micro USB | 700mA |
| Raspberry Pi 1 B/B+ | Micro USB | 1.2A to 1.8A |
| Raspberry Pi 3 A+/B/B+ | Micro USB | 2.5A |
| Raspberry Pi 4 B/400 | USB-C | 3.0A |
| Raspberry Pi 5 | USB-C | 5.0A |
Avoid using standard phone chargers or USB cables due to insufficient power; official Raspberry Pi power supplies are recommended for each model.
When connecting peripherals, consider their power consumption: GPIO pins consume up to 50mA combined, HDMI ports use 50mA, the Camera Module requires 250mA, and USB devices vary from 100mA to 1000mA. Use an externally-powered USB hub for devices exceeding specified power limits. For optimal performance, ensure you are using a Class 10 speed microSD card.
For an added layer of convenience and safety, you can also implement a power button using a simple circuit and configuration changes. Verify your power supply can handle the total current draw of all connected devices. Be cautious with third-party USB-PD multi-port power supplies to avoid unexpected booting issues. Checking the ‘vcgencmd get_config usb_max_current_enable’ command can help confirm USB power settings. Following these safety practices will guarantee reliable operation of your Raspberry Pi.
Initial Configuration

With your Raspberry Pi powered on and fully assembled, it’s time to plunge into the initial configuration. This step is essential for setting up your device to meet your specific needs and guaranteeing it operates efficiently.
First, you need to access the configuration screen. If it doesn’t load automatically, you can do this by typing ‘sudo raspi-config’ in the terminal. Here, you’ll set up the language and keyboard layout through the configuration menu. It’s also important to change the default user password for enhanced network security and user management.
Ensure that you have connected all necessary peripherals for initial setup, such as a keyboard, mouse, and screen, or configured remote access using SSH. Additionally, make sure your Raspberry Pi is connected to a reliable network using either wired or wireless options, such as WiFi or Ethernet.
Key Configuration Steps
- Network Setup: Connect to a WiFi network using the desktop interface or through ‘raspi-config’. You may need to select “Network Options” and then “WiFi” to enter your SSID and passphrase. Alternatively, you can use the ‘wpa_supplicant.conf’ file for WiFi configuration.
- Localization: Set the appropriate country code, configure the time zone, and adjust locale settings to match your preferences.
- Remote Access: Enable VNC for remote access and configure SSH for remote management if needed.
Verify that your clock is set correctly for proper system functioning.
Finally, update your system to make certain all components are up to date. This guarantees you have the latest security patches and features.
Updating the Operating System

To keep your Raspberry Pi up-to-date, you need to update the operating system regularly.
Start by opening the terminal and running ‘sudo apt update’ to fetch the latest package lists from the repositories. This step is essential before upgrading any packages or firmware.
Regular updates are crucial for system security and performance. Ensure you have a stable internet connection, as software updates require internet access.
Updating via Terminal
Package Management
To update your Raspberry Pi’s operating system is a critical step to confirm you have the latest security patches, features, and performance enhancements. To do this efficiently, you’ll need to use terminal commands.
To update your package list, run the ‘sudo apt update’ command. This polls package repositories for the latest package lists and confirms you have the most current information. Make sure you have an internet connection for this process.
If errors occur, consider using a different package repository mirror.
- Update Package List: Run ‘sudo apt update’ to fetch the latest package lists.
- Upgrade Packages: Use ‘sudo apt full-upgrade’ to upgrade all available packages, including any additional dependencies required by the software.
- Troubleshoot Errors: If errors occur, try using a different package repository mirror.
Regular updates enhance performance and security of the Raspberry Pi by installing bug fixes and other improvements. Keeping your OS updated is crucial for performance and security.
System Maintenance
After updating your packages, you may need to update your bootloader and firmware. Use ‘sudo rpi-eeprom-update’ to check for bootloader updates and apply them with ‘sudo rpi-eeprom-update -a’.
Back up important data before performing these updates due to potential risks.
Finally, reboot your Raspberry Pi with ‘sudo reboot’ to apply all changes and confirm your system is stable and up-to-date. Rebooting is necessary for kernel or bootloader updates to take effect.
Checking for Updates
First, you need to update the package list to verify your package manager knows what packages need updating. Run the following command in your terminal:
”’bash
sudo apt update
”’
This command polls package repositories for the latest package lists.
Next, check if you have enough disk space available. You can do this by running:
”’bash
df -h
”’
This verifies that there is sufficient space on the root partition or the specified installation location.
Upgrade Packages
To upgrade all packages, including any additional dependencies required by the software, use:
”’bash
sudo apt full-upgrade
”’
This command will prompt you to continue with the update; type ‘y’ and press ‘ENTER’ to proceed.
| Step | Command | Description |
|---|---|---|
| Update Package List | ‘sudo apt update’ | Polls package repositories for latest packages. |
| Check Disk Space | ‘df -h’ | Verifies enough space is available. |
| Upgrade Packages | ‘sudo apt full-upgrade’ | Upgrades all packages and their dependencies. |
Reboot the System
After upgrading, reboot your Raspberry Pi to apply any final changes:
”’bash
sudo reboot
”’
This verifies the system is stable and running with the latest updates.
Bootloader Updates
For Raspberry Pi 4 and 5 models, it’s important to check for bootloader updates using:
”’bash
sudo rpi-eeprom-update
”’
If updates are available, apply them with:
”’bash
sudo rpi-eeprom-update -a
”’
And then reboot your device:
”’bash
sudo reboot
”’
Remember to be cautious with beta updates due to potential instability. Regularly checking for updates maintains the health and security of your Raspberry Pi, verifying peak performance and innovation in your projects.
Exploring Available Software
When you boot up your Raspberry Pi, you’ll find a range of pre-installed software packages that cater to various needs. These include productivity applications like LibreOffice, which is part of the recommended software package, and educational tools such as Python, Scratch, Sonic Pi, and Java.
For multimedia support, you have access to VLC and other media players. Here are some key software options you can explore:
- Productivity Applications: LibreOffice for word processing, spreadsheet management, and presentations.
- Educational Tools: Python for programming, Scratch for interactive coding, Sonic Pi for music creation, and Java for advanced development.
- Multimedia Support: VLC and other media players for video and audio playback.
If you need more software, you can install it through the Preferences menu by selecting Recommended Software or using the Add / Remove Software option. The APT tool guarantees easy package management and updates.
The Raspberry Pi OS uses the GNU userland and is compatible with most Debian packages, offering a wide range of additional programs from the software library.
Community resources such as guides, tutorials, and courses are available online to help you customize your software setup according to your needs. This flexibility in software installation and management makes your Raspberry Pi highly versatile and innovative.
Enabling Remote Access
To enable remote access to your Raspberry Pi, you have several options that can be tailored to your specific needs.
SSH Configuration
For secure command-line access, you can enable SSH. Using ‘raspi-config’, open the terminal and run ‘sudo raspi-config‘. Navigate to Interface Options and select SSH, then choose Yes to enable the SSH server.
Alternatively, in headless mode, create a file named ‘ssh’ in the ‘/boot’ or ‘/bootfs’ directory before booting up your Raspberry Pi.
You can also use ‘systemctl’ commands: ‘sudo systemctl start ssh’ to start the service, ‘sudo systemctl enable ssh’ to enable it on boot, and ‘sudo systemctl status ssh’ to check its status.
VNC Setup
For graphical remote access, you can set up VNC. Use ‘raspi-config’ again, navigate to Interface Options, and select VNC. Choose Yes to enable the VNC server.
You can also configure VNC settings through the desktop interface or use RealVNC Cloud by signing up for an account and linking your Raspberry Pi to it.
Finding Your IP Address
To connect via SSH or VNC, you need your Raspberry Pi’s IP address. You can find this by hovering over the network icon on the desktop or using the ‘hostname -I’ command.
Network scanning tools are another option.
Adding Additional Hardware

To enhance your Raspberry Pi setup, you can install a camera module for capturing images and videos, add a touchscreen display for interactive interfaces, or use power management HATs to optimize power consumption and stability.
These additions require careful connection to the GPIO pins and configuration through the operating system.
Make certain you follow the specific installation guidelines for each hardware component to avoid any compatibility issues.
Installing Camera Module
Installing the camera module on your Raspberry Pi involves a few precise steps to confirm it’s properly connected and functioning. First, make certain your Raspberry Pi is turned off and disconnected from the power supply. Identify the camera port, which is located between the HDMI and audio ports (or between the Ethernet and HDMI ports on older models).
- Remove any plastic film from the camera cable.
- Lightly pull the black plastic to open the port.
- Align the camera cable with the correct orientation (blue side towards the USB ports or Ethernet port) and insert it into the camera port.
Once the cable is securely in place, close the camera port by pushing the black plastic. Next, plug all cables back into your Raspberry Pi and start it up. Access the Raspberry Pi configuration tool (usually through ‘raspi-config’ or the GUI settings), navigate to the Interfaces tab, and enable the camera interface. Reboot your Raspberry Pi to apply these changes.
To verify functionality:
- Use ‘rpicam-still -o test.jpg’ to capture a test image.
- Check for any issues or errors in the captured image.
- Confirm the camera cable is securely connected to both the Raspberry Pi and the camera module.
Make sure to check camera compatibility with your Raspberry Pi model and use appropriate libraries like Picamera Python library for advanced configurations.
For troubleshooting tips, review system logs or error messages if the camera doesn’t function as expected. Refer to official documentation for further guidance.
Adding Touchscreen Display
With your camera module successfully installed and functioning, you can now focus on enhancing your Raspberry Pi setup with a touchscreen display. To begin, verify you have all the necessary hardware: the Raspberry Pi 7″ Touchscreen Display, DSI Ribbon cable, jumper wires (Red for 5V, Black for GND, Yellow for SCL, and Green for SDA), screws for mounting the Pi board to the adapter board, a USB keyboard and mouse for initial configuration, and an Ethernet cord or USB WiFi Dongle for internet connectivity.
Connect the DSI Ribbon cable to the Raspberry Pi’s Display port, making sure the blue tab faces inward. Then, connect the jumper wires: Red to 5V (pin 2 or 4) and Black to GND (pin 6 or any other GND pin). Secure the controller board to the screen using standoffs and mount the Raspberry Pi on top of these standoffs with screws.
Update your Raspberry Pi OS with ‘sudo apt-get update’ and ‘sudo apt full-upgrade’. Install the matchbox-keyboard using ‘sudo apt-get install matchbox-keyboard’ and reboot the Pi with ‘sudo shutdown -r now’.
If touchscreen drivers aren’t pre-installed, configure them using fbtft drivers. Adjust screen rotation if necessary by editing ‘/boot/config.txt’ and adding ‘lcd_rotate=2’.
Finally, assemble the enclosure and power up your system to test the touchscreen and perform any necessary calibration or adjustments. This setup will enable you to use your Raspberry Pi with a fully functional touchscreen display.
Using Power Management HATs
Enhance your Raspberry Pi setup by integrating a Power Management HAT, which offers a robust solution for managing power dynamics. This HAT is designed to guarantee your Raspberry Pi remains operational even in the absence of a primary power source, making it ideal for applications that require continuous operation.
Here are some key features of the Power Management HAT:
- True UPS and Dynamic Power Management: Automatically switches between different power sources without causing a reset or failure on the Raspberry Pi, guaranteeing power efficiency by sharing the load between the main source and the battery.
- Battery Management and System Protection: Protected 18650 Li-ion battery holder with integrated temperature sensors, thermal shutdown, and overvoltage protection to safeguard your system.
- Dynamic Monitoring and Installation Ease: Real-time monitoring of input, system, and battery current through an available Python API, with a simple installation process involving attaching the HAT to your Raspberry Pi.
The Power Management HAT supports various usage scenarios, including solar panels and external batteries. It also features deep sleep modes to save battery life in power-sensitive applications.
For troubleshooting, tools are available to monitor real-time load voltage, current, power, and percentage of battery use. Additionally, an onboard watchdog timer keeps your system alive if the Raspberry Pi freezes up. This makes it an indispensable addition for any project requiring reliable power management.
Ensuring Long-Term Stability
To secure the long-term stability of your Raspberry Pi, it’s important to focus on several key aspects.
Power Supply and Hardware Stability
Using a good, stable power supply is vital for continuous operation. Consider investing in a UPS (Uninterruptable Power Supply) to prevent downtime from power outages. This will protect against power abnormalities like surges and spikes, ensuring hardware safety and data integrity. Utilize a software-controlled fan to prevent throttling and overheating, and choose low-power peripherals to reduce overall power consumption. Disable unused hardware components like Bluetooth, Wi-Fi, and HDMI to minimize power draw.
Data Integrity and File System
Configure your root file system to be read-only to prevent corruption from power cycles. Use a tmpfs in RAM for logs and temporary data to reduce wear on the SD card. Mount logs and scripts to a USB thumb drive or external hard drive for added reliability. Disable and uninstall the swapfile to avoid unnecessary writes to the SD card.
Power Management and System Monitoring
| Category | Recommendation | Benefits |
|---|---|---|
| Power Supply | Use stable power supply and UPS | Prevents downtime, guarantees continuous operation |
| Cooling Solutions | Software-controlled fan | Prevents throttling and overheating |
| System Monitoring | Use ‘vcgencmd’, ‘cron’ for scheduling | Optimizes energy consumption, tracks CPU/GPU utilization |
Employ power management tools like ‘vcgencmd’ or third-party solutions like ‘PiJuice’. Use tools like ‘cron’ to schedule shutdowns and startups, and implement sleep modes during inactivity. Monitor power consumption using a USB multimeter or specialized power supply.
Performance Optimization
Guarantee code and applications are optimized for performance to reduce CPU load and power consumption. Limit the number of background processes and services running on the Raspberry Pi. Configure the operating system to use power-saving modes such as dimming the display and reducing CPU frequency.
Frequently Asked Questions
Can I Use a Different Operating System Besides Raspberry Pi OS?
Yes, you can use an alternative OS on your Raspberry Pi. Options include Ubuntu, Fedora Linux, Kali Linux, Manjaro Linux ARM, and SparkyLinux. Refer to the installation guide for each OS to set it up.
How Do I Troubleshoot if the Raspberry Pi Does Not Boot?
To troubleshoot boot issues, check if the SD card is properly inserted and the OS is correctly flashed. Confirm the power supply is stable and sufficient. Verify no shorts on GPIO pins and inspect for damage. Check the status LED for warning codes and update the bootloader if necessary.
What Are the Best Practices for Cooling the Raspberry Pi?
To keep your Raspberry Pi cool and performing smoothly, consider a heatsink installation to drop temperatures by 5-10°C. For extra effectiveness, guarantee proper fan placement and control fan speed using PWM based on temperature trip points.
Can I Use a Battery to Power My Raspberry Pi?
You can use a battery to power your Raspberry Pi, but verify the battery type and power management are suitable. For example, use a 5V power bank or batteries with a voltage regulator to meet the Pi’s current requirements.
How Do I Backup My Data on the Raspberry Pi Regularly?
To regularly backup your Raspberry Pi data, use tools like RPi-Clone for full SD card backups or rsync for incremental file-level backups. Set up cron jobs to automate these backup solutions at specified times.
Conclusion
Congratulations, you’ve successfully set up your first Raspberry Pi. Now, your tiny powerhouse is ready to tackle a world of projects. Remember, this is just the tip of the iceberg; with each new configuration and addition, you’re revealing its full potential. Keep exploring and experimenting – the possibilities are endless, and your Raspberry Pi is a versatile tool that can turn your ideas into reality like a Swiss Army knife for tech enthusiasts.

I am a retired software engineer with experience in a multitude of areas including managing AWS and VMWare development environments. I bought a relative a mini-PC a year ago and have become passionate about the technology and its potential to change how we deploy software.