
To install an M2 SSD on Raspberry Pi, you’ll need a compatible M2 SSD, a USB enclosure or PCIe adapter, a microSD card, and a 27W power supply. First, verify your Raspberry Pi firmware is updated, then power off the device and connect the SSD to the adapter. Boot up and configure the bootloader for SSD support, then optimize performance with cooling solutions. Keep exploring to find out more about configurations and troubleshooting tips.
Key Takeaways
- Choose the appropriate Raspberry Pi model (4 or 5) and acquire a compatible NVMe M.2 SSD (2230 to 2280 sizes).
- Use a PCIe adapter board for Raspberry Pi 5 or a USB enclosure for Raspberry Pi 4 to connect the M.2 SSD.
- Update the Raspberry Pi firmware and configure the bootloader to prioritize booting from the M.2 SSD.
- Ensure proper thermal management with high-quality enclosures and consider cooling solutions to prevent overheating.
- Regularly check for firmware updates and monitor performance benchmarks to optimize SSD operation.
Understanding Compatibility of M2 SSD on Raspberry Pi
Alright, let’s tackle this. Different types of M2 SSD on Raspberry Pi models don’t always play nice out of the box.
If you’ve got a Raspberry Pi 4, you can’t slot an M2 SSD on Raspberry Pi directly—it needs a USB enclosure or adapter. But you’re capped by USB 3.0 speeds, maxing around 2.5 Gbps in practice, so even a high-end NVMe drive won’t outrun a SATA SSD here. Be cautious about thermal management, as cheap enclosures might overheat during sustained use, causing performance drops or hardware failures. The choice between using an SSD versus SD card becomes critical here, as test results show M.2 drives hitting 130 MB/s compared to SD cards at 12.6 MB/s. Ensuring energy efficiency, like the carbon-neutral status of some devices, is also important for long-term reliability.
Jump to the Pi 5, and things get interesting. Its PCIe Gen 3 interface via the M.2 HAT+ releases speeds up to 837 MB/s read, making NVMe drives viable—but check compatibility, as not all work. The Raspberry Pi 5 also supports dual-band 802.11ac Wi-Fi, ensuring robust wireless connectivity while you’re setting up your SSD.
Size matters too: the official SSD uses M.2 2230, though adapters can handle 2242, 2260, or 2280. Match your hardware to avoid bottlenecks or meltdowns. This attention to detail is similar to how Apple ensures seamless integration within their ecosystem for devices like the Mac Mini 2024.
Gathering Necessary Hardware and Tools
Okay, so putting the pieces together for your M2 SSD on Raspberry Pi setup means checking off five essentials. First, secure a Raspberry Pi 5 or 4 (hardware selection hinges on target performance). Then grab an NVMe M.2 SSD—models like 2230 to 2280 work, but skip SATA variants. Pair it with a PCIe adapter board like Pimoroni’s NVMe Base or Geekworm’s X1002. You’ll also need a microSD card for initial OS setup and boot files and a screwdriver for assembly. Ensure you are using a compatible operating system such as Raspberry Pi OS to maximize performance. Consider the energy efficiency of your setup, similar to the 15W TDP seen in some mini PCs, to ensure stable operation without excessive heat. Tool organization is key: keep standoffs, screws (long and short), anti-static gear, and cooling solutions (like active coolers) within reach. Avoid clutter with this setup matrix: NVMe SSD or Adapter, Cooling Solutions, Standoffs/Screws, Power Supply. A 27W power supply required for stable operation guarantees stable operation. Prioritize compatibility charts and community feedback to dodge pitfalls. Precision now prevents headaches later. Additionally, ensure the M.2 SSD adapter supports USB 3.0 connectivity to maximize transfer speeds and avoid bottlenecks.
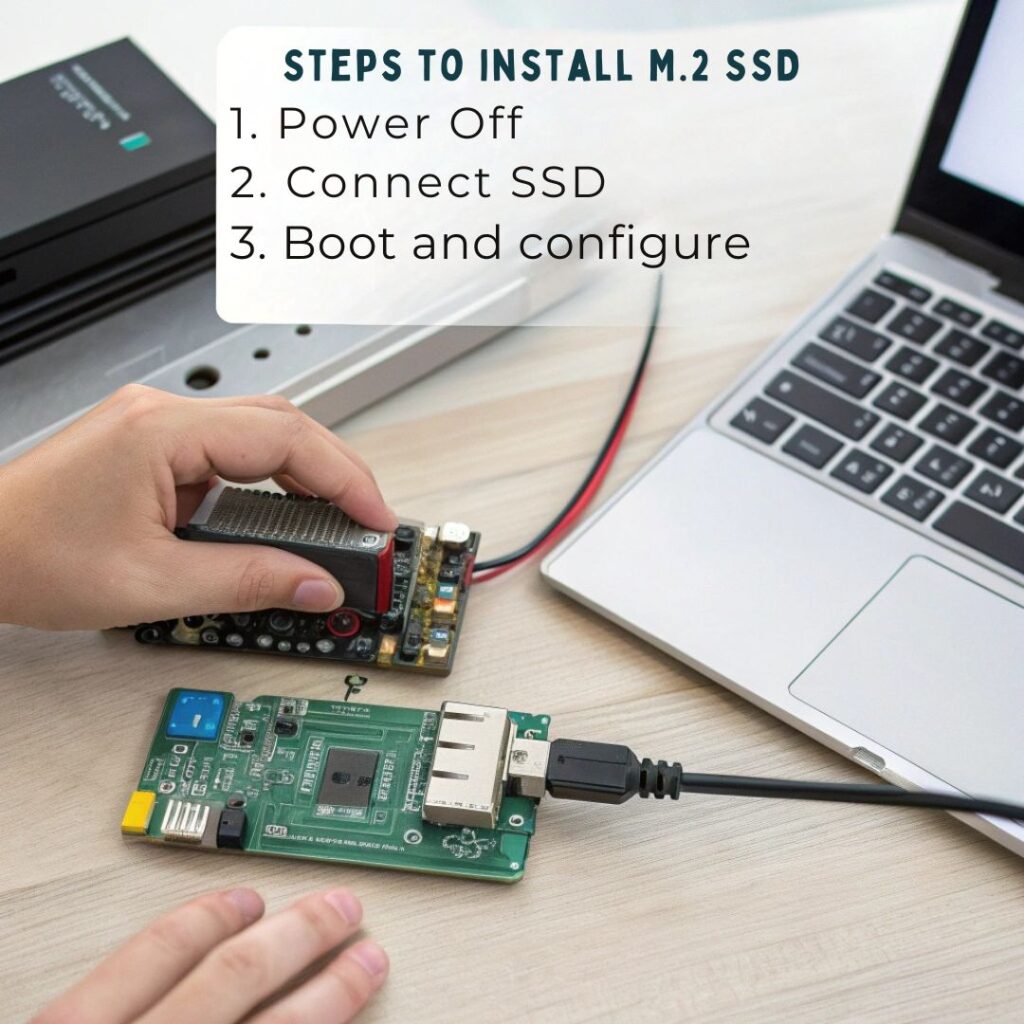
Step-by-Step Installation of M.2 SSD
Once the necessary components are gathered and arranged, ensuring your Raspberry Pi’s firmware supports PCIe with a firmware update via ‘sudo rpi-eeprom-update -a’ followed by a reboot, the physical installation of the M2 SSD on Raspberry Pi begins. Leveraging M.2 SSD advantages like faster data speeds and compact storage, you’ll navigate installation challenges with precision, especially given the enhanced performance of models like the Raspberry Pi 4. This setup is particularly beneficial for tasks such as video editing, where faster storage can significantly improve performance.
Start by powering off the Pi, then secure spacers using screws to raise the M.2 HAT. Connect the ribbon cable to the Pi’s PCIe port—copper contacts face inward—and repeat for the HAT, ensuring alignment.
Three key steps solidify the process:
1) Slotting the SSD into the HAT at a slight angle, avoiding force,
2) Locking its position with the attachment screw,
3) Securing the HAT onto spacers.
Confirm all connections are flush, power the Pi, and watch the system recognize your drive—innovation now sits firmly in your hands. Using an external SSD can also help in optimizing storage by reducing reliance on slower SD cards for data access.
Configuring Raspberry Pi to Boot From M.2 SSD
To configure your Raspberry Pi to boot from the M.2 SSD, you’ll first need to adjust a few settings that confirm your system recognizes the new storage.
Start with bootloader configuration by editing the EEPROM with ‘sudo rpi-eeprom-config –edit’. Change the ‘BOOT_ORDER’ to ‘BOOT_ORDER=0xf416’ to prioritize NVMe boot and add ‘PCIE_PROBE=1’ if you’re using a non-HAT+ adapter. Save your changes and reboot. Additionally, ensure that you update the config.txt file on your NVMe SSD to reflect the necessary settings for a successful boot.
Next, enable PCIe support by adding ‘dtparam=nvme’ to ‘/boot/firmware/config.txt’. If necessary, use ‘dtparam=pciex1_gen=3’ for PCIe3 speeds. Keep in mind that compatible NVMe SSDs like the WD Blue SN550 series will require a firmware update to be bootable.
Once you’ve made these adjustments, reboot again to confirm everything is set correctly, preparing your Raspberry Pi to utilize the impressive speed of your M.2 SSD.
Optimizing Performance and Troubleshooting Tips
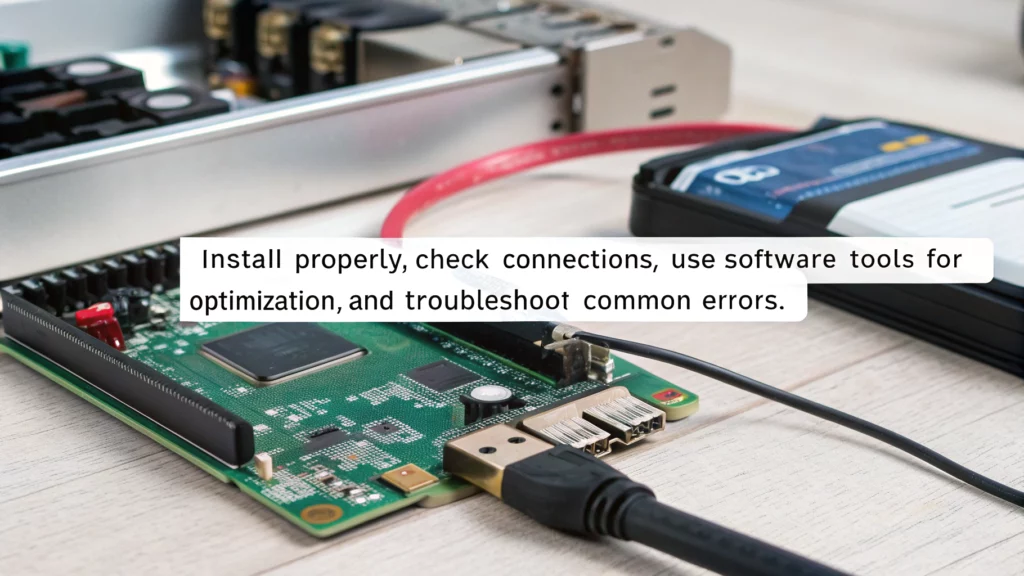
While setting up your M2 SSD on the Raspberry Pi can greatly enhance performance, optimizing that performance and addressing potential issues is essential for a smooth experience.
Here are three key areas to focus on:
- Confirm you’re using a high-quality USB 3.0 enclosure to maximize speed, as performance benchmarks show M2 SSDs outperform microSD cards considerably. Ensuring the enclosure is compatible with your SSD’s USB ID assignment can prevent recognition issues. Additionally, NVMe drives provide superior data transfer rates compared to traditional SSDs, making them a great choice for Raspberry Pi users.
- Prioritize thermal management; overheating SSDs can throttle performance, so invest in cooling solutions like heatsinks or active cooling.
- Regularly check for firmware updates on the Raspberry Pi to improve compatibility and performance.
Frequently Asked Questions
Can I Use an M.2 SATA SSD With Raspberry Pi 5?
You can’t use an M2 SATA SSD with the Raspberry Pi 5 due to M2 SATA compatibility issues. To boost your Raspberry Pi performance, opt for an NVMe SSD instead for peak speed and functionality.
What Tools Are Needed for M.2 SSD Installation?
For your M.2 SSD installation guide, you’ll need a compatible M.2 SSD, an M.2 adapter, screws, spacers, a screwdriver, a ribbon cable, and optionally, a USB enclosure and network connection for setup.
How Do I Know if My SSD Is NVME?
To identify your SSD, use SSD identification methods like checking Task Manager, Device Manager, or third-party tools. Look for NVMe vs SATA indicators in properties to determine your drive’s type and capabilities effectively.
Is a Power Supply Required for M.2 Hat+?
Isn’t it exciting to enhance your tech setup? For M.2 compatibility, a power supply is vital to meet power requirements. Using the official PSU guarantees reliable performance, keeping your innovative projects running smoothly.
Can I Transfer Data From My SD Card to the SSD?
Yes, you can transfer data from your SD card to the SSD. Use the SD Card Copier in the desktop environment or the ‘dd’ command in the command line for efficient data transfer. It’s straightforward!
Conclusion
Just like planting a seed in fertile soil, installing an M.2 SSD on your Raspberry Pi can yield incredible growth in performance. You’ve gathered your tools and nurtured the process step-by-step, transforming your little device into a powerhouse. As you configure and optimize, watch it flourish into a robust machine ready to tackle any task. Embrace this journey, and soon, your Raspberry Pi will bloom into something extraordinary, proving that with a little care, even the smallest can achieve greatness.

I am a retired software engineer with experience in a multitude of areas including managing AWS and VMWare development environments. I bought a relative a mini-PC a year ago and have become passionate about the technology and its potential to change how we deploy software.