How can MQTT Communication with Raspberry Pi improve your Project?
When you’re aiming to streamline IoT communication on your Raspberry Pi, setting up MQTT communication with Raspberry Pi can offer a lightweight and scalable solution. You’ll need to prepare your device, install an MQTT broker like Mosquitto, and configure it for secure local or remote connections. By leveraging Python with the Paho-MQTT library, you can develop reliable clients that publish and subscribe to essential data streams. There’s more to reflect upon as you look to scale and secure your system further.
Key Takeaways
- Install and configure the Mosquitto MQTT broker on Raspberry Pi using system package managers for local and remote message handling.
- Secure the MQTT broker by enabling authentication, disabling anonymous connections, and configuring TLS/SSL encryption.
- Test message publishing and subscribing using command-line tools like mosquitto_pub and mosquitto_sub to verify broker functionality.
- Develop Python MQTT clients with the Paho-MQTT library for automated message exchange and integration with Raspberry Pi GPIO.
- Monitor and optimize broker performance using access controls, logging, and system metrics for reliable IoT communication.
Understanding the MQTT Communication with Raspberry Pi for IoT Applications
MQTT, a lightweight publish/subscribe messaging protocol, forms the backbone of many IoT applications due to its efficiency and reliability on resource-constrained devices like the Raspberry Pi.
MQTT delivers efficient, reliable messaging for IoT, making it ideal for resource-constrained devices such as the Raspberry Pi.
You’ll benefit from MQTT advantages such as low bandwidth usage and minimal resource requirements, making it ideal for scalable IoT applications. Its topic hierarchy enables you to organize and filter messages logically, while message retention guarantees new subscribers gain instant access to the latest data. MQTT supports the connection of millions of IoT devices in a scalable manner, making it suitable for both small and large deployments.
Operating efficiently on local area networks, MQTT Communication with Raspberry Pi does not require Internet connectivity, giving you flexibility in both connected and isolated environments. MQTT’s QoS levels let you balance speed and reliability, essential for unpredictable network reliability. Bi-directional messaging supports seamless device-to-cloud and cloud-to-device communication.
Security features—including TLS encryption and modern authentication—safeguard your messages. These combined capabilities position MQTT as the protocol of choice for robust, secure, and scalable IoT solutions.
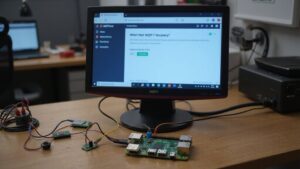
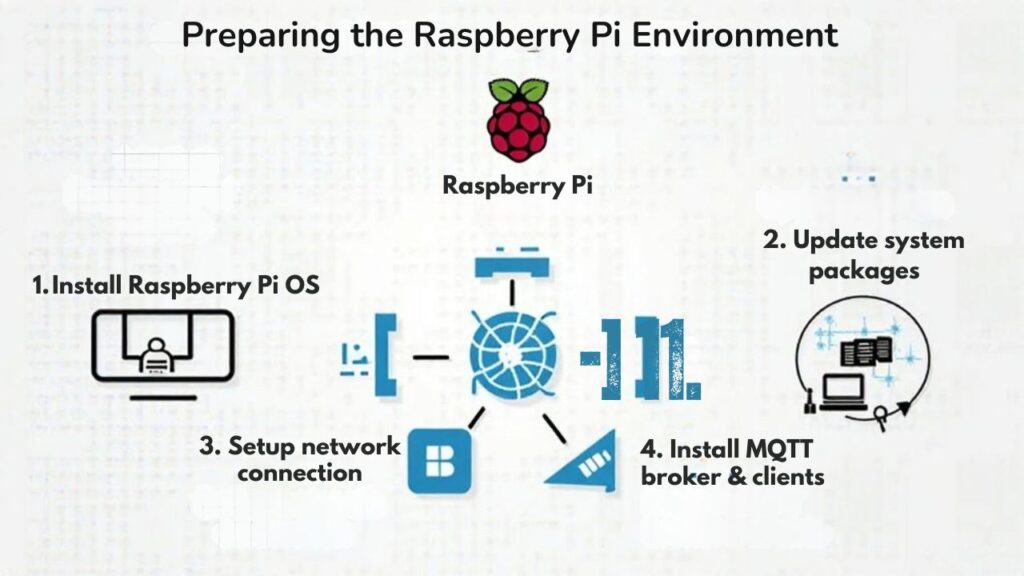
Preparing the Raspberry Pi Environment
Before you can implement MQTT communication, you’ll need to methodically prepare your Raspberry Pi environment for reliable and secure operation.
Begin by completing the Raspberry Pi setup: gather hardware, download Raspberry Pi OS, and flash it onto a microSD card using Raspberry Pi Imager. Boot your Pi, configure language and keyboard settings, and verify network connectivity through DHCP for dynamic IPs or assign a static IP for stability. Since MQTT relies on a publish and subscribe system, making sure your network is reliable and responsive will help your future MQTT broker function correctly. Installing the mosquitto broker software on your Raspberry Pi will enable it to function as an MQTT server for your networked devices.
For robust system configurations, enable SSH for remote management and change default credentials to bolster security. Update your system using `sudo apt update && sudo apt upgrade` for software compatibility and security patches.
Configure firewall rules and DNS settings to secure network access. Allocate adequate resources and monitor storage to maintain ideal performance for eventual MQTT deployment.
Installing and Configuring the Mosquitto MQTT Broker
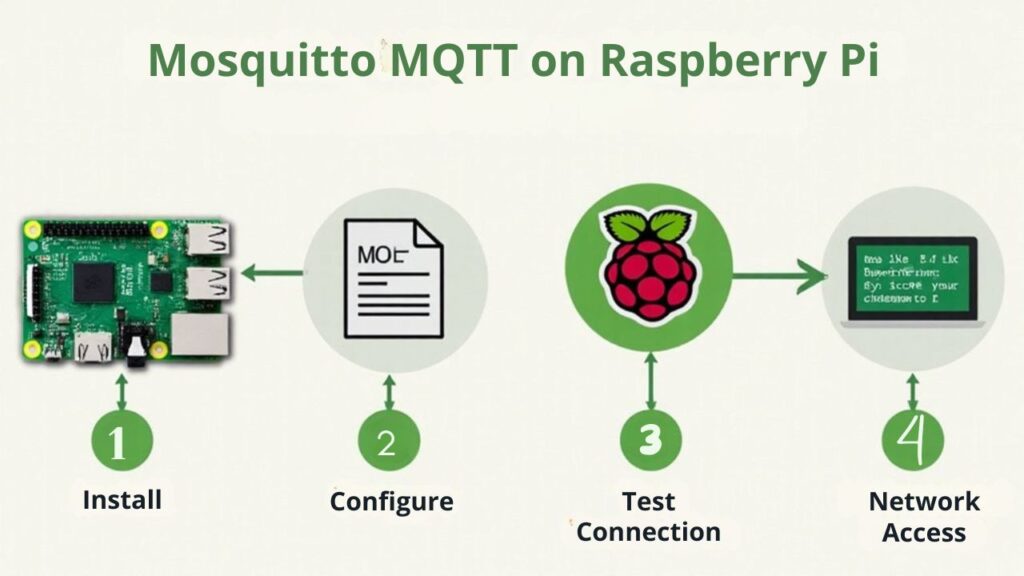
To set up MQTT on your Raspberry Pi, start by updating your system packages and installing Mosquitto with a single command. In addition to rapid setup, Raspberry Pi’s low power consumption makes it ideal for always-on IoT broker applications. The Mosquitto broker is supported on all modern Raspberry Pi models, making it a reliable choice for most users.
You’ll confirm the broker is running, then adjust the configuration to move beyond local-only mode and establish secure remote connections.
Configuring listener ports and enabling authentication guarantees your broker is accessible yet secure for your IoT devices.
Broker Installation Steps
One essential step in establishing reliable MQTT communication involves installing and configuring the Mosquitto broker directly on your Raspberry Pi.
Start by performing system updates and dependency management with `sudo apt update && sudo apt upgrade`; this guarantees your device avoids compatibility issues.
Proceed with package installation using `sudo apt install -y mosquitto mosquitto-clients` to deploy the broker service and necessary client tools. It is important to note that a Micro SD Card (8GB or larger) is required for storing the operating system and running the Mosquitto broker effectively.
Enable persistent broker service activation via `sudo systemctl enable mosquitto.service`, then confirm service verification with `sudo systemctl status mosquitto`.
For terminal testing, use `mosquitto_sub` and `mosquitto_pub` on different sessions to validate local message exchange.
To innovate with remote access, adjust configuration options in `/etc/mosquitto/mosquitto.conf` to allow external connections, balancing functionality against security implications before broader deployment.
Basic Security Settings
After completing Mosquitto broker installation, tightening its security should be your immediate focus to safeguard your MQTT environment. Begin by implementing proper password file management using the `mosquitto_passwd` utility. Append or remove users as needed, and reference the password file in your `mosquitto.conf` with precise permissions. Next, enhance access control configurations by disabling anonymous connections (`allow_anonymous false`) and applying per-listener authentication for isolated security zones.
For data-in-motion protection, configure TLS/SSL using signed certificates and the appropriate `listener`, `certfile`, and `keyfile` directives. To further secure your setup, utilize the access control list mechanism by defining an `acl_file` in your configuration, ensuring only authorized clients can subscribe or publish to selected topics. Configuring authentication is crucial to prevent unauthorized clients from accessing your MQTT broker, and recent Mosquitto versions require you to explicitly set authentication options to ensure a secure deployment.
| Security Aspect | File/Directive | Key Command/Setting |
|---|---|---|
| User Management | password_file | mosquitto_passwd |
| Anonymous Access | mosquitto.conf | allow_anonymous false |
| Per-Listener Auth | mosquitto.conf | per_listener_settings true |
| TLS/SSL Protection | certfile, keyfile | listener 8883 |
| Dynamic Security Roles | plugins, JSON config | mosquitto_ctrl dynsec |
Establishing Local-Only and Remote MQTT Connections
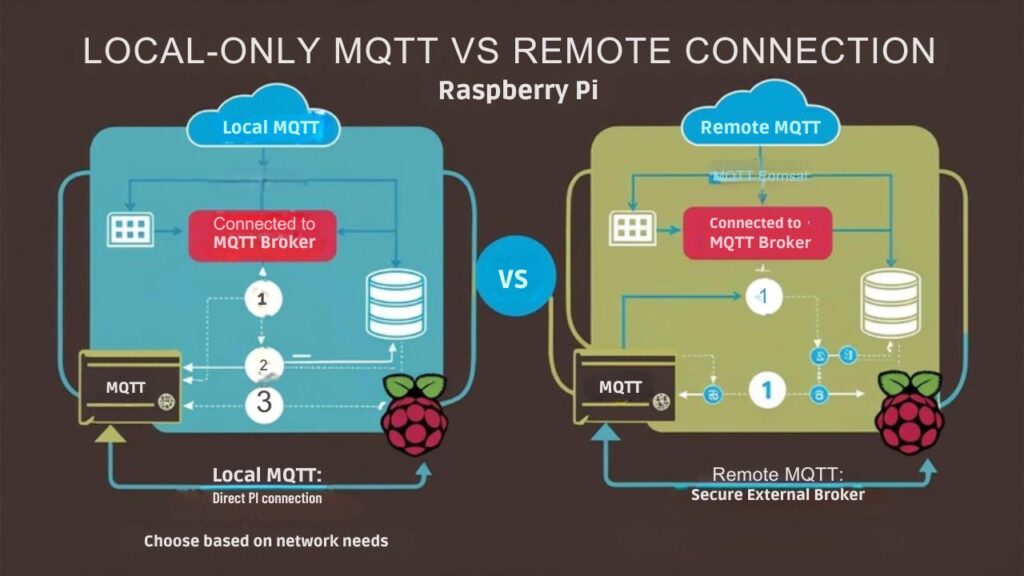
To control how clients connect to your Mosquitto broker, you’ll need to choose between local-only access and enabling remote connections.
By default, Mosquitto allows connections only from the Raspberry Pi itself, but you can expand this by editing the configuration file to define network listeners and authentication options. If you install the Mosquitto clients package, you will have the necessary tools for subscribing and publishing to topics from the command line. When setting up your broker for remote access, it’s important to remember that MQTT is a lightweight messaging protocol for IoT using a publish/subscribe model, which is designed for flexibility across local and remote networks.
Specify the correct IP address and ports for remote clients, and apply security settings to guarantee safe access beyond your local system.
Configuring Local Broker Access
When deploying MQTT on a Raspberry Pi, you’ll need to decide whether your broker should accept connections only from software running on the Pi itself or also allow remote devices to communicate. For robust security and minimal resource usage, configure Mosquitto’s `bind_address` in the broker configuration to 127.0.0.1, which guarantees local-only access. This segregation simplifies access control, enhances service management, and keeps your local network architecture lean. Use the password file for client authentication, enforce connection limits, and monitor message retention for peak performance tuning.
Restricting your MQTT broker to local interfaces eliminates the need for network routing and reduces attack vectors, making it perfect for isolated workloads and strict security practices. Unlike managed brokers that provide quick setup, self-hosted MQTT broker deployments on devices like Raspberry Pi give you full control over configuration and data flow.
| Configuration | Advantage | Keyword |
|---|---|---|
| bind_address (127) | Isolates broker | access control |
| Auth file config | Guarantees exclusivity | client authentication |
| Connection limits | Conserve resources | resource usage |
Enabling Remote Client Connectivity
Curious about letting devices beyond your Raspberry Pi communicate over MQTT? To enable remote client setup, first edit `/etc/mosquitto/mosquitto.conf`: add `listener 1883` and remove any `bind_address` limiting connections to localhost.
When setting up remote access, remember that the broker must always be running to accept connections from other devices; you can ensure this with `sudo systemctl enable –now mosquitto.service`. If you experience issues connecting between different devices on your local network, check your router’s settings, as some models may restrict machine-to-machine communication by default.
For easy testing, set `allow_anonymous true`—but replace this with authentication soon. Restart Mosquitto with `sudo service mosquitto restart`.
On your network, assign a static IP to your Pi and confirm that remote devices are on the same subnet. Use your Pi’s IP (find it via `hostname -I`), not `localhost`, for client connections.
For connection troubleshooting, check firewall rules and use `mosquitto -v` for debug logs. If you see “connection refused,” revisit broker configuration and validate port 1883 is open and reachable.
Test with `mosquitto_pub` and `mosquitto_sub`.
Testing Broker Functionality With Command-Line Tools
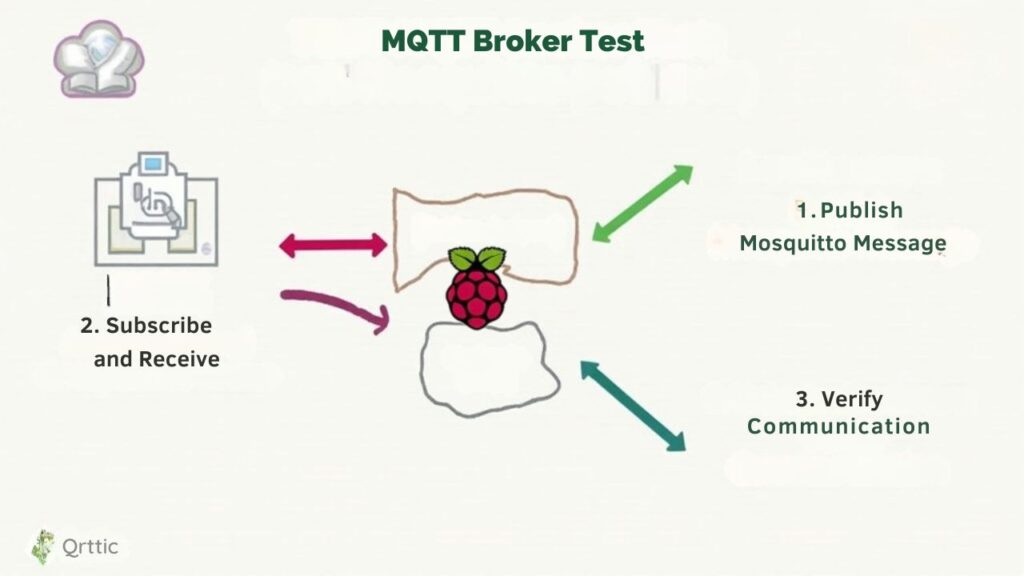
Three robust command-line tools—Mosquitto CLI, MQTTX CLI, and HiveMQ MQTT CLI—enable you to rigorously test MQTT broker functionality on a Raspberry Pi.
Selecting the right tool enhances development and troubleshooting when verifying broker deployments on your device.
If you’re evaluating command line comparisons, start with Mosquitto CLI for rapid basic testing using `mosquitto_pub` and `mosquitto_sub` to validate topic messaging and broker reachability across MQTT v3.1.1/v5.0 with SSL/TLS.
For advanced testing strategies, use MQTTX CLI to simulate high-throughput loads, emulate IoT data, and benchmark broker performance via flexible commands like `mqttx bench pub`.
You can install MQTTX CLI using the command line on a variety of operating systems, ensuring versatility during your Raspberry Pi MQTT workflow.
HiveMQ MQTT CLI’s interactive shell brings multiparallel client management, subscription tracking, and efficient context switching, ideal for stress testing configurations or validating MQTT 5-specific scenarios.
On the Pi, install each tool natively or with Docker for seamless, reproducible broker validation workflows.
Developing Python MQTT Clients on Raspberry Pi
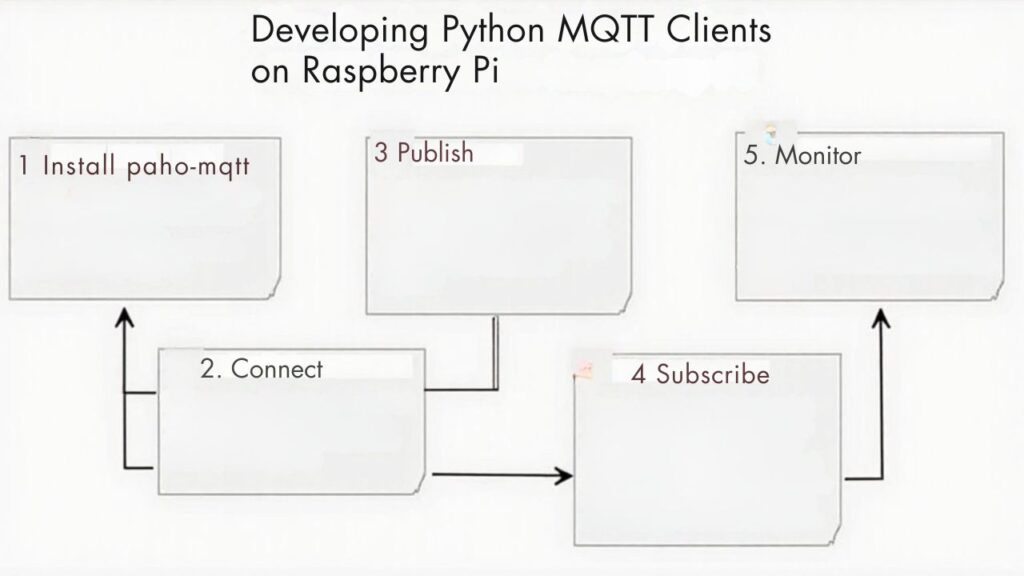
After validating broker connectivity with robust command-line tools, you’ll want to implement MQTT logic directly within your applications.
Start by verifying Python 3 is installed on your Raspberry Pi, then install the Paho-MQTT library with `sudo pip install paho-mqtt`. MQTT is a lightweight messaging protocol using a publish/subscribe model, making it highly efficient for IoT scenarios like those supported by Raspberry Pi. The Mosquitto Broker acts as the central server that distributes messages between publishers and subscribers, enabling flexible communication between your Raspberry Pi and other devices.
You’ll create a client instance, set up essential callback functions—`on_connect`, `on_message`, and `on_subscribe`—and configure parameters like TLS/SSL for encrypted connections.
Subscribe to topics within the `on_connect` callback to maintain resiliency after reconnects.
For advanced MQTT features, define a “will” message using `will_set()` or handle GPIO automation inside message callbacks.
If you’re troubleshooting Python clients, enable detailed output to reveal connection and message issues.
For limited environments, try MicroPython with `umqtt.simple` for lightweight deployments.
Integrating With External Platforms and Cloud Brokers
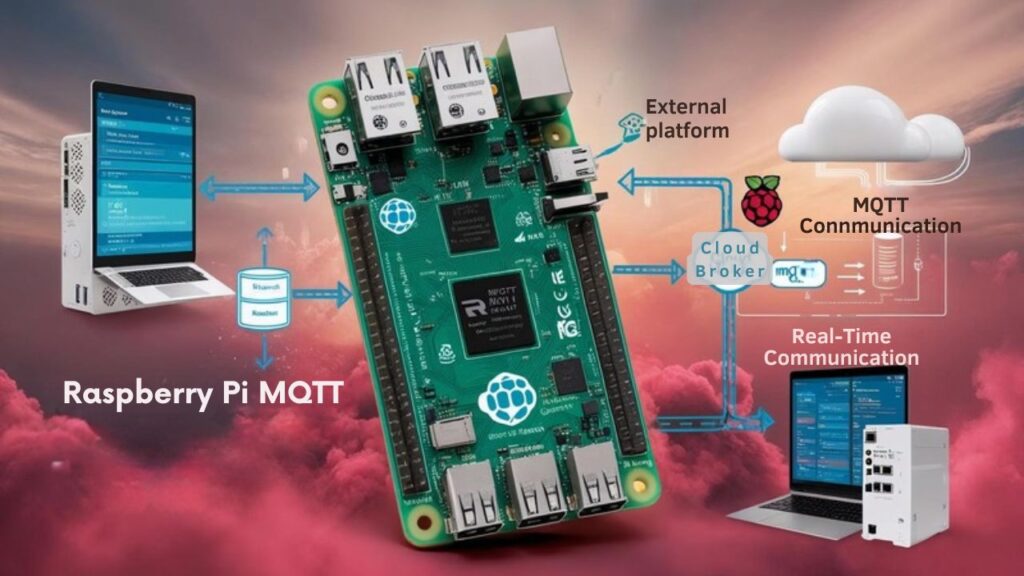
Although a Raspberry Pi can host its own local MQTT broker for personal projects, integrating with external platforms or cloud brokers greatly expands your deployment’s reach and reliability.
For robust cloud integration, configure your Raspberry Pi MQTT clients to connect to public brokers such as AWS IoT or Azure IoT Hub. Specify the broker URL, enable TLS/SSL for secure communication, and set credentials to guarantee platform compatibility. Many cloud providers offer dynamic DNS solutions, which help manage changing public IP addresses when accessing MQTT brokers remotely.
Leveraging cloud brokers adds benefits like high availability and persistent queues, key for scaling across distributed IoT environments.
Cloud brokers deliver high availability and persistent queues, making them essential for scaling IoT solutions across distributed environments.
If you work with platforms like Home Assistant, use their native MQTT integrations, adapting topics and payloads as required. This strategy allows seamless data transfer, remote device control, and efficient management—unlocking innovative possibilities beyond basic local deployments.
Enhancing Security and Optimizing MQTT Performance
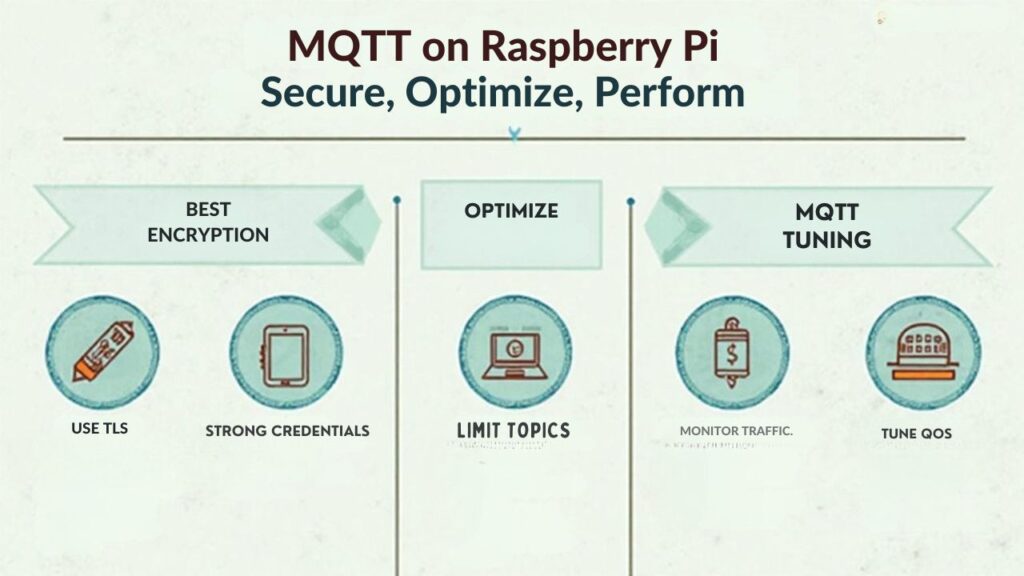
While MQTT offers a lightweight and efficient protocol for IoT communication, securing your implementation and optimizing performance on a Raspberry Pi is critical for reliable, scalable deployments.
Start by applying security enhancements such as enabling TLS encryption with x509 certificates for broker and clients, and configuring Mosquitto for username/password authentication while disabling anonymous access.
Use Access Control Lists (ACLs) to tightly control topic permissions and position your network in a DMZ secured by strict firewall rules.
For performance tuning, select the appropriate QoS level to balance reliability and system overhead. Optimize broker resource management and utilize efficient libraries like Paho-MQTT.
Batch client messages, use asynchronous APIs, and compress payloads if appropriate.
Regularly audit security, monitor system metrics, and prioritize critical MQTT processes for robust, innovative deployments.
Frequently Asked Questions
Can MQTT Be Used to Trigger GPIO Pins on the Raspberry Pi Directly?
You can’t use MQTT to trigger Raspberry Pi GPIO pins directly; true GPIO control requires MQTT integration using a Python script. You’ll subscribe to topics, parse payloads, and toggle pins through a GPIO library within your integration code.
What Are Common Use Cases for MQTT Outside Home Automation?
You know over 63% of industrial IoT projects rely on MQTT. Leverage it for industrial monitoring, environmental sensing, fleet tracking, healthcare applications, smart agriculture, and remote telemetry—enabling scalable, real-time, and reliable data-driven solutions across innovative sectors.
How Do I Monitor MQTT Traffic Visually With a GUI Tool?
You can monitor MQTT traffic visually by using MQTT dashboards in GUI tools like MQTT Explorer or MQTTX. These platforms let you perform detailed traffic analysis, visualize topic hierarchies, view real-time message flows, and inspect payload data instantly.
Is It Possible to Bridge Multiple MQTT Brokers Together?
Yes, you can implement broker bridging to connect multiple MQTT brokers, enabling seamless message routing. This approach enhances MQTT scalability by distributing loads, offering redundancy, and allowing flexible integration between networks, systems, or cloud platforms to foster innovative solutions.
What Should I Do if the Raspberry Pi’S Date or Time Is Incorrect?
Like calibrating a sundial, you should verify the Pi’s network, review time synchronization services, and check date settings. Manually adjust using `timedatectl` or an HTTP method if NTP’s blocked, ensuring accuracy for advanced, time-dependent solutions.
Conclusion
By setting up MQTT on your Raspberry Pi, you’ve opened the gateway to IoT possibilities as vast as the universe. Precise configuration, robust Python client development, and proper security measures let you exchange messages reliably and efficiently. Whether you’re connecting local devices or cloud platforms, this solution scales with your ambitions. Now, you’re prepared to architect complex, secure IoT ecosystems, all anchored by your Raspberry Pi’s powerful MQTT backbone. The future of smart automation is yours to command.

I am a retired software engineer with experience in a multitude of areas including managing AWS and VMWare development environments. I bought a relative a mini-PC a year ago and have become passionate about the technology and its potential to change how we deploy software.