Embark on a coding adventure as you transform your Raspberry Pi into a powerhouse with our ultimate nodejs setup on raspberry pi guide. Imagine your humble device evolving into a nimble development platform—ready to run your Node.js applications with ease and precision. Whether you’re a curious beginner or a seasoned coder, this guide lays out a clear, step-by-step journey that starts with a simple system update and leads you through installing essential packages, configuring repositories, and verifying your setup.
Key Takeaways
- Update your Raspberry Pi before installing Node.js to ensure system stability by running ‘sudo apt update’ and ‘sudo apt full-upgrade’.
- Install essential packages like ‘curl’, ‘ca-certificates’, and ‘gnupg’ to securely add NodeSource repository for Node.js installation.
- Utilize the NodeSource setup script by executing ‘curl -fsSL https://deb.nodesource.com/setup_20.x | sudo -E bash -‘ to easily install Node.js.
- Verify the installation by checking Node.js and npm versions with ‘node -v’ and ‘npm -v’ to ensure everything is functioning correctly.
- Set up a test script in a ‘.js’ file and execute it with ‘node filename.js’ to confirm that your development environment is operational.
Update Your Raspberry Pi
Before you plunge into setting up Node.js on your Raspberry Pi, it’s essential to make certain your system is up to date. An efficient Raspberry Pi setup begins with checking your package management system.
First, run ‘sudo apt update‘ to refresh the package lists from the repositories. This guarantees you’re aware of the latest available packages and updates. If you encounter any errors, consider switching to a different package repository mirror.
Next, upgrade your existing packages using ‘sudo apt full-upgrade’. This command upgrades all available packages, installing any necessary dependencies and updating the kernel when needed. You’ll be prompted to confirm the update; just type ‘y’ and hit ENTER. Additionally, keeping your system firmware updated is crucial for optimal hardware performance, especially with the new CPU architecture.
Don’t overlook firmware upgrades for peak performance. Utilize ‘sudo rpi-update’ to install the latest Linux kernel and firmware pre-releases. Reboot your Raspberry Pi with ‘sudo reboot’ afterward to apply these changes effectively. Remember, having a stable internet connection is crucial during this upgrade process to avoid interruptions.
Lastly, check your current OS version with ‘cat /etc/os-release’. Making sure your system is fully updated is essential for both stability and security before deploying Node.js, paving the way for a seamless development experience.
Install Required Packages

Before you proceed with the Node.js installation, you’ll need to verify all essential package dependencies are in place. An active internet connection is required to download these packages, so check your network status. Finally, confirm that you have SSH access configured correctly for remote operations if needed. This setup will ensure a smooth installation process for Node.js on Raspberry Pi. It is crucial to resolve installation issues related to unmet dependencies to avoid conflicts during the setup.
Essential Package Dependencies
One vital step in setting up Node.js on your Raspberry Pi is installing the essential package dependencies. This guarantees you have the right environment for compatibility checks and performance optimization. Here are three key tasks to complete:
- Update and Upgrade Your System: Run ‘sudo apt-get update’ followed by ‘sudo apt-get upgrade’. This guarantees you have the latest essential libraries and security updates, preventing dependency resolution issues during Node.js installation. Regular updates are crucial for keeping your system aligned with the latest updates. Additionally, ensure you utilize the Adafruit package repository for the most recent versions of Node.js.
- Determine Your Architecture: Execute ‘uname -m’ to identify if your Raspberry Pi is ARMv6, ARMv7, or ARMv8. Selecting the correct version of Node.js binaries based on your architecture is vital for performance optimization.
- Add NodeSource Repository: If you haven’t already, install ‘curl’ using ‘sudo apt install curl’. Then, download the installation script for the NodeSource repository using:
”’bash
curl -fsSL https://deb.nodesource.com/setup_20.x | sudo -E bash –
”’
This package source allows for version management and simplified updates for Node.js.
Internet Connection Required
To successfully install the required packages for Node.js on your Raspberry Pi, a stable internet connection is fundamental. You can choose between wireless configuration or a wired Ethernet connection, each with its advantages. For wireless, scan available networks with ‘sudo iwlist wlan0 scan’ and edit the ‘wpa_supplicant.conf’ file with your network details. Restart your Raspberry Pi using ‘sudo reboot’, and confirm connectivity by checking the IP address with ‘ifconfig wlan0’. Guarantee proper network security throughout this process. It is essential to ensure that your router supports port forwarding during the setup for optimal external access. Additionally, having an up-to-date Raspberry Pi OS ensures better NodeJS installation compatibility.
Alternatively, an Ethernet connection offers more connection stability. Simply connect the Ethernet cable from your Raspberry Pi to the router, and it will automatically obtain an IP address, requiring no additional configuration. Confirm that the connection is active by using ‘ifconfig eth0’, as this guarantees reliable IP address management. Regardless of your choice, be aware of your router settings and the influence of firewalls on your connection. Make sure to also document your Raspberry Pi’s assigned IP address for future troubleshooting connectivity and potential SSH access. This foundational step prepares your environment for successful Node.js installation and usage.
SSH Access Configuration
Enabling SSH access on your Raspberry Pi is essential for remote management, as it allows you to configure and control your device without needing a direct connection to the terminal. Additionally, enabling SSH on Raspberry Pi can be achieved through the Raspberry Pi imager tool during installation for easier setup. This is particularly important since NodeJS installation requires proper access to configure packages remotely.
To guarantee proper SSH setup, follow these key steps to enhance SSH security and troubleshoot any issues effectively:
- Enable SSH: Open the terminal and run ‘sudo raspi-config’. Navigate to Interface Options, select SSH, and choose Yes to enable the SSH server. Alternatively, use ‘sudo systemctl start ssh’ and ‘sudo systemctl enable ssh’ to initiate the service.
- Check SSH Status: Confirm that the SSH service is running by executing ‘sudo systemctl status ssh’. Verify the output displays active (running) to avoid any potential SSH troubleshooting.
- Generate SSH Keys: For improved security, generate an SSH key pair on your local device using ‘ssh-keygen -t rsa -b 4096’.
Copy your public key to the Raspberry Pi with ‘ssh-copy-id
Set Up NodeSource Repository
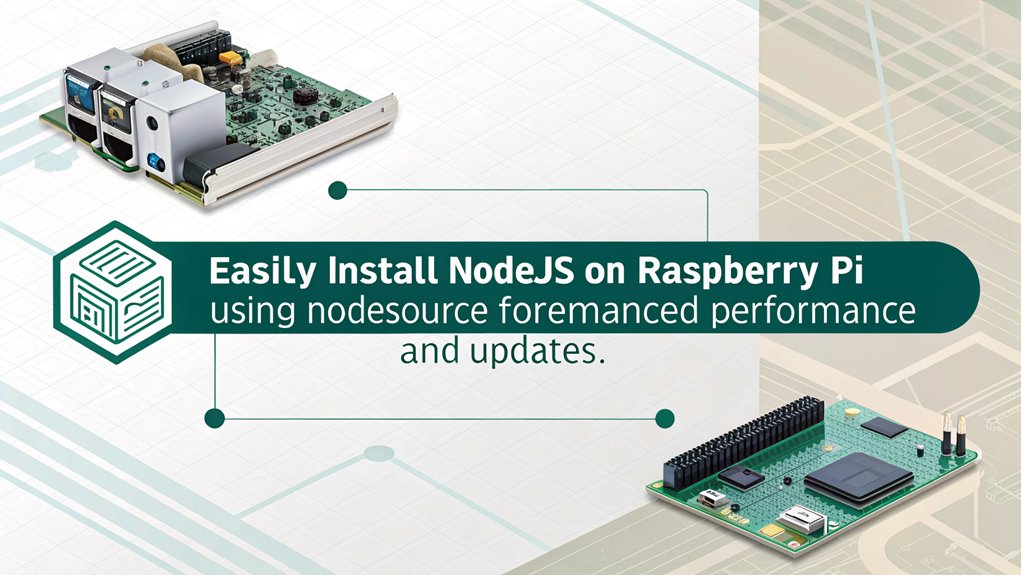
Setting up the NodeSource repository is necessary for obtaining the desired version of Node.js on your Raspberry Pi, especially since it allows for straightforward package management and updates. Start by updating your package list with ‘sudo apt update’, guaranteeing you pull the latest package information. Next, upgrade existing packages using ‘sudo apt upgrade’ to maintain system stability and security.
To install Node.js seamlessly, you’ll need to prepare your system by installing necessary Debian packages: run ‘sudo apt install -y ca-certificates curl gnupg’. These packages facilitate secure communication with external repositories and guarantee package integrity. After that, download the GPG key vital for repository verification with the command ‘curl -fsSL https://deb.nodesource.com/gpgkey/nodesource-repo.gpg.key | sudo gpg –dearmor -o /usr/share/keyrings/nodesource.gpg’. Additionally, this process simplifies the management of Raspberry Pi dependencies and ensures that you can access the latest updates.
Define your desired Node.js version by setting the ‘NODE_MAJOR’ environment variable. For instance, use ‘NODE_MAJOR=20’ for Node.js 20. Finally, add the NodeSource repository to your sources list using the echo command, confirming it’s verified with the GPG key. This setup allows for effective Node.js installation and seamless version management.
Install Node.js Properly
Once you’ve established the NodeSource repository, it’s essential to install Node.js properly on your Raspberry Pi. Start by detecting and choosing the correct version based on your device’s ARM architecture. Run the ‘uname -m’ command and check if it responds with ‘armv6’, ‘armv7’, or ‘armv8’. This step is significant for performance considerations.
Follow these installation techniques to guarantee a smooth process:
- Download Node.js Linux Binaries: Use the correct link address for your ARM version from the Node.js download page and download it using ‘wget’.
- Extract and Copy Files: Run ‘tar -xzf [filename].tar.gz’, then navigate to the extracted directory and copy files to ‘/usr/local’ with ‘sudo cp -R * /usr/local/’.
- Alternative Installation Method: If you encounter common errors, consider using a ‘.deb’ package. Update your packages before executing ‘sudo dpkg -i node_latest_armhf.deb’.
Be diligent with configuration tips post-installation to optimize performance. By adhering to these steps, you’ll guarantee Node.js is efficiently set up on your Raspberry Pi.
Verify Node.js Installation
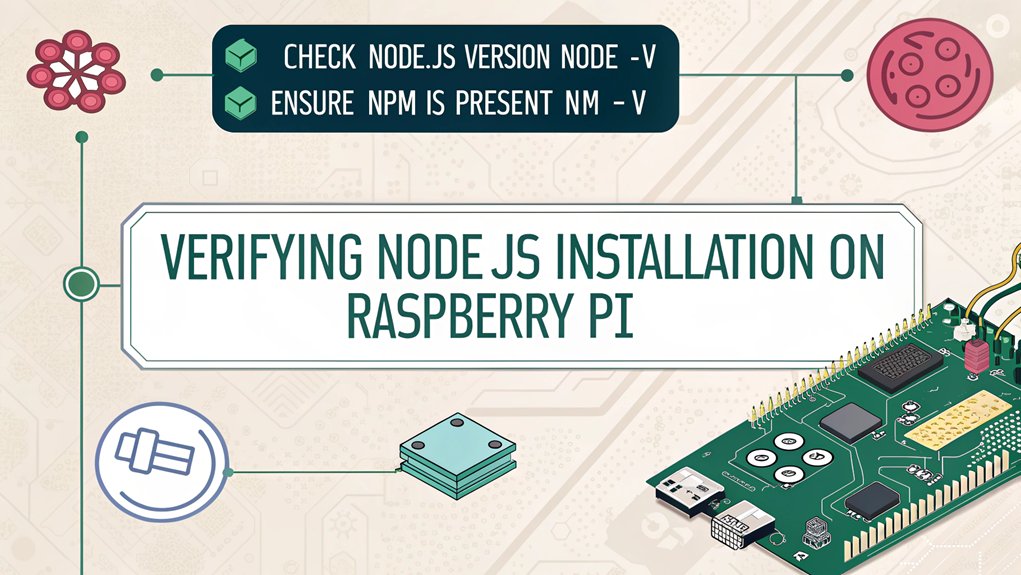
To confirm your Node.js installation, you’ll first check the Node.js version using the ‘node -v’ command. This step is essential especially if you’re using unofficial builds to ensure compatibility with your Raspberry Pi setup. Next, you’ll verify npm’s functionality with ‘npm -v’, guaranteeing both tools are properly installed. Finally, you’ll execute a simple test script to ascertain Node.js operates as expected.
Check Node.js Version
How can you confirm that Node.js is properly installed on your Raspberry Pi? Verifying the installation is essential for guaranteeing compatibility with your projects. You should follow these steps to check the Node.js version effectively:
- Open Terminal: Launch your Raspberry Pi’s terminal interface. This is where you’ll run your verification commands.
- Check Node.js Version: Execute the command ‘node -v’. If installed correctly, you’ll see the version number, such as ‘v16.14.2’ or ‘v22.11.0’.
- Verify npm Installation: Run ‘npm -v’ to confirm npm is installed and functioning. Proper npm installation is important for managing packages.
If the version doesn’t match the expected output or if you encounter errors, you might face version troubleshooting issues. This necessitates checking compatibility between Node.js and your Raspberry Pi model.
Regularly validating the version helps maintain stability and performance for your applications, enabling you to innovate seamlessly. By confirming your installation, you can swiftly move on to developing your projects with confidence.
Execute Test Script
Execute a test script to verify your Node.js installation and confirm everything is functioning correctly. Begin by creating a basic Node.js script named ‘app.js’.
Open your terminal and input ‘echo “console.log(‘Hello, World!’);” > app.js’ to generate the script. This simple command outputs a familiar phrase, serving as a straightforward test case for the installation.
Run the test script by executing ‘node app.js’. If the installation is successful, you should see “Hello, World!” displayed in your terminal, confirming the output verification of your Node.js setup. Additionally, ensure that you have installed Node.js using NodeSource for proper platform compatibility.
In case you set up a basic server instead, utilize ‘curl localhost:3000’ to check the server response, confirming it aligns with the expected output.
For enhanced validation, consider using multiple SSH connections to simultaneously run instances of your application. This approach can further confirm stability and responsiveness under load.
Any discrepancies in output must be addressed, as they could indicate underlying installation issues. Following these steps will confirm that your Node.js setup on Raspberry Pi is both innovative and reliable, allowing you to explore more complex applications.
Verify NPM Functionality
Is NPM functioning properly on your Raspberry Pi? Verifying NPM functionality is essential for your project setup. To guarantee everything’s working smoothly, you’ll want to follow these steps:
- Check Node.js Version: Run ‘node -v’ in the terminal. This command should return the installed version of Node.js without errors. If it doesn’t, revisit your installation steps.
- Verify NPM Version: Execute ‘npm -v’. Similar to Node.js, a successful output confirms that NPM is properly installed. If you encounter issues, you might need to troubleshoot your installation.
- Conduct NPM Testing: Create a simple test project. Inside a new directory, run ‘npm init -y’ to generate a package.json file. This step verifies that your NPM can handle package management effectively.
If any of the above commands fail, consider checking your Node.js and NPM installation processes.
Confirming both tools are fully operational sets the groundwork for successful project setups. Remember, staying updated and verifying functionality can save you time and prevent future issues while innovating on your Raspberry Pi.
Create a Test Script

To create a test script in Node.js on your Raspberry Pi, you’ll start by setting up a new file with a ‘.js’ extension, such as ‘test.js’. Use a text editor like ‘nano’ or ‘vim’ to create and edit this file.
After successfully opening the editor, write your Node.js code to perform a specific task. For instance, you could write a simple script to print numbers from 0 to 10 using a for loop:
”’javascript
for(let i = 0; i <= 10; i++) { console.log(i); }
”’
Once you’ve completed writing your script, save the file and exit the editor, which is essential for effective file management. It’s important to ensure the script is written correctly to avoid syntax errors, which can prevent execution. Additionally, installing Node.js via ‘sudo apt-get install nodejs’ is crucial for running your scripts on the Raspberry Pi.
Next, open a command line interface on your Raspberry Pi. Use ‘cd’ commands to navigate to the directory containing your script.
To execute the script, use the command ‘node test.js’. This will run your script, and you should observe the output in the console.
If issues arise, utilize debugging techniques to troubleshoot. You can add console logs at various points in your code to gain insights into its execution, ensuring your test script runs successfully.
Manage Packages With Npm

To manage packages effectively with NPM, you’ll first install new ones quickly using commands like ‘npm install
Installing Packages Quickly
Although you’ve successfully installed Node.js and npm on your Raspberry Pi, managing packages efficiently with npm is essential for streamlining your development process. By mastering npm, you’re not only engaging in advanced package management but also optimizing node performance.
Here are three key strategies to maximize your efficiency:
- Batch Install Packages: Instead of installing packages one by one, you can install multiple packages in a single command. For instance, use ‘npm install package1 package2 package3’ to save time and reduce redundancy.
- Utilize ‘package.json’: Initialize a project with ‘npm init’. This will create a ‘package.json’ file, allowing you to list all dependencies in one place. You can then run ‘npm install’ to install everything at once. Additionally, this file serves as a reference for managing your project’s Node.js packages.
- Keep Packages Updated: Regularly verify and update your packages to avoid dependency issues. Use ‘npm outdated’ to check for updates and ‘npm update’ to apply them swiftly.
Upgrading Existing Packages
While managing your Node.js environment on a Raspberry Pi, staying on top of package upgrades is essential for maintaining performance and security. You can start by updating your package list with ‘sudo apt update’, guaranteeing you have access to the latest Node.js and npm versions. This step is critical for effective package management. Additionally, keeping your system up-to-date helps to ensure overall system stability. Ensuring energy efficiency, such as using low TDP processors, can also contribute to the overall longevity of your setup.
Next, run ‘sudo apt full-upgrade’ to upgrade all installed packages to their latest versions. This command not only upgrades your software but also removes obsolete packages, which can help in maintaining system stability. Be mindful of dependencies during this process to avoid any conflicts. It’s also important to consider the impact of RAM capacity on your system’s performance.
If you find yourself with an old version of Node.js, remove it using ‘sudo apt remove nodejs’, confirming the action when prompted. Following this, reinstall the latest version of Node.js with ‘sudo apt install nodejs’. This guarantees you have a clean installation and a stable environment.
Finally, validate your setup by checking the versions with ‘node -v’ and ‘npm -v’. Regular upgrades not only enhance performance but also fortify security, making your Node.js setup on the Raspberry Pi resilient and efficient.
Managing Dependencies Effectively
Effective management of dependencies is essential for maintaining the integrity and functionality of your Node.js projects on the Raspberry Pi. By utilizing npm, you can guarantee that your project’s dependencies are well-organized and easily accessible.
Here’s how to streamline your dependency management:
- Install Dependencies: Use ‘npm install’ to automatically download and install everything listed in your ‘package.json’. For specific packages, simply run ‘npm install
‘. This method updates ‘package.json’, keeping your project metadata up to date. Additionally, the npm registry offers a vast array of packages, ensuring you have access to the latest libraries and tools. npm serves as a critical tool for managing JavaScript packages, streamlining the development process. - Utilize Package Versioning: To avoid breaking changes, specify version numbers when installing dependencies. This precision helps in maintaining compatibility as your project evolves.
- Leverage Scripts: The ‘scripts’ section in ‘package.json’ allows you to define reusable command line tasks. Run these tasks with ‘npm run
‘ to execute predefined actions, enhancing productivity and project structure.
Install Additional Tools

To successfully set up Node.js on your Raspberry Pi, you’ll need to install several essential tools that facilitate package management and secure connectivity. Begin by updating your package list with ‘sudo apt update’ to guarantee you have the latest information on available packages. Following that, execute ‘sudo apt upgrade’ to improve your system’s stability by upgrading currently installed packages.
Next, install important tools and certificates by running ‘sudo apt install -y ca-certificates curl gnupg’. This step is critical for accessing and verifying repositories securely. To add the NodeSource GPG key for package signing, use the command ‘curl -fsSL https://deb.nodesource.com/gpgkey/nodesource-repo.gpg.key | sudo gpg –dearmor -o /usr/share/keyrings/nodesource.gpg’.
Once you’ve secured your environment, install additional development tools, specifically ‘build-essential’, using ‘sudo apt install build-essential‘. These tools are necessary for handling compilation issues that may arise during development. Remember, NPM installs concurrently with Node.js, but it’s wise to verify its presence with ‘npm -v’. With these installations complete, you’re set for configuring your Node.js application effectively.
Configure Your Node.js App

When you set up your Node.js application, establishing a well-organized project structure is essential for effective development. A well-defined structure not only enhances maintainability but also simplifies collaboration.
Here are three key steps to take into account:
- Initialize Your Project: Create a new directory for your project using the ‘mkdir’ command, then change into that directory with ‘cd’. Initialize your project using ‘npm init’, which creates a ‘package.json’ file vital for package management.
- Organize Your Files: Create subdirectories for routes, models, and controllers as necessary. This type of organization keeps your project structure clear and manageable, making it easier to navigate.
- Install Necessary Packages: Install required packages like Express.js for web server functionality using ‘npm install express’, and other dependencies listed in your ‘package.json’.
Regularly update them with ‘npm update’ to keep your project up-to-date.
Run Your Application
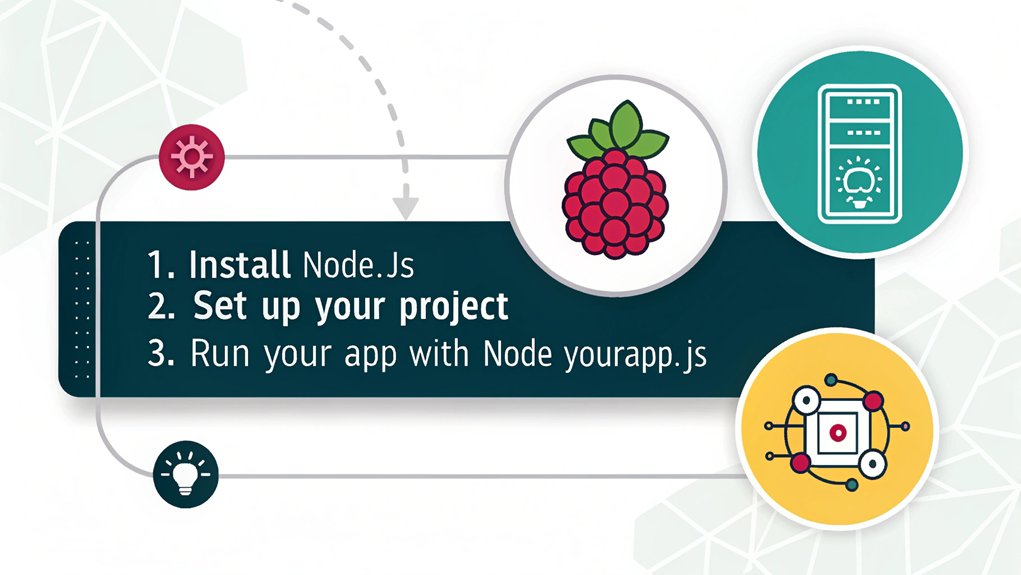
Run your Node.js application by traversing to the project directory and executing the command ‘node your-app.js’, replacing “your-app.js” with the entry point of your application. This straightforward command initiates your Node.js environment.
To guarantee your application runs efficiently, focus on key aspects such as application performance, robust error handling, and application testing. By thoroughly testing your app before deploying, you can detect potential issues early and enhance user experience. Ensuring optimal performance is crucial, similar to how high-performance CPUs in advanced systems like the GMKTEC M2 Mini PC enhance overall computing efficiency.
Ensure that your Raspberry Pi device is properly set up with an appropriate operating system using tools like Raspberry Pi Imager to ensure compatibility and optimal performance.
Consider implementing the following strategies for effective resource monitoring and error management:
| Strategy | Purpose | Command/Tool |
|---|---|---|
| Monitor Memory Usage | Prevent unnecessary resource drain | ‘top’ or ‘htop’ |
| Log Errors | Capture application errors | Use logging libraries like Winston |
| Run Tests | Validate application integrity | ‘npm test’ |
| Optimize Performance | Enhance responsiveness | Use profiling tools (like Node Inspector) |
These steps facilitate real-time insights into your Node.js application’s health, promoting a smoother operational flow. By seriously addressing application performance and error handling, you position your app for success in any environment.
Frequently Asked Questions
Which Raspberry Pi Models Are Best for Running Node.Js?
For best Node.js performance, you’d want to use a Raspberry Pi 4, thanks to its ARMv8 architecture. Avoid the Raspberry Pi Zero, as its ARMv6 architecture won’t support the latest Node.js versions effectively.
How Do I Enable SSH on My Raspberry Pi?
To enable SSH on your Raspberry Pi, access the Raspberry Pi Configuration or use the terminal with ‘sudo raspi-config’. Toggle SSH on or select it from the menu, ensuring you’ve configured for remote access effectively.
Can I Run Node.Js Applications Without Wi-Fi?
Imagine developing locally on your Raspberry Pi, effortlessly running Node.js applications without Wi-Fi. By leveraging offline capabilities, you can package your app and dependencies, ensuring seamless performance even in isolated environments—perfect for innovative projects!
Is Node.Js Suitable for Iot Projects on Raspberry Pi?
Absolutely, Node.js is ideal for IoT projects on Raspberry Pi due to its quick execution, excellent IoT device compatibility, and extensive module ecosystem. Its event-driven architecture enhances scalability, making it a powerful choice for innovative applications.
How Do I Troubleshoot Node.Js Installation Errors?
To troubleshoot Node.js installation issues, analyze logs for errors, resolve dependency conflicts by verifying version compatibility, and guarantee your system is updated. Regular checks can prevent future installation hurdles and enhance project efficiency.
Conclusion
So, you’ve maneuvered through the maze of Raspberry Pi and Node.js like a tech-savvy Indiana Jones. With your updated system and neatly installed packages, you’ve constructed a digital fortress ready to host your Node.js applications. Just remember, should you accidentally invoke the “Error of Eternal Debugging,” you can always retreat to the comforting embrace of your Raspberry Pi’s command line. Now, go forth and conquer the digital world, one npm package at a time, while avoiding the lurking specter of outdated dependencies!

I am a retired software engineer with experience in a multitude of areas including managing AWS and VMWare development environments. I bought a relative a mini-PC a year ago and have become passionate about the technology and its potential to change how we deploy software.