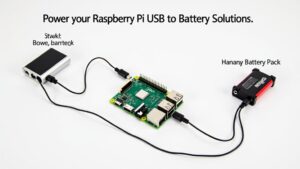
How Can I Power A Raspberry Pi?
You can power your Raspberry Pi using several options, including USB-C, Micro-USB, and battery power. The USB-C port is perfect for newer models, providing up to 25.5W. Conversely, Micro-USB ports require stable 5.1V supplies to guarantee performance. For portable use, connect 18650 lithium batteries via a DC/DC converter to step up to 5V. Consider Power Over Ethernet (PoE) if you want a cleaner setup, combining power and data through a single cable. Keep voltage consistent, and always choose quality power supplies to avoid performance issues. Discover the nuances of each method to maximize your Raspberry Pi’s potential.
Key Takeaways
- Use a reliable USB-C power supply for Raspberry Pi 4 and 5, delivering stable 5.1V at 3A and 5A respectively.
- Micro-USB power supplies for Raspberry Pi 1, 2, and 3 require 5.1V with at least 2.5A output for optimal performance.
- Power over Ethernet (PoE) simplifies powering Raspberry Pi 4 and 3 models using a single cable with appropriate equipment.
- Consider using 18650 lithium batteries with a DC/DC converter to provide stable 5V output for portable projects.
- Connect a regulated 5V supply to GPIO pins for versatile powering options, ensuring correct voltage to avoid damage.
Powering via USB-C Port
Power your Raspberry Pi effortlessly via the USB-C port, a popular and efficient method for guaranteeing your device runs smoothly.
One of the standout USB C advantages is its ability to deliver up to 25.5 W of power, fully supporting both the Raspberry Pi 5 and Raspberry Pi 4. With an average active efficiency of 89% for the 27W supply, you’ll experience minimal energy loss, translating into longer device life and reduced electricity bills. Additionally, the input voltage range of 100 – 240 v.a.c allows for versatile usage across different regions. Moreover, using the official USB-C power supply is recommended to ensure stability and optimal performance.
Compatibility issues are largely minimized, as USB-C is becoming the standard for many devices. This versatility allows you to use a single power supply for various PD-compatible devices, making your setup more streamlined.
You’ll appreciate the added flexibility in working with high-power peripherals, like SSDs or hard drives, essential for computation-heavy projects.
With options for multiple plug types across geographical locations, you can quickly adapt your power solution based on where you are. A well-ventilated environment guarantees safety, thanks to built-in protection features against short circuits and overheating.
Consequently, investing in a USB-C power solution offers an innovative step towards powering projects efficiently and effectively.
Powering via Micro-USB Port

When you power your Raspberry Pi through the micro-USB port, it’s essential to adhere to the recommended power specifications for peak performance. Using inconsistent chargers, like those meant for mobile devices, can lead to instability and performance issues due to fluctuating voltage. To maintain a reliable connection, always choose a power supply dedicated to your specific Raspberry Pi model and verify it meets the necessary output requirements. The official power supply for Raspberry Pi devices has a power output of 12.5W, ensuring optimal performance. Additionally, using a 5.1V supply is crucial for the Raspberry Pi models to function correctly without any interruptions.
Recommended Power Specifications
To guarantee your Raspberry Pi runs smoothly, using the correct power specifications is essential. Each model has unique requirements; however, all versions demand a voltage of 5.1V. For optimum power supply efficiency, verify that your supply can deliver the necessary current—ranging from 700mA for the Pi 1 A/A+ to 2A for the Zero 2 W. It is crucial to note that newer models like the Pi 3 require a 2.5A micro USB supply, which guarantees not only performance but also voltage stability during operation. Additionally, using the official PSU is recommended to ensure stable power delivery.
Select cables that are at least 1.5m long and rated at 18 AWG to minimize voltage drop, particularly important for those longer runs. Additionally, invest in a power supply that provides robust safety features such as short circuit and overcurrent protection. This not only protects your hardware but also enhances overall system stability.
When choosing a power supply, aim for a minimum efficiency rating of 80.73%. This guarantees that more of the power drawn from your outlet is effectively utilized, leading to a more reliable experience with your Raspberry Pi.
Following these specifications will help you maintain performance levels and extend the lifespan of your device.
Avoiding Inconsistent Chargers
Using a reliable charger is essential for maintaining the performance and longevity of your Raspberry Pi. Inconsistent chargers can severely impact your device, leading to voltage fluctuations that may cause instability or even damage.
Verify that your charger is compatible with your specific Raspberry Pi model; for instance, the Raspberry Pi 4 requires up to 3A at a steady 5V, while other models have different current needs. It’s important to ensure that your charger provides a minimum power requirement of 0.7A to guarantee stable operation. Additionally, remember that test pads PP2 can be utilized for direct power connections if you encounter issues with the micro-USB port. Ensuring proper system updates can also help in maintaining stability, as regular updates often include fixes for hardware compatibility issues such as Bluetooth connectivity.
Opt for official power supplies designed with voltage regulation and current specifications in mind. Avoid low-quality or mobile phone chargers, as they often lack the necessary circuitry to regulate power effectively. These inadequate chargers risk current overload or insufficient supply, resulting in unstable operation.
Also, steer clear of mixing power sources, like using battery and USB simultaneously, to prevent uncontrolled charging, which can harm both your Raspberry Pi and the power supply.
Always check the specifications of any charger you plan to use, verifying that it adheres to the required standards. Quality cables are equally important; they help maintain proper polarity and current rating, safeguarding your project from potential power-related failures.
Stability and Performance Issues
To power your Raspberry Pi via the Micro-USB port can introduce unique stability and performance challenges. The most critical factor here is voltage regulation; the Raspberry Pi 3 and Zero 2 require a stable 5V with a current capacity of 2.5A. If your power supply fails to provide this, you could experience frustrating crashes or performance hiccups. Cheap chargers often don’t deliver adequate current stability, exacerbating these issues. To mitigate risks, always opt for an official power supply designed for your model. Shorter, high-quality Micro-USB cables with at least 22AWG wires guarantee minimal voltage drop. Additionally, ensure that your power source meets the recommended power supply ratings for optimum device functionality.
Even the best setups can falter under load if you connect multiple peripherals that demand more power; make certain your power supply can handle the total draw. Consider the impact of using USB hubs—many don’t support the Raspberry Pi’s requirements and lack overcurrent protection. Regularly monitoring your voltage and current can save you from unexpected shutdowns and potential damage to GPIO pins. Furthermore, using a regulated power supply is advisable to avoid common issues related to voltage fluctuations.
Powering via GPIO Pins
When you consider using GPIO pins to power your Raspberry Pi, it’s important to assess the inherent risks involved. Incorrect connections can lead to permanent damage, so understanding proper setup instructions is vital. A steady 5.1V power supply is recommended to avoid potential issues during operation. Additionally, this method allows for alternative power sources when micro USB is not practical for your project.
Risks of GPIO Powering
Raspberry Pi enthusiasts often overlook the risks associated with powering through GPIO pins, which can lead to serious consequences. The absence of voltage regulation and protective fuses makes GPIO powering particularly hazardous. Applying more than 5V can result in irreversible damage, with the potential to “fry” your board. Additionally, when you power your Raspberry Pi 4 through GPIO header pins 2 and 4 introduces complexities as both pins must be used carefully to avoid issues on the board.
| Risk Type | Consequences |
|---|---|
| Incorrect Voltage | Permanent damage to the Raspberry Pi |
| Current Spikes | Burnt GPIO pins or complete failure |
| Inconsistent Power Supply | System instability and data corruption |
Using unregulated power sources increases the risk of current spikes, which can severely harm the GPIO pins. Remember, the GPIO pins handle low voltages, so they’re not immune to electrical mishaps. Frequent power failures can lead to accidental shorting or unstable supplies that may cause malfunctions. Efficient GPIO pin handling and ensuring power supply reliability are essential to mitigate these risks.
Integrate GPIO safety precautions into your setup practices. Always test the power source for stability before connecting via GPIO. When you’re aiming for innovation, don’t let overlooked risks undermine your projects. Prioritize voltage regulation importance and current spike prevention in your Raspberry Pi endeavors.
Connections and Setup Instructions
Guaranteeing a reliable connection is vital for you to effectively power your Raspberry Pi through GPIO pins. Start by identifying GPIO pin configuration: connect your 5V power supply to pins 2 or 4, while grounding it to pin 6 or any of the additional ground pins available, like pins 9 or 14. Using both 5V pins can greatly enhance voltage drop prevention, particularly if your wiring is long or thin.
To maintain ideal performance, a well-regulated 5V power supply is critical. Aim for an input voltage within 5V ±5%, ideally using a 3A supply for the Raspberry Pi 4. This helps in guaranteeing your device runs smoothly, without sudden shutdowns or performance issues. Additionally, ensure that the current limitations of the GPIO pins are observed to prevent power instability.
When setting up, utilize thicker wires to minimize resistance and guarantee stable connections. With pins 2 and 4 directly linked to the USB-C power jack, there’s no need to cut any traces or connections.
Powering your Raspberry Pi via GPIO fundamentally replicates USB-C powering, providing the flexibility you need for innovative projects. Keep these guidelines in mind, and you’ll have a secure, efficient power setup for your Raspberry Pi.
Power Over Ethernet (Poe)
Power Over Ethernet (PoE) offers an elegant solution for one to power your Raspberry Pi, streamlining both power and data transmission through a single cable.
Compatible with the Raspberry Pi 4 Model B and Raspberry Pi 3 Model B+, implementing PoE requires a PoE HAT and a suitable power-sourcing equipment that adheres to the 802.3af standard. This approach not only simplifies your setup by eliminating the clutter of multiple cables, but it also saves on installation costs. Additionally, using a PoE HAT enables power delivery to the Raspberry Pi without any modifications required on the main board. PoE technology supports multiple standards, ensuring you can utilize PoE-compatible devices effectively.
While PoE advantages are clear, such as ease of installation and safety through automatic power cutoff during outages, there are PoE limitations to evaluate.
Power delivery is capped at 30W, and if you need more, you’ll require newer standards like PoE++. Additionally, the reach is limited to 100 meters unless you use extenders, which can complicate your network layout.
Security can also be a concern; without proper safeguards, your network could be vulnerable. Ultimately, weighing these factors will help you determine if PoE is the right choice for your innovative Raspberry Pi project.
Using Battery Power
How can you effectively use a battery to power your Raspberry Pi in remote settings? First, select a suitable battery, like the popular 18650 lithium battery, which offers high energy density. Since the Raspberry Pi requires a 5V supply, you’ll need a DC/DC converter to step up the typical 3.7V output of your lithium batteries. To maintain battery efficiency, choose a converter with high conversion efficiency; this directly impacts how long your project can run before needing a recharge. Raspberry Pi requires a 5V power source, so it’s crucial to ensure your battery solution meets this specification. Additionally, the Pi-UpTimeUPS Overview ensures uninterrupted power supply to your Raspberry Pi, providing essential features like battery level monitoring and safe shutdown when low.
You should also implement proper voltage regulation to avoid damage from over-voltage. Using over-voltage protection guarantees the Raspberry Pi operates safely within its allowed voltage range of 4.7V to 5.3V.
Additionally, consider using parallel batteries to extend runtime considerably. For example, a 2200 mAh battery could power your Raspberry Pi for about 1 hour and 45 minutes; combining multiple batteries can easily stretch this to several hours.
Finally, don’t overlook the importance of battery management systems, as they prevent overcharging and support safe shut down when power is low.
With the right setup, you’ll harness battery power effectively for your Raspberry Pi projects.
General Power Considerations

A reliable power source is essential for ideal Raspberry Pi performance, especially considering the varying requirements across different models. The need for power efficiency can’t be overstated; each model has unique current ratings, with Raspberry Pi 1 requiring as little as 200mA to Raspberry Pi 5 demanding up to 5A under peak load. To guarantee voltage stability, always use recommended power supplies, as this impacts peripheral compatibility and overall device performance, including the use of the Official Supply to ensure optimal performance.
Heat dissipation becomes a critical factor when managing power, particularly with active tasks that can trigger power spikes. Monitoring power consumption helps avert under-voltage warnings that can lead to erratic behavior.
Consider implementing power management strategies, including power monitoring commands, to oversee USB power output efficiently.
Redundant power systems offer a safety net, guaranteeing continuous operation even if one source fails. Evaluate your applications concerning battery longevity and environmental impact; robust solutions may be necessary in challenging conditions.
Choosing the Right Power Supply
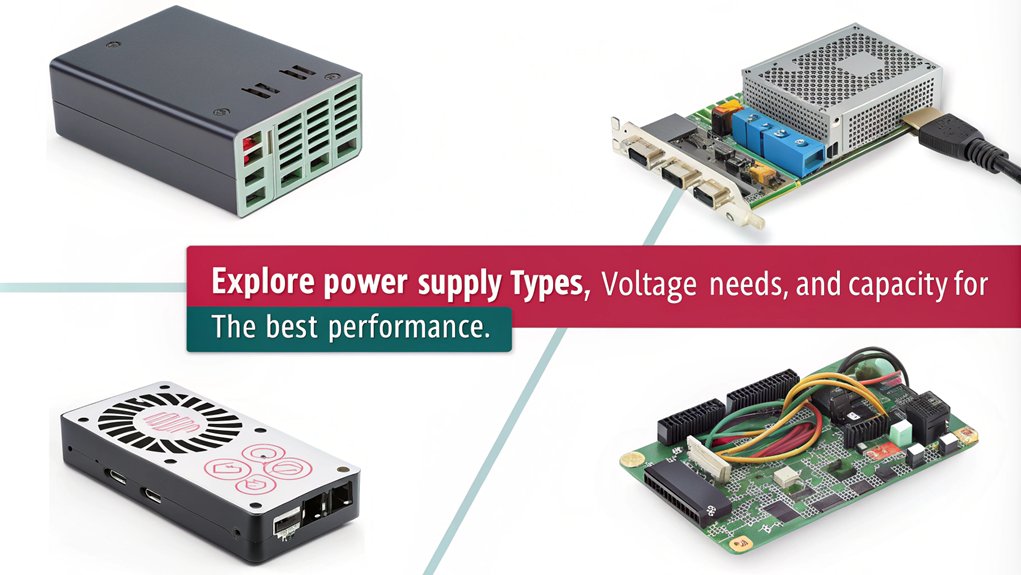
Selecting the right power supply to power your Raspberry Pi can greatly influence its performance and stability. You’ll want to verify power supply compatibility with your specific model.
For example, the Raspberry Pi 1, 2, and 3 require a 2.5A micro USB supply, while the Raspberry Pi 4 and Pi 400 need a 3A USB-C supply. If you’ve upgraded to a Raspberry Pi 5, a robust 27W USB-C power supply delivering 5A is crucial.
Voltage fluctuations can harm Raspberry Pi functionality. Aim for a voltage range between 4.75V and 5.25V, guaranteeing peak performance across the board.
For instance, the Pi 4 operates best at 5.1V with 3.0A, while the Pi 5 also requires 5.1V at 5A, especially with USB PD support.
In addition, while third-party USB-PD multi-port supplies seem convenient, they might lead to performance issues due to renegotiation when multiple devices are connected.
For ultimate flexibility, you can also power your Raspberry Pi using GPIO pins, but make sure you have a stable 5V supply for consistent operation.
Frequently Asked Questions
Can I Use a Phone Charger for My Raspberry Pi?
Are you really willing to risk your Raspberry Pi’s performance? Phone charger compatibility often falls short on power output specifications. Instead, use reliable power supplies designed specifically for your model to guarantee smooth operation and reliability.
What Happens if I Underpower My Raspberry Pi?
If you underpower your Raspberry Pi, it can experience voltage drops, causing performance throttling and unstable operations. Insufficient power supply directly impacts its power consumption, leading to crashes during demanding tasks or system updates.
How Do I Prevent Power Surges to My Raspberry Pi?
Imagine a lightning storm hitting your home, causing a power surge. You can prevent this by using surge protectors and voltage regulators, ensuring your Raspberry Pi remains safe and continuous, even amidst unpredictable power fluctuations.
Can I Power Multiple Raspberry Pis From One Supply?
You can effectively power multiple Raspberry Pis from a single supply using Raspberry Pi power sharing techniques. Confirm your setup accommodates the total power requirements and maintains the necessary current distribution for peak performance across your devices.
What Are the Signs of Unstable Power Supply?
You’ll notice unstable power supply through power indicators like erratic LED patterns, voltage fluctuations, and inadequate current draw. These symptoms highlight issues with power stability, potentially affecting your device’s reliability and performance efficiency.
Conclusion
In the world of Raspberry Pi, powering your device is akin to choosing the lifeblood that fuels your creative ambitions. Whether you opt for USB-C, Micro-USB, GPIO pins, Power over Ethernet, or a portable battery, each method has its own strengths, tailored for various projects. Always consider your power needs carefully—like a sculptor selecting the right chisel to breathe life into marble. By choosing wisely, you set the stage for innovation and realize the full potential of your Raspberry Pi adventures.

I am a retired software engineer with experience in a multitude of areas including managing AWS and VMWare development environments. I bought a relative a mini-PC a year ago and have become passionate about the technology and its potential to change how we deploy software.

