
Did you know over 70% of industrial IoT projects now use LoRaWAN for long-range connectivity? If you’re aiming to deploy a Raspberry Pi as a LoRaWAN gateway, you’ll work hands-on with GPIO wiring, RF concentrators, and tailored software installations. It’s not just about plugging parts together—configuring the data flow and security settings can make or break your deployment’s reliability and scalability. Let’s look at what truly matters when setting up your gateway.
What is LoRaWAN and Why Use it for IoT?
LoRaWAN (Long Range Wide Area Network) is a wireless protocol designed for low-power, long-range IoT applications. It enables devices to communicate over several kilometers while consuming minimal power, making it ideal for applications like smart agriculture, environmental monitoring, and industrial IoT. With its low operating cost, scalability, and robust security, LoRaWAN has become the backbone of many modern IoT deployments.
Key Takeaways
- Pair a Raspberry Pi (Model 2 or newer) with a compatible LoRaWAN concentrator shield for reliable gateway hardware.
- Flash Raspberry Pi OS or ChirpStack Gateway OS to the SD card for optimized LoRaWAN gateway operations.
- Register the gateway with a network server (e.g., ChirpStack, The Things Network) using correct regional frequency plan and EUI.
- Ensure robust network connectivity via Ethernet, Wi-Fi, or cellular and securely enclose hardware for outdoor protection.
- Monitor gateway performance, perform log-based troubleshooting, and apply firmware updates for stable LoRaWAN operation.
Required Hardware Components for LoRaWAN Gateways
Using a Raspberry Pi as a LoRaWAN gateway starts with carefully selecting key hardware components that meet your deployment requirements.
Focus first on the RF concentrator specifications—ensure your concentrator supports simultaneous multichannel reception, operates within your regional band (EU868, US915, etc.), and achieves sensitivity near -139 dBm for long-range, low-power communication.
Prioritize an RF concentrator with multichannel support, regional band compatibility, and ultra-high sensitivity for optimal LoRaWAN gateway performance.
Pair it with a robust gateway host, like a Raspberry Pi, that reliably manages processing, packet forwarding, and seamless integration with network servers. The RF Front-End is critical in this architecture, as it manages the reception and transmission of radio signals across a wide frequency range and directly impacts the gateway’s communication performance.
Choosing the Right Raspberry Pi for Your LoRaWAN Gateway
Not all Raspberry Pi models are equally suited for LoRaWAN gateway deployment. Here’s a breakdown of the most common options and their trade-offs:
Raspberry Pi 2 Model B:
- Pros: Lowest cost, sufficient for basic gateway tasks.
- Cons: Limited RAM (1GB), slower CPU, only 100Mbps Ethernet, no built-in Wi-Fi.
- Best for: Indoor, low-traffic gateways, or proof-of-concept deployments.
Raspberry Pi 3 Model B/B+
- Pros: Improved CPU, built-in Wi-Fi and Bluetooth, 1GB RAM, better USB/Ethernet performance.
- Cons: Still limited RAM, older Wi-Fi standard (2.4GHz only on Pi 3B).
- Best for: Home or small business gateways, moderate device counts, or where Wi-Fi-only backhaul is acceptable.
Raspberry Pi 4 Model B
- Pros: Much faster CPU, up to 8GB RAM, Gigabit Ethernet, dual-band Wi-Fi, USB 3.0, better thermal management.
- Cons: Higher power consumption, slightly higher cost.
- Best for: High-traffic gateways, edge computing with local data processing, or future-proofing for demanding applications.
Raspberry Pi Zero 2 W
- Pros: Ultra-low cost, compact size, low power draw, built-in Wi-Fi.
- Cons: Limited CPU/RAM, only one USB port, not all concentrator hats are compatible, not recommended for high-traffic or multi-channel gateways.
- Best for: Experimental, ultra-low-cost, or space-constrained deployments.
| Model | Performance | Connectivity | Power Draw | Cost | Use Case |
|---|---|---|---|---|---|
| Pi 2 B | Low | Ethernet only | Low | $ | Basic/indoor gateway |
| Pi 3 B/B+ | Medium | Wi-Fi/Ethernet | Medium | $$ | Home/small business |
| Pi 4 B | High | Gigabit Eth/Wi-Fi | Higher | $$$ | High-traffic/edge compute |
| Pi Zero 2 W | Low | Wi-Fi only | Very Low | $ | Experimental/portable |
For most users, the Raspberry Pi 3B+ or 4B offers the best balance of performance, connectivity, and community support. If you expect to handle a large number of devices or want future-proofing, go with the Pi 4B.
What’s Next to Implement a Raspberry Pi as a LoRaWAN Gateway?
Assess network interface modules, choosing Ethernet, Wi-Fi, or cellular based on your location and backhaul needs.
Prioritize gateway power efficiency by selecting low-consumption components, ideally with PoE or solar compatibility.
Finally, use purpose-built enclosures, weatherproof for outdoor deployments, to guarantee environmental protection and maintain peak RF performance throughout your solution’s lifecycle.
Assembling and Wiring the Gateway
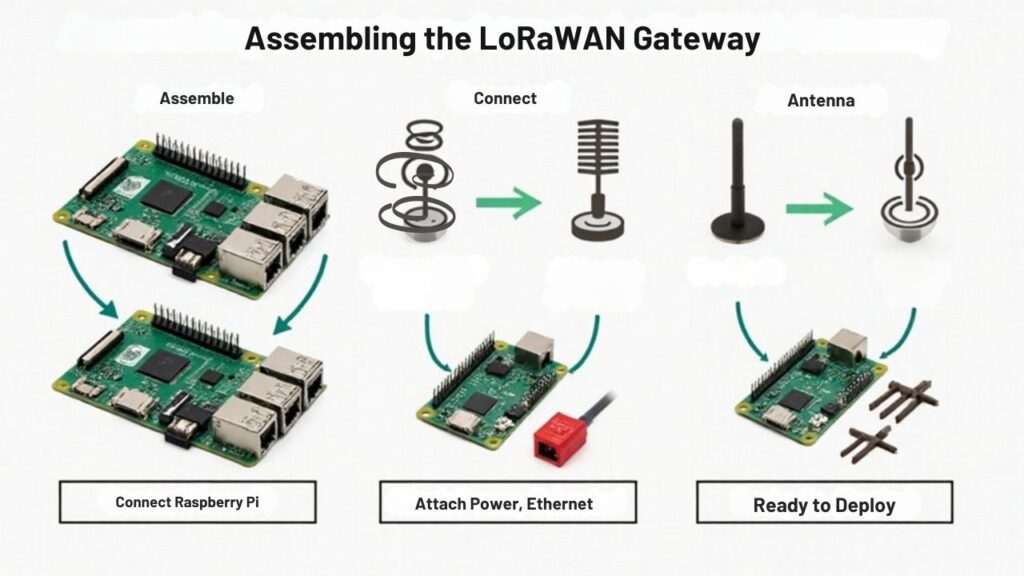
After selecting your hardware components, it’s time to assemble and wire the gateway for reliable field operation. Start by attaching the 40-pin terminal to the LoRaWAN board and screw the plastic spacers into the Raspberry Pi for structural stability—these assembling techniques prevent board flexing and accidental shorts.
When preparing your gateway, it is important to use a plastic antenna spacer to avoid electrical interference and to keep mounting secure.
It’s essential to ensure that you have chosen a Raspberry Pi Model 2 or newer, as Raspberry Pi Model 2 or newer is mandatory for proper compatibility with most LoRaWAN concentrator boards.
Mount the LoRaWAN module onto the Raspberry Pi’s GPIO pins and secure it with screws. For wiring safety, verify the power is off throughout the process. Connect the 5V, GND, and SPI lines (MOSI, MISO, SCK, NSS) precisely; use jumpers for RESET and control signals if needed.
Always connect a compatible antenna before powering up using a stable 2.5A supply. Double-check all connections, test basic functionality, and document your assembly before field deployment.
Installing and Configuring Gateway Software
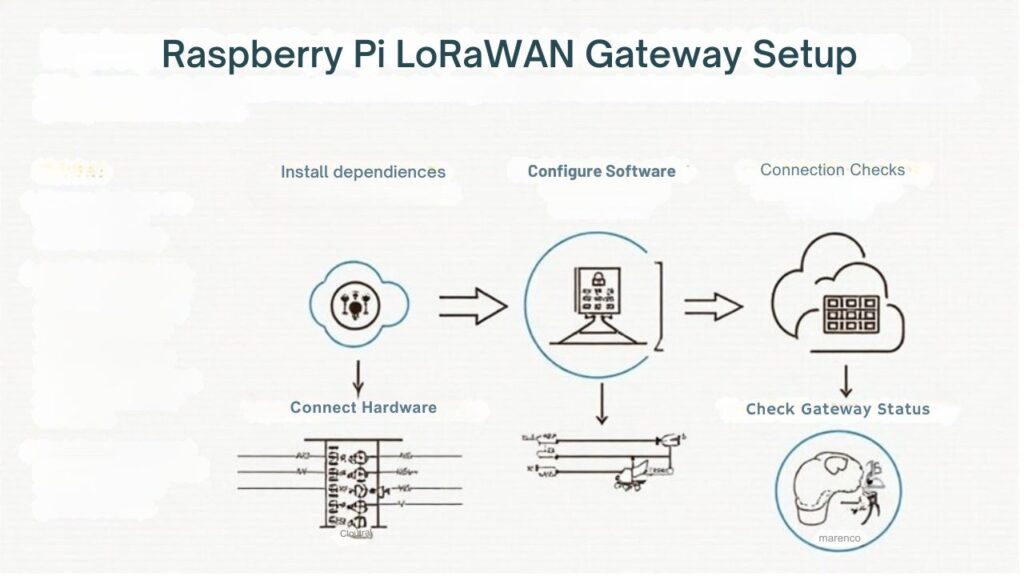
Even with robust hardware in place, your Raspberry Pi gateway won’t function until you’ve installed and properly configured the software stack. Incorporating bias-free language practices in your documentation and configuration notes supports an inclusive and accessible LoRaWAN deployment. Begin by flashing the microSD card with the latest Raspbian image—Ubuntu’s `dd` utility simplifies this task. Connect via SSH to set up Wi-Fi and Ethernet, prioritizing reliable internet to keep gateway performance high through ongoing software updates. For optimal reliability, make sure that antennas are securely fastened before proceeding with any further software configuration.
Harness configuration tools like `sudo gateway-config` for seamless setup, supporting protocols such as Basic Station and multi-server environments (TTN, AWS IoT Core).
For best results, verify you:
- Register your gateway EUI with your chosen LoRaWAN network.
- Select the correct regional frequency plan.
- Test uplink and downlink with real nodes.
- Monitor logs and network interfaces to troubleshoot connectivity swiftly.
Routine enhancement keeps your deployment innovative and resilient.
Operating System and Network Server Options
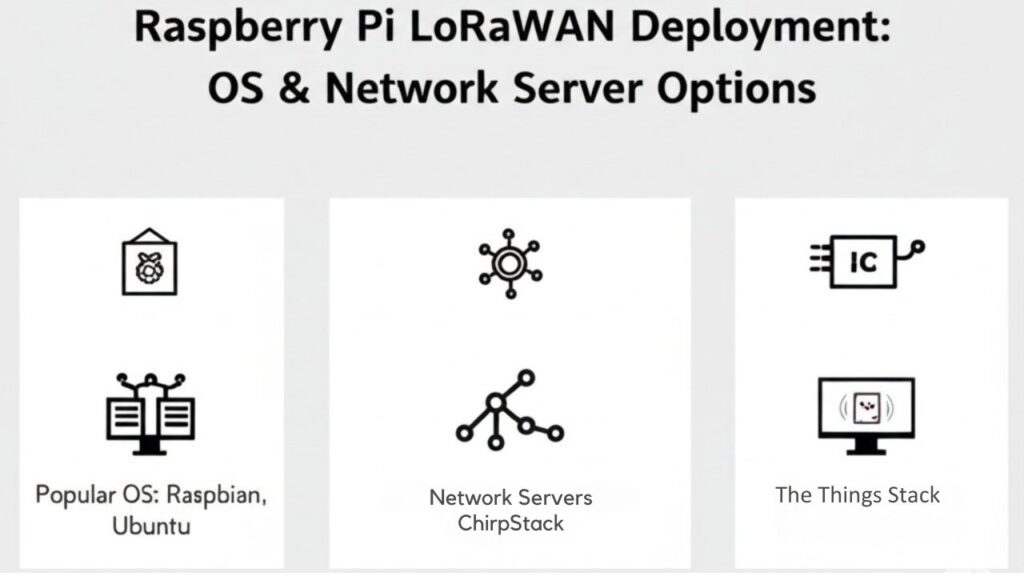
When choosing your operating system and network server, you can opt for ChirpStack OS variants for a turnkey gateway environment or use The Things Network to quickly connect to a global LoRaWAN infrastructure. On standard Linux-based systems, strict timing requirements for LoRaWAN may cause unreliable communication with some radio modules. If you need maximum flexibility, customize your stack with Raspberry Pi OS and run your preferred network server software. The ChirpStack Gateway OS is available in two flavors, Base and Full, allowing you to tailor your setup to your specific LoRaWAN requirements. Your selection depends on your project’s integration needs, desired control, and hardware resources.
Comparing ChirpStack OS Variants
While deploying a Raspberry Pi as a LoRaWAN gateway, you’ll find that choosing the right ChirpStack OS variant is essential for a smooth setup and long-term flexibility.
ChirpStack variants, including the base and full images, differ considerably in feature sets and expansion capabilities. ChirpStack supports both LoRaWAN 1.0 and 1.1 versions out of the box, ensuring compatibility with a wide range of LoRaWAN devices and requirements. For a direct image comparison:
- Base Image: Minimalist, optimized for streamlined gateways—ideal when low storage and rapid setup trump extras.
- Full Image: Includes Node-RED and other advanced applications, supporting rich data flows and automation.
- Feature Differences: Evaluate performance benchmarks and user experiences; the full image suits complex deployments, while the base variant is efficient for simple setups.
A key integration advantage is that both variants include a web interface for configuration, enabling straightforward management of gateway components and system settings. - Configuration Choices: Both variants offer intuitive web interfaces, but full images enhance deployment preferences with broader customization options.
Select based on target performance, project growth, and integration needs.
Using The Things Network
Although your Raspberry Pi serves as the hardware foundation, deploying it as a LoRaWAN gateway with The Things Network requires you to make informed decisions about both the operating system and network server options.
In addition to these choices, it’s essential to understand that The Things Stack combines Network Server and Application Server functions, enabling comprehensive device management within a single platform.
You’ll choose between cloud-based The Things Stack Cloud for commercial deployments and the free Sandbox for experimentation, each supporting LoRaWAN protocols and security standards.
If you prioritize control, on-premises deployment lets you manage your own infrastructure, while public network integration leverages Community engagement and broad coverage.
Hybrid models enhance flexibility, combining local resources and cloud scalability.
The Things Stack offers integrated device provisioning, secure connectivity, and efficient management for thousands of devices.
For additional support, The Things Network ecosystem provides comprehensive resources for hardware selection, helping you choose compatible devices and valuable contacts to source your IoT hardware.
Tap into Community resources for troubleshooting, certifications, and innovative collaborations—maximizing your gateway’s value and fostering your expertise in scalable IoT solutions.
Customizing With Raspberry Pi OS
To maximize your Raspberry Pi‘s potential as a LoRaWAN gateway, start by selecting an operating system like Raspbian OS, which offers robust stability and broad community support.
Before deploying, it’s important to understand that LoRaWAN coverage depends not only on gateway configuration but also on your physical proximity to other gateways or network infrastructure in the area. As part of company vision, RAKwireless prioritizes the development of user-friendly systems that simplify every stage of the IoT deployment process.
With Raspberry Pi customization in mind, install the OS using Raspberry Pi Imager on a MicroSD card (minimum 4GB). Guarantee LoRaWAN compatibility with hardware like a Model 2 or newer, iC880A concentrator, and a 2.5A power supply.
Integrate appropriate libraries for your board and select a network server, such as LoRa Basics Station, for flexible management.
- Configure SPI pins (NSS, MOSI, MISO, SCK) correctly between Pi and concentrator for reliable data flow.
- Secure API keys and certificates to maintain robust network security.
- Choose server tools like Chirpstack for advanced network integration.
- Optimize antenna selection for your required frequency band.
Setting Up LoRaWAN Communication on Raspberry Pi
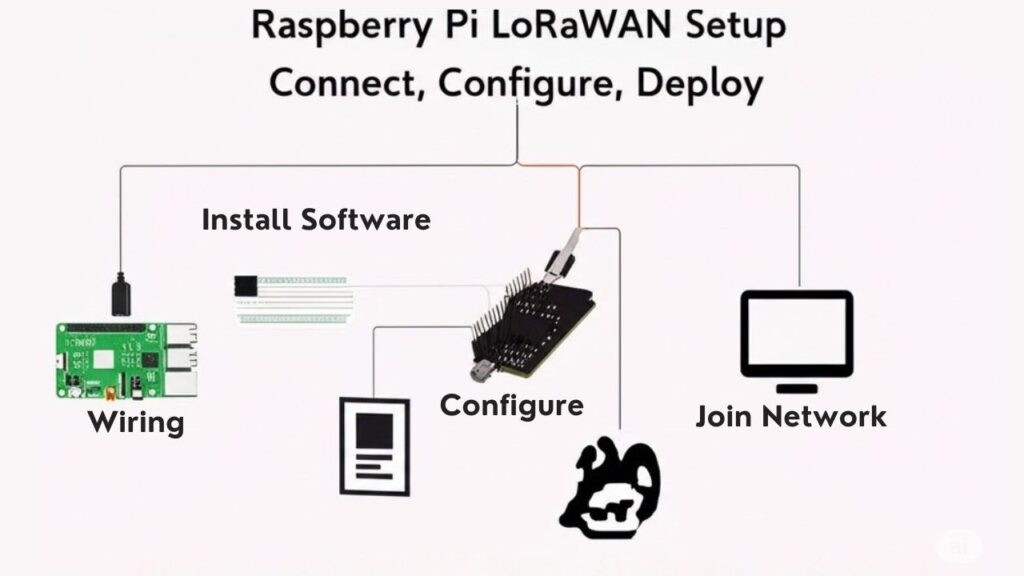
Once you’ve chosen a Raspberry Pi model—such as the Pico or 3B+—you can start establishing LoRaWAN communication by connecting a compatible module like the Semtech SX1276 or SX1278.
Use breakout boards such as the Adafruit RFM95W to interface your module with the Pi’s GPIO and serial pins. Begin by installing essential Raspberry Pi libraries, including `pyLoRa` and `SX127x`, which facilitate integration with LoRaWAN protocols. For robust applications, it’s important to pay attention to data reception and processing to ensure messages are decoded accurately and alarm conditions are handled promptly.
Clone relevant repositories using Git for updated device drivers. You’ll configure parameters like frequency (e.g., 868MHz), bandwidth (125kHz), and power settings directly in your Python scripts. Peer-to-peer communication is also possible on LoRa between Raspberry Pi and other nodes, offering flexible testing before joining a full LoRaWAN network.
Use the TTN (The Things Network) cloud or deploy your own gateway with the cost-effective lora_pkt_fwd package. This approach streamlines scalable deployments, bridging IoT endpoints through robust LoRaWAN connectivity.
Running IoT Applications and Data Transmission
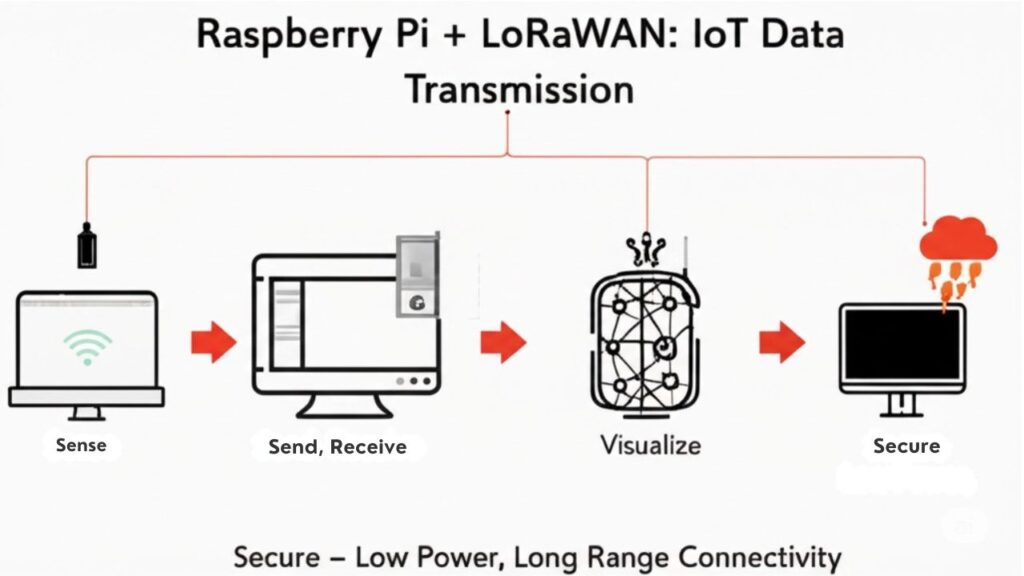
With your Raspberry Pi now communicating over LoRaWAN, you can start building IoT applications that collect sensor data and transmit it efficiently to the cloud.
LoRaWAN protocol prioritizes energy efficiency, allowing devices to run on small batteries for years with minimal maintenance.
Focus on sensor integration—connect digital or analog sensors via GPIO, using proven Python libraries for swift data acquisition. Emphasize compact data encoding to fit LoRaWAN’s small payload constraint and minimize energy usage. Note that LoRaWAN limits both uplink and downlink message frequencies, which is critical to keep in mind when planning your application’s communication strategy.
Python scripts periodically capture sensor values, encode them, and transmit via LoRaWAN uplinks to a cloud platform, like The Things Network, for realtime monitoring or automated control logic.
You’ll achieve ideal IoT deployment by carefully managing:
- Sensor integration: Streamline with GPIO and compatible expansion modules.
- Data encoding: Minimize and serialize payloads.
- Uplink scheduling: Balance interval frequency with battery life.
- Downlink support: Handle remote configuration and actuation.
Monitoring, Logging, and Troubleshooting
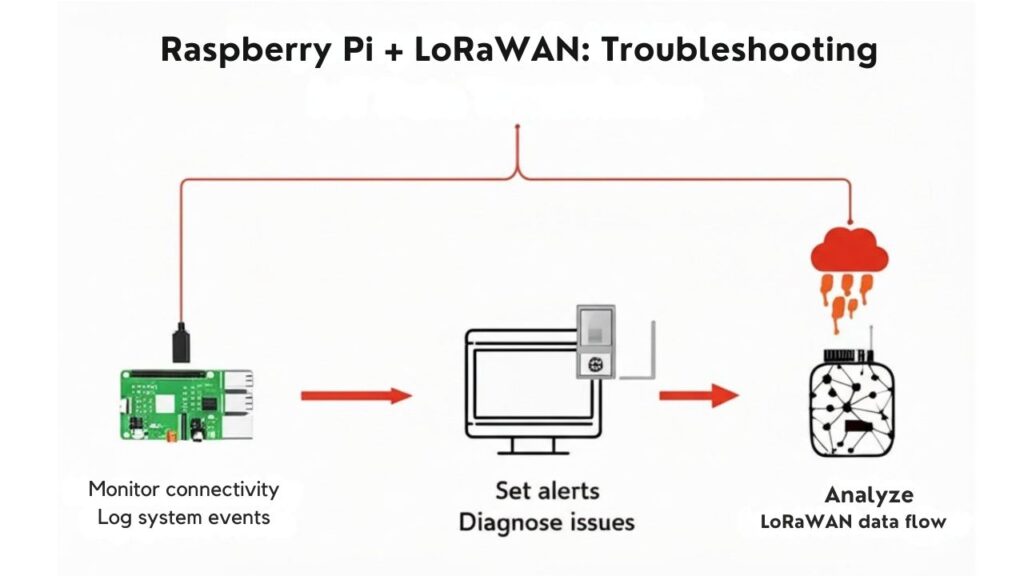
To keep your deployment running smoothly, you’ll need to set up real-time gateway monitoring so you can quickly spot disconnections or low signal strength. This is especially relevant in LoRa deployments, where lower power utilization can sometimes lead to infrequent heartbeat signals or subtle connectivity issues that benefit from vigilant monitoring.
Because compatibility between LoRa module and Raspberry PLC communication boards is essential for hardware stability, always verify that your modules are properly matched and connected before rolling out new nodes.
Adopt structured logging practices, like writing errors and sensor events to persistent storage with timestamps, making it easier to trace issues and audit activity.
When problems crop up—like packet loss, misconfiguration, or hardware failures—use systematic troubleshooting steps and diagnostic tools such as signal analyzers or remote SSH access to pinpoint and resolve faults efficiently.
Real-Time Gateway Monitoring
Effective real-time gateway monitoring forms the foundation of stable LoRaWAN deployments, enabling you to track key metrics such as RSSI, SNR, and gateway latency through platforms like The Things Network or AWS IoT Core for LoRaWAN.
By leveraging these platforms with your Raspberry Pi setup, you can unleash the power of real-time metrics and robust gateway diagnostics. An innovative approach involves integrating tools like Grafana for visual dashboards, which highlight performance fluctuations and operational status.
To optimize monitoring, focus on:
- Analyzing RSSI and SNR trends to proactively address signal issues.
- Monitoring gateway latency to guarantee minimal transmission delays.
- Applying adaptive spreading factor (SF) management to reduce congestion.
- Utilizing cloud-based dashboards for centralized, scalable performance tracking.
With these practices, you’ll secure reliable, high-performance LoRaWAN connectivity.
Diagnostic Logging Practices
Although real-time monitoring highlights gateway status and performance, robust diagnostic logging is what lets you pinpoint and troubleshoot issues within your Raspberry Pi LoRaWAN setup.
Build a logging infrastructure by using systemd-compatible frameworks, storing logs in lightweight databases like SQLite for efficient error handling and timestamped event tracking.
Trigger log entries and health checks—such as CPU temperature sampling—with Python schedulers at five-second intervals to catch anomalies swiftly.
Structure logs with event flags, error codes, and transmission metadata for granular log analysis.
Rotate log files automatically via logrotate to conserve storage.
Extract insights by parsing logs with grep and awk or transforming them to CSV for visual dashboards.
Correlate system, gateway, and error logs to detect and resolve emerging issues, ensuring reliable LoRaWAN deployment.
Handling Common Issues
When deploying a Raspberry Pi on LoRaWAN, you’ll inevitably encounter issues ranging from intermittent sensor data to network instability and hardware faults.
To handle these challenges effectively and maintain node reliability, focus on systematic monitoring, thorough logging, and targeted troubleshooting. Start by monitoring environmental factors like vegetation or weather that cause signal interference. Use detailed logs to track data transmissions, device performance, and security events.
Address frequency overlap and network misconfigurations promptly to minimize disruptions. Optimize hardware and software to guarantee efficient operation.
Here are four essential practices:
- Monitor node health and log all sensor data inconsistencies.
- Use tools to detect and document sources of signal interference.
- Analyze logs for root causes of failed transmissions or node downtime.
- Perform regular software and firmware updates to prevent recurring issues.
Best Practices for Security and Maintenance
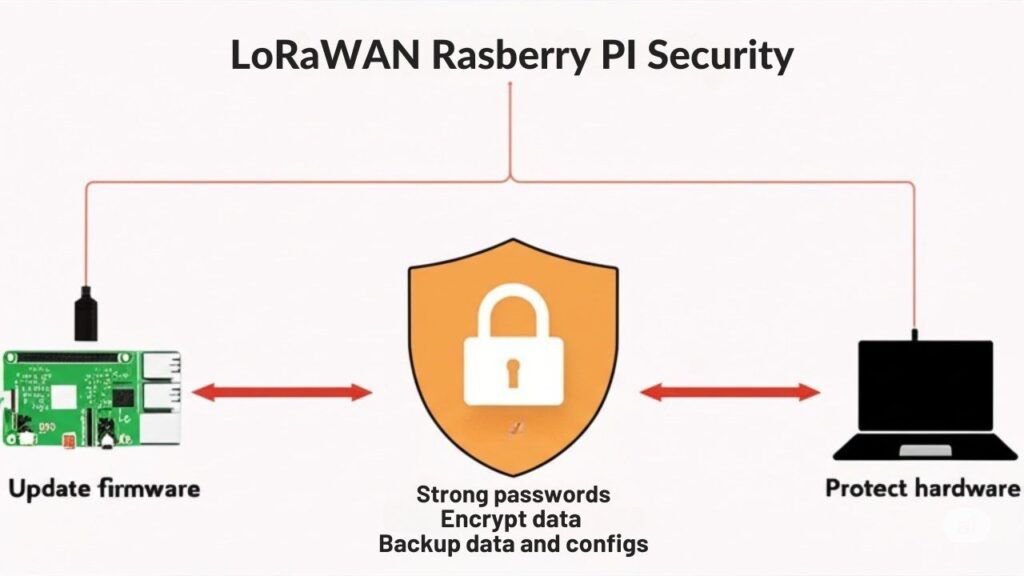
Whether you’re deploying a single Raspberry Pi node or managing a fleet of devices across a LoRaWAN network, robust security and thoughtful maintenance practices are critical to minimize vulnerabilities. Begin by enforcing strong security protocols—enable secure boot, protect SD cards with physical covers, and employ VLANs or firewalls for network isolation. Keep key material secure, use LoRaWAN protocol compliance, and implement end-to-end encryption with AES. For efficient maintenance routines, schedule device health checks and log events, monitor for anomalies, and create regular backups. Use LoRaWAN-certified devices and prefer OTAA for activation. To summarize critical practices and their application:
| Practice | Security Focus | Maintenance Tactic |
|---|---|---|
| Secure Boot | Firmware Integrity | – |
| SD Card Covers | Physical Protection | – |
| VLANs/Firewalls | Network Segmentation | – |
| Updates & Backups | Vulnerability Mitigation | Data Loss Prevention |
| Health Checks & Logging | Anomaly Detection | Operational Assurance |
Frequently Asked Questions
What Is the Typical Range of a Raspberry Pi as a LoRaWAN Gateway?
You’ll typically achieve 1–3km in urban areas and 5–12km in rural environments with a LoRaWAN gateway, depending on LoRaWAN propagation factors and environmental impact like antenna height, building density, and ideal hardware selection.
Can Multiple LoRaWAN Gateways Cover Overlapping Areas Without Interference?
Did you know overlapping gateways can halve packet delivery ratios if unmanaged? You’ll boost reliability by using gateway coordination and interference mitigation. For example, IRONWAN overlays let gateways share resources and route downlinks precisely, minimizing interference in innovation-driven networks.
How Much Power Does a Raspberry Pi as a LoRaWAN Gateway Consume Daily?
You can expect power consumption around 5.5 watts per hour, totaling about 132 watt-hours daily. To boost energy efficiency, choose low-power modules and optimize software—strategies that innovators use to minimize long-term operational costs and environmental impact.
Are There Regulatory Restrictions on LoRaWAN Frequencies in Different Countries?
You’ll juggle a stunning patchwork of frequency allocations, global regulations, and wireless standards—it’s never “one spectrum fits all.” For real innovation, prioritize regional compliance: Europe’s 868 MHz, U.S. 915 MHz, Asia’s varied bands—each mandates exact rules.
What’s the Maximum Number of Nodes a Raspberry Pi as a LoRaWAN Gateway Can Support?
You’ll generally achieve node capacity of 500 to 1000 nodes per gateway for ideal network scalability. For best results, manage payload sizes, adjust data rates, and deploy multiple gateways in dense environments to maintain performance and innovation.
Conclusion
Think of your Raspberry Pi gateway as the beating heart of your IoT ecosystem—it sends life through the veins of LoRaWAN, connecting distant sensors to the cloud. With careful assembly, precise configuration, and vigilant monitoring, you guarantee each heartbeat is strong and secure. Just as a skilled surgeon trusts their instruments, you can rely on proven libraries and routines. So, power up, stay alert, and let your network pulse with reliable, real-world data.

I am a retired software engineer with experience in a multitude of areas including managing AWS and VMWare development environments. I bought a relative a mini-PC a year ago and have become passionate about the technology and its potential to change how we deploy software.