
To enhance your audio experience, consider enhancing your Raspberry Pi audio with external DAC. These devices, like the HiFiBerry or Topping D10S, support high-resolution audio formats up to 24-bit/192 kHz, vastly improving sound quality. Connect via USB for seamless integration or use analog outputs for personal listening. Amplifiers may be needed for larger speakers, while proper configuration guarantees your DAC works efficiently. Utilize the ALSA mixer to fine-tune audio settings, optimizing your overall experience. Choosing the right DAC based on compatibility and desired audio quality is essential for maximizing performance. There’s more to explore to fully optimize your setup.
Key Takeaways
- Upgrade your Raspberry Pi’s audio quality by integrating external DACs like HiFiBerry or Topping D10S for high-resolution sound up to 24-bit/192 kHz.
- Use DAC HATs or combos for easy GPIO attachment, enhancing audio output and simplifying your setup without a lot of additional hardware.
- Ensure proper power supply (5V/3A) to maintain optimal performance and prevent electrical interference affecting audio output quality.
- Configure audio settings via ALSA Mixer to optimize output levels and minimize noise, ensuring clarity in your listening experience.
- Leverage software options like Volumio to transform your Raspberry Pi into a versatile audio hub, supporting various streaming services seamlessly.
Types of External DACs
When exploring the landscape of external Digital-to-Analog Converters (DACs), understanding their various types and functionalities enriches your audio experience. The DAC chipsets themselves play a vital role, with options like the PCM5121 and PCM5122 that support high-definition audio up to 32-bit/384 kHz, albeit limited to 192 kHz under certain conditions. Moreover, i2s DACs provide optimal performance, offering lower jitter and shorter signal paths for Raspberry Pi users.
Alternatively, the ES9023 SABRE chip offers 24-bit/192 kHz audio, while the WM5102 WOLFSON is specifically tailored for mobile devices, including various input and output options. If you’re seeking superior signal quality, the Texas Instruments PCM5242 excels with its dedicated headphone amp and balanced output capabilities. Additionally, many users report successful compatibility with USB DACs specifically designed for Raspberry Pi, adding to the diversity of available options.
Moreover, exploring different functionality types proves equally essential. DAC HATs can seamlessly attach to your Raspberry Pi’s GPIO, supporting full HD audio without soldering. On the other hand, DAC-amp combos integrate conversion and amplification, allowing direct speaker connections, while SPDIF and USB DACs introduce advanced signal processing features, relying heavily on external clock recovery and data handling.
Each type brings unique advantages, catering to your specific audio needs and preferences, ultimately revolutionizing your sound experience.
Connectivity Options For Raspberry Pi Audio with External DACs

Explore the diverse connectivity options available for external DACs when integrating with your Raspberry Pi.
You’ll find that USB connectivity is a robust choice, allowing the DAC to interface seamlessly with your Raspberry Pi via the USB port. This method supports various audio formats while ensuring a hassle-free setup without needing additional power sources. Additionally, the integration of external DACs and amplifiers can provide a complete audio solution for a richer sound experience, leveraging high-resolution outputs like those from the DAC PRO. It also benefits from centralized media management, similar to how a NAS streamlines access to large media collections.
If you prefer wireless audio streaming, Bluetooth integration opens up exciting possibilities. You can connect your DAC to Bluetooth-enabled devices, enhancing convenience with a clutter-free environment. However, this requires careful selection of DACs that support Bluetooth to fully leverage this feature.
For traditional analog connections, RCA sockets provide reliable output. The DAC HAT’s balanced output caters to audiophiles seeking reduced noise, while headphone connections via a 3.5mm amplifier facilitate personal listening. It’s noteworthy that the Raspberry Pi DAC Pro’s(24-bit 192kHz) specifications offer superior audio performance for enhanced listening experiences. This setup also benefits from flexible mixing paths for professional-level audio configuration and supports high-resolution formats like Dolby Vision.
Note that digital outputs like S/PDIF aren’t typically available directly; you’ll need supplementary hardware for such capabilities.
Lastly, don’t forget that connecting to Hi-Fi systems can greatly enhance your audio experience, especially when using specialized OS like Volumio or RuneAudio. With the right setup and stable network connections, your Raspberry Pi can transform into an innovative audio hub, bridging modern digital sources with classic audio equipment.
With the right setup, your Raspberry Pi can transform into an innovative audio hub, bridging modern digital sources with classic audio equipment.
Audio Quality Improvements for Raspberry Pi Audio with External DACs

The pursuit of superior audio quality often leads Raspberry Pi users to seek solutions beyond the device’s onboard capabilities. While the onboard audio provides basic functionality, it’s limited in handling high-fidelity audio formats due to its inherent circuitry. This is where external Digital-to-Analog Converters (DACs) come into play. By integrating an external DAC, you can elevate your sound processing considerably.
These DACs, like HiFiBerry or Topping D10S, are specifically designed to manage higher bit rates and sampling frequencies, which translates into clearer and more detailed audio output. The Raspberry Pi 4 offers improved USB output, further enabling high-quality sound transfer without the need for additional HATs. Furthermore, the use of different models can lead to distinct pros and cons in audio quality, highlighting the importance of selecting the right DAC for your needs. Additionally, users appreciate the affordability of Raspberry Pi 4, making it accessible for many audio enthusiasts.
Moreover, employing a proper power supply—such as the low noise iFi 5volt/2.5amp—can enhance audio quality drastically by minimizing noise and ensuring a stable power source. This is particularly important when considering the device’s low power consumption, as it ensures that energy efficiency does not compromise on performance. Similar to how NAS systems prioritize stable and efficient operation for continuous media streaming, a reliable power supply is crucial for uninterrupted audio performance.
Some users opt for advanced DACs featuring oversampling circuits, which improve frequency response and overall sound clarity. In a quest for superior audio performance, considering external DACs not only enhances your Raspberry Pi’s capabilities but also enriches your listening experience.
Power and Amplification Needs

To achieve ideal audio output with your Raspberry Pi, you’ll need to carefully consider power and amplification needs.
Start with the right power supply; the official Raspberry Pi USB-C power supply is crucial, especially for the Raspberry Pi 4 models, which require a 5V input at 3A. Opt for a power supply designed specifically for the Raspberry Pi to prevent voltage drop and instability, as general AC adapters may not suffice. Ensuring your power supply meets the current requirements is essential for consistent performance. Many used models also indicate that higher ratings can be beneficial for peak demand scenarios. Additionally, using a reliable power source helps in maintaining optimal device performance and reduces the risk of underpowering.
Once you’ve secured proper power, focus on amplifier selection. The Raspberry Pi’s 3.5mm audio jack isn’t suited for driving larger speakers directly; you’ll need an external amplifier, such as the PAM8403 module, to enhance audio quality and volume.
Smaller earbuds can be connected directly, but for widespread sound, amplification is essential.
If you’re integrating a DAC, be mindful of the power supply’s capacity. It should support both the Raspberry Pi and the amplifier without compromising performance.
Using separate power supplies can help reduce noise, guaranteeing a cleaner audio output. Always verify you handle wiring and polarity correctly to avoid damaging your setup.
Configuration and Setup
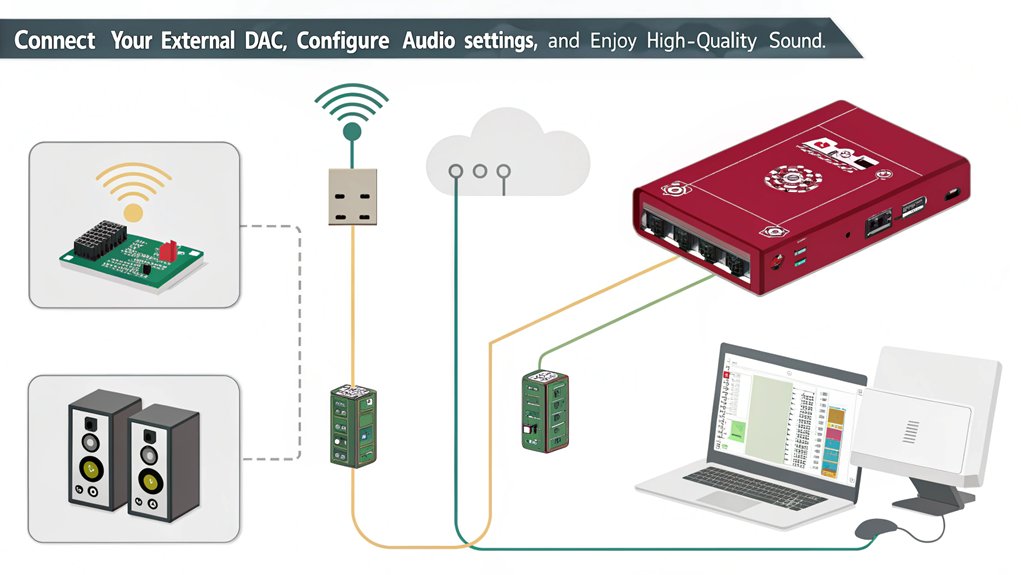
Begin by verifying that your Raspberry Pi setup is ready for audio enhancements, ensuring you are using a compatible and efficient operating system like Raspberry Pi OS, which is lightweight and pre-loaded with programming tools.
Once your external DAC, such as the IQaudio DAC+ HAT, is securely attached to the GPIO pins, you’ll need to dig into the configuration files to guarantee proper functionality and DAC compatibility. The IQaudio DAC+ HAT is officially supported by Raspberry Pi, ensuring optimal performance for your audio system. It is crucial to confirm that your DAC’s drivers are correctly installed to avoid playback issues.
Follow these steps:
- Open a terminal and navigate to the ‘/boot’ directory (‘cd /boot’).
- Edit the ‘config.txt’ file (‘sudo nano config.txt’).
- Uncomment the line ‘dtparam=i2s=on’ to activate the Integrated Inter-IC Sound Bus.
- Comment or remove ‘dtparam=audio=off’, then add ‘dtoverlay=iqaudio-dacplus’ or the relevant ‘dtoverlay’ parameter for your DAC model.
- Select the DAC as the output device in your audio player or media server interface, ensuring it aligns with the PIXEL desktop environment for seamless integration.
After making these changes, restart your Raspberry Pi to apply the settings. Make sure your operating system is up-to-date and compatible with your chosen DAC, especially considering factors like long-term support versions.
This thorough setup process will optimize your audio experience, making it more vibrant and engaging.
Using ALSA Mixer

When using ALSA Mixer, you’ll focus on adjusting audio levels and selecting output devices for ideal performance. Access the mixer interface to fine-tune volume and balance across different channels. Additionally, make sure you’ve configured the correct output device, whether it’s HDMI, analog, or Bluetooth, to enhance your listening experience. This includes ensuring that you have installed ALSA utilities to effectively manage audio settings on your Raspberry Pi. Understanding the ALSA drivers is crucial for optimizing sound card performance.
Adjusting Audio Levels
Optimizing audio levels using ALSA Mixer allows you to tailor sound quality to your preferences on the Raspberry Pi.
To achieve the finest audio experience, focus on the following key adjustments:
- Volume Control: Use the Down-arrow key to lower total output and avoid distortion, aiming for levels around 89-90. Powering RPi through pin headers can enhance performance stability during this adjustment process.
- Audio Balance: Fine-tune individual output channels to achieve a balanced sound across speakers or headphones. This will help in managing the various audio settings available in AlsaMixer.
- Digital Gain: Lowering Digital gain prevents distortion while providing headroom for volume adjustments, especially valuable during streaming.
- Device Mixers: Manage levels for specific inputs and outputs, ensuring ideal output without signal saturation.
- Testing: Regularly test settings with audio playback or sine wave generation to confirm clarity and quality.
Choosing Output Devices
Choosing the right output device is essential for achieving the best audio experience on your Raspberry Pi, and ALSA Mixer provides the necessary tools for this task. Begin by identifying available output devices using the ‘aplay -l’ command; this will list options like the 3.5mm analog jack, HDMI, and USB DACs. Confirm your desired output device is recognized by checking the loaded audio driver with ‘lsmod | grep 2835’. Additionally, using a properly configured DAC can significantly enhance audio playback quality. To ensure seamless audio performance and avoid common errors, verify that the USB host rate matches the USB gadget capture rate.
For device prioritization, use the ‘amixer’ command to select the output device. For instance, setting the output to the 3.5mm jack requires ‘amixer cset numid=3 1’, whereas HDMI can be chosen with ‘2’. The auto option (0) may not yield the expected results, so apply changes system-wide with ‘sudo amixer‘.
Considering USB DACs, verify they’re recognized and configured correctly by checking with ‘aplay -l’. Remember to test audio output through your selected device, and if issues arise, access ‘alsamixer’ for volume adjustments or check ‘/usr/share/alsa/alsa.conf’ for unrecognized PCM cards. These practices guarantee ideal output compatibility across devices.
Recommended Software Solutions

To optimize your Raspberry Pi’s audio performance, you’ll want to explore various software solutions tailored for audio tuning and control. Start with driver installation guides to ascertain compatibility with your hardware, followed by recommended audio distributions that enhance playback quality. Additionally, consider installing FLAC support to ensure high-quality audio playback and transport. Using Audacity can further enhance your editing capabilities and provide a user-friendly interface for audio projects.
These elements collectively improve your audio experience, making your setup more robust and user-friendly.
Audio Performance Tuning
While selecting the right software solutions is integral to enhancing audio performance on your Raspberry Pi, understanding their distinct functionalities can greatly streamline the process.
Prioritize audio driver optimization and audio format compatibility by considering the following software and configurations:
- Operating Systems: Opt for Raspbian, Ubuntu, or Arch Linux based on their support for audio features.
- ALSA and PulseAudio: Utilize these systems for robust audio routing and management.
- MPD: This command-line audio player offers efficient streaming and can be managed remotely, conserving resources.
- Configuration Files: Tweak the ‘asound.conf’ file to direct audio output to your external DAC.
- Sampling and Bit Rates: Set higher sampling rates and bit depths only if your processing capabilities allow for them without lag. Sound card benefits can further enhance the overall audio quality, should you choose to integrate one into your setup. Moreover, addressing issues related to grounding and interference can significantly improve your audio fidelity and minimize distortion.
Making sure your OS is up-to-date and efficiently utilizing resources can greatly improve audio output quality.
Remember, an optimized setup not only enhances playback but also makes certain the Raspberry Pi effectively handles various audio formats with minimal distortion.
Embrace these software solutions for a refined audio experience.
Driver Installation Guides
Installing the right drivers is essential for maximizing the audio capabilities of your Raspberry Pi. Start by relying on automated installation using scripts, such as the one provided by Pimoroni for the pHAT DAC. Simply execute ‘curl https://get.pimoroni.com/phatdac | bash’. This one-liner works seamlessly with Raspbian Wheezy and Jessie, ensuring driver compatibility while configuring your DAC. After running the script, you’ll be prompted to reboot; make sure to test the setup again post-reboot.
For manual installation, open the ‘/etc/modules’ file and comment out ‘snd_bcm2835’. You’ll also need to edit your ‘/etc/asound.conf’ to set the default audio card and modify the ‘/boot/config.txt’ for the device tree overlay. Configuring specific DAC boards, like the HiFiBerry DAC+, requires additional overlays—be meticulous here to prevent installation troubleshooting later.
If you’re using USB DACs, adjust ALSA settings in ‘/etc/asound.conf’ and utilize ‘alsamixer’ for soundcard selection and volume adjustments. Always set the gain to 0 dB to avoid signal compression. With these driver installations, you can fully leverage your Raspberry Pi’s audio potential.
Recommended Audio Distributions
Numerous audio distributions stand out for Raspberry Pi users seeking ideal sound performance and functionality.
Each offers unique features tailored to enhance your audio experience with external DACs. Here are some of the top choices:
- DietPI: A lightweight, user-friendly Linux distribution with advantages like a command-line GUI installer, Roon Bridge support, and compatibility with external DACs like the Singxer SU-1.
- Volumio: This free and open-source distribution specializes in music playback, supporting various audio formats and streaming services. It’s easily controlled through a web interface or mobile apps.
- moOde Audio Player: A responsive web-based audio player that provides audiophile-class features, supporting lossless audio and various streaming services, all with a user-friendly interface.
- piCorePlayer: Emulating a Squeezebox, this software is lightweight and presents a command-line interface while supporting lossless audio, extensible through plugins.
- RuneAudio: Focused on high-quality music playback, it supports various streaming services and offers an intuitive web-based control mechanism.
Choosing the right distribution can greatly impact your listening experience, so assess these options based on your audio needs and preferences.
Enhancing Playback Experience

Enhancing your playback experience with a Raspberry Pi can considerably elevate your audio quality and flexibility. By integrating external DACs, you gain access to support for high-resolution audio formats, enabling up to 24-bit 192kHz digital output.
Models like the DAC Pro and IQaudio DAC+ offer low noise and distortion, critically enhancing your sound fidelity, particularly for streaming services that demand precise audio reproduction.
Utilizing advanced DAC chips such as the Texas Instruments PCM5242 and PCM5122 guarantees a superior signal-to-noise ratio, making subtle audio details discernible. With multiple output options, including balanced and differential outputs through XLR connectors, you can connect seamlessly to high-end audio systems and enhance your listening experience.
Moreover, the Raspberry Pi’s AUX IN and AUX OUT capabilities, combined with S/PDIF lines, allow for direct integration with various setups, including home theaters.
The plug-and-play nature simplifies your setup, while user-friendly configurations via Raspberry Pi OS allow for tailored playback settings. This adaptability means you can optimize audio quality effectively, assuring your system meets the demands of your preferred streaming services and audio formats.
Choosing the Right DAC

When selecting a DAC for your Raspberry Pi, it’s important to take into account compatibility, audio quality, and the features that best suit your needs. Be sure to assess the following criteria:
- DAC Compatibility: Verify it’s compatible with your specific Raspberry Pi model; most support the 40-pin GPIO header.
- Audio Quality: Look for a DAC that offers high-definition output, preferably 24-bit/192kHz, and utilizes quality chips like Texas Instruments or Burr Brown.
- Output Options: Consider the types of outputs available, including RCA, 3.5mm jacks, or S/PDIF for versatile connectivity.
- Support for Software: Confirm compatibility with audiophile-friendly applications such as Volumio or RuneAudio.
- Brand Recommendations: Opt for reputable brands that guarantee longevity and have extensive compliance testing.
Focusing on these areas will provide a foundation for superior audio enhancement with your Raspberry Pi.
Importantly, brands like HiFiBerry and Audiophonics offer dedicated solutions catering to varied audio preferences, guaranteeing you find a DAC that meets your creative and technical aspirations.
Frequently Asked Questions
Can I Use Multiple DACS Simultaneously With Raspberry Pi?
Yes, you can use multiple DACs simultaneously with your Raspberry Pi. Confirm DAC compatibility and configure a multiple device setup through the appropriate software. Adjust settings to manage outputs and maintain audio synchronization effectively.
What Is the Difference Between a DAC and an Audio Interface?
Ever wondered how sound quality can transform your experience? A DAC features digital-to-analog conversion for enhanced playback, while an audio interface functions as a bridge for recording, offering versatile input options and better processing capabilities.
Are DACS Compatible With All Raspberry Pi Models?
DAC compatibility varies, but most models support numerous Raspberry Pi models with a 40-pin GPIO header. You’ll find installations straightforward, as they typically require no soldering and include necessary mounting hardware for easy setup.
How Do I Clean and Maintain My DAC?
To keep your DAC running smoothly, follow essential maintenance tips. Regularly employ effective cleaning techniques like checking housing and replacing worn o-rings. Stay proactive, and you’ll avoid future issues and extend your DAC’s lifespan.
Will a DAC Improve Sound Quality on Headphones?
Yes, a DAC will considerably improve headphone performance by enhancing sound fidelity. By converting digital signals accurately, it reduces noise and interference, leading to clearer, more detailed audio, especially with high-quality headphones.
Conclusion
By incorporating an external DAC into your Raspberry Pi setup, you’re not just improving audio quality – you’re releasing a sonic revolution that’ll make your favorite tracks sound like they’re performed in a grand concert hall! You’ll hear every nuance, every note, as if musicians are playing live right in your living room. With the right configuration and software, you’ll elevate your audio experience to celestial heights, transforming ordinary sound into an extraordinary auditory feast that’ll thrill your senses!

I am a retired software engineer with experience in a multitude of areas including managing AWS and VMWare development environments. I bought a relative a mini-PC a year ago and have become passionate about the technology and its potential to change how we deploy software.