
Mastering Raspberry Pi Command Line Troubleshooting
Hitting a wall with your Raspberry Pi command line? You’re not alone. From mysterious “Command Not Found” errors to frustrating permission denials, these compact computing powerhouses can sometimes leave even experienced users scratching their heads. The goodnews? Most Raspberry Pi command Line errors have straightforward solutions once you know where to look.
In this troubleshooting guide, we’ll dive into the most common Raspberry Pi command line challenges and equip you with practical, step-by-step solutions to get your projects back on track. Whether you’re building an IoT device, setting up a retro gaming station, or configuring a home server, these troubleshooting techniques will help you overcome the command line hurdles that stand between you and your next successful Pi project.
Key Takeaways
- Verify command existence and proper installation using ‘which [command]’ and install missing packages with ‘sudo apt-get install’.
- Fix permission denied errors by adjusting file permissions with chmod or changing ownership with chown commands.
- Update package lists with ‘sudo apt-get update’ and repair broken dependencies using ‘sudo apt-get -f install’.
- Check system logs using ‘dmesg’ for error messages and review command syntax in documentation.
- Monitor system resources with ‘top’ or ‘htop’ to identify performance issues and resource conflicts.
Understanding Command Not Found Errors
When you encounter a “command not found” error on your Raspberry Pi, it typically means the system can’t locate the command you’re trying to execute in your PATH environment variable.
Understanding command line basics is essential for resolving this common issue.
To troubleshoot, first verify the command’s spelling and check if the required package is installed. Use ‘which [command]’ to confirm the command’s location. If the package is missing, install it using ‘sudo apt-get install [package-name]’.
Error message comprehension helps identify if the command exists but isn’t in your PATH. You can add custom paths by editing your ~/.bashrc file.
After making changes, run ‘source ~/.bashrc’ to apply them. For third-party applications, make certain they’re properly installed and their directories are included in your PATH variable.
Fixing Permission Denied Issues
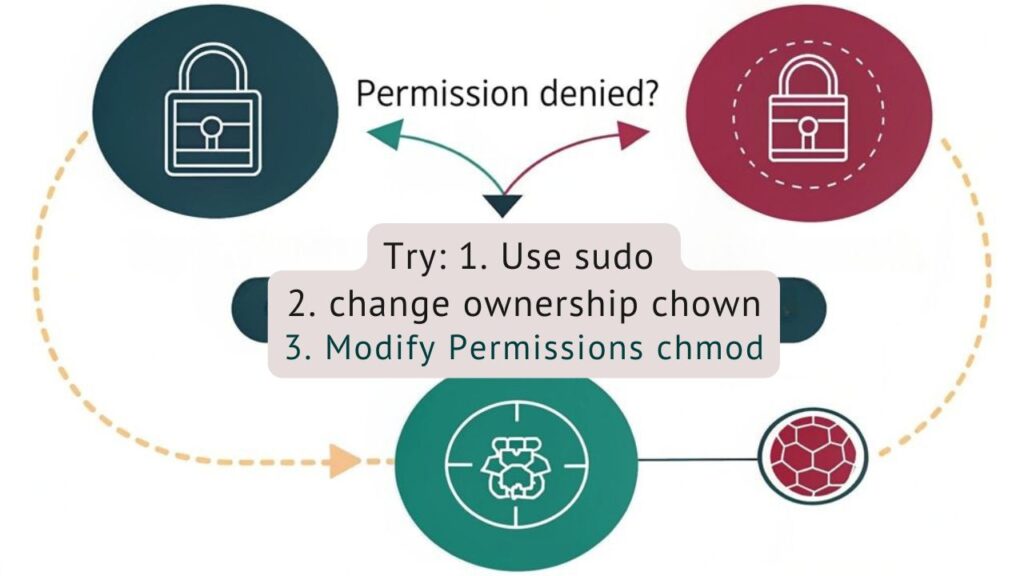
Permission denied errors occur when you lack the necessary rights to access files, directories, or execute commands on your Raspberry Pi. To resolve these issues, you’ll need to understand user permissions and user groups within Linux.
Understanding file permissions and user groups is essential for resolving access issues on your Raspberry Pi Linux system.
You can modify file permissions using the chmod command. For example, to make a script executable, run “chmod +x script.sh”. To change file ownership, use the chown command: “chown user:group filename”. If you need elevated privileges, prefix your command with sudo.
Check your current user’s group memberships with the “groups” command. Join additional groups using “sudo usermod -aG groupname username”. Remember that the default “pi” user belongs to the sudo group, allowing administrative access.
For system-wide changes, verify you’re using the appropriate user account with sufficient privileges.
Resolving Package Installation Failures
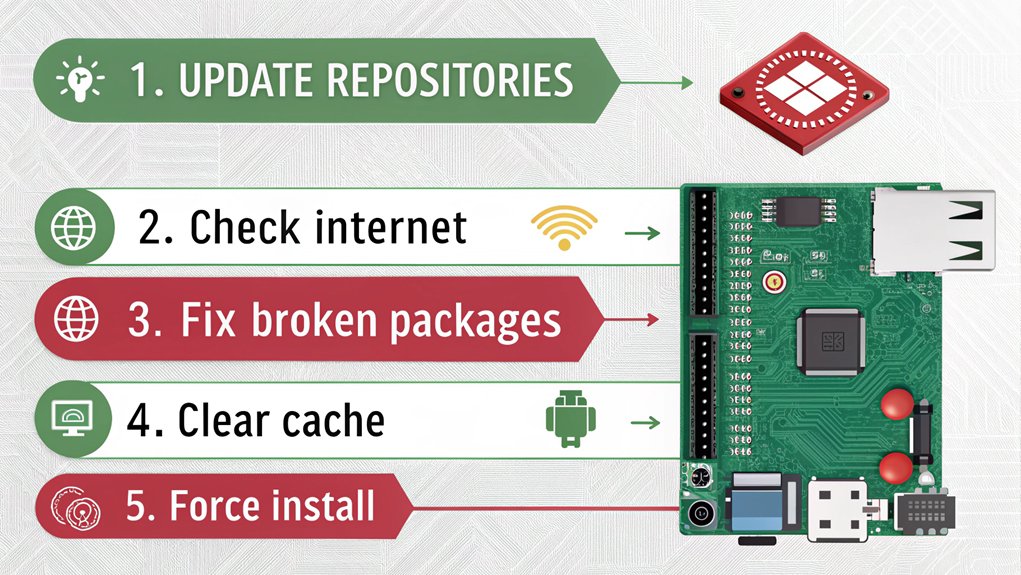
Package installation failures on Raspberry Pi typically stem from connectivity issues, corrupted package lists, or insufficient disk space.
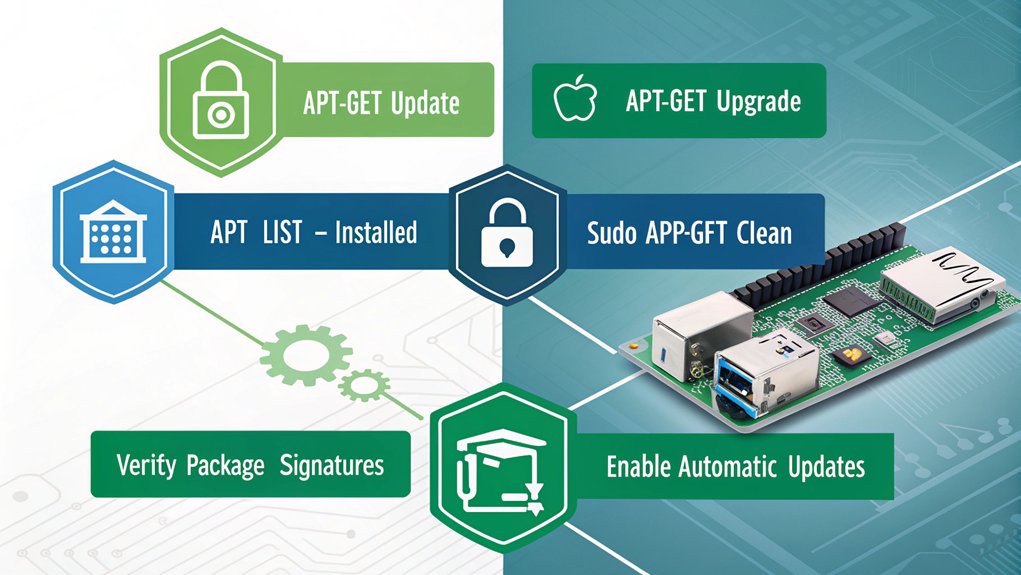
To resolve these issues, first refresh your package lists using ‘sudo apt-get update’ and check your internet connection. If you encounter package source conflicts, disable conflicting repositories or remove duplicate entries in your sources list.
For dependency resolution strategies, try ‘sudo apt-get -f install’ to fix broken dependencies. If space is limited, clear your package cache with ‘sudo apt-get clean’ and remove unused packages using ‘sudo apt-get autoremove’.
When specific packages fail, examine error messages carefully and consider alternative installation methods like downloading .deb files directly or using different package versions.
For persistent issues, check your repository mirrors and verify they’re properly synchronized.
Recovering From Boot and Login Problems

Boot and login problems on Raspberry Pi can prevent system access and require specific recovery steps. To restore functionality, you’ll need to systematically troubleshoot the boot sequence and recover login credentials when necessary.
| Issue | Symptom | Solution |
|---|---|---|
| Kernel Panic | System freezes | Edit cmdline.txt |
| Failed Boot | Rainbow screen | Check SD card |
| Login Loop | Returns to login | Reset password |
| Black Screen | No display output | Check config.txt |
| Corrupt Files | Boot failure | Recovery mode |
When encountering boot sequence issues, start by checking your power supply and SD card connection. If you’re stuck in a login loop, you can reset credentials by mounting the SD card on another system and modifying the password file. For persistent boot problems, access recovery mode by holding the Shift key during startup.
Managing File System and Storage Errors
Storage issues on Raspberry Pi systems can manifest as corrupted file systems, disk space limitations, or mounting failures.
You’ll need to employ file system management tools to diagnose and repair these problems. Run fsck to check and fix file system errors, and use df -h to monitor available disk space.
For storage optimization, you can implement several strategies. Clear your apt cache with apt-get clean, remove unused packages using apt-get autoremove, and delete old log files from /var/log.
If you’re experiencing mounting issues, verify your fstab entries and check dmesg for hardware-related errors. Consider using tools like ncdu to identify large files and directories consuming excessive space.
For corrupted SD cards, you might need to use dd to create a backup before attempting repairs.
Debugging Network Connection Issues

When troubleshooting network connectivity on your Raspberry Pi, you’ll want to check your interface status first using the command “ifconfig” or “ip addr show”. For Wi-Fi issues, examine the output of “iwconfig” to verify your wireless connection parameters and signal strength. Review system logs with “dmesg | grep wlan0” to identify specific Wi-Fi error messages that might explain connection failures or drops.
Checking Network Interface Status
Network connectivity issues on your Raspberry Pi can be quickly diagnosed by checking the status of network interfaces.
When performing network interface troubleshooting, you’ll want to examine both the physical and logical configuration of your connections:
- Run ‘ifconfig’ or ‘ip addr show’ to display all active interfaces, their IP addresses, and status – look for “UP” or “DOWN” states to identify potential problems.
- Use ‘iwconfig’ to check wireless interface settings, signal strength, and connection quality if you’re using Wi-Fi.
- Execute ‘sudo systemctl status networking’ to verify if the networking service is running properly and check for any configuration errors.
These commands provide essential data for checking interface configuration and identifying common network issues.
Focus on the interface status indicators and error messages to pinpoint specific connectivity problems.
Wi-Fi Connection Error Messages
Common Wi-Fi error messages on your Raspberry Pi provide specific insights into connection failures and their root causes.
When you encounter “wlan0: CTRL-EVENT-DISCONNECTED,” it typically indicates wi-fi security protocol mismatches or authentication failures. The “No wireless interfaces found” error suggests driver issues or disabled wireless hardware.
Check your network configuration using “iwconfig” to verify wi-fi speed settings and connection status.
For “Network is unreachable” errors, run “sudo wpa_cli reconfigure” to reset your wireless interface. If you see “Invalid key management type,” ascertain your wpa_supplicant.conf file contains the correct security parameters.
Use “sudo iwlist wlan0 scan” to confirm your network’s visibility and signal strength.
To resolve “DHCP timeout” errors, verify your router’s DHCP settings and try static IP configuration.
Handling GPIO Pin Access Errors
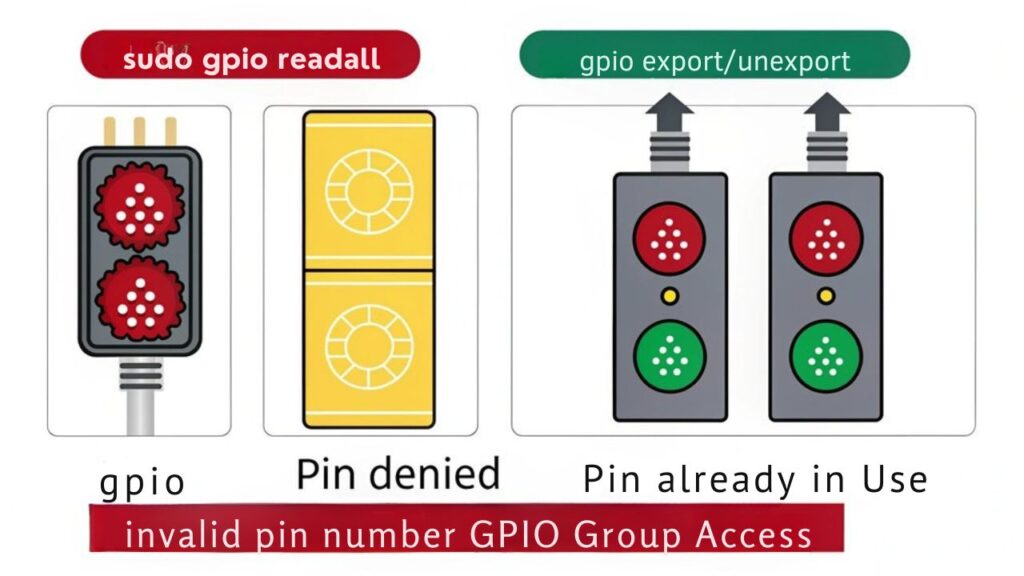
If you’re encountering “Permission Denied” errors when accessing GPIO pins, you’ll need to add your user to the gpio group using the command “sudo usermod -a -G gpio $USER”.
When configuring GPIO pins, first check that you’ve specified the correct BCM pin numbers in your code and verify the pin’s current state using “gpio readall”.
You can troubleshoot GPIO pin configuration issues by ensuring your GPIO libraries are properly installed and up-to-date through “pip install RPi.GPIO” or “apt-get install python3-rpi.gpio”.
Permission Denied Issues
Accessing GPIO pins on your Raspberry Pi can trigger frustrating “Permission denied” errors when you lack the proper user permissions.
You’ll need to adjust your user permissions and file ownership settings to resolve these issues and regain control of your GPIO functionality.
To fix permission denied errors:
- Add your user to the GPIO group with the command: ‘sudo usermod -a -G gpio $USER’
- Update GPIO pin permissions using: ‘sudo chown root:gpio /dev/gpiomem’ followed by ‘sudo chmod g+rw /dev/gpiomem’
- Check your permissions with: ‘groups $USER’ to verify you’re in the gpio group, then log out and back in for changes to take effect.
These steps guarantee you have the necessary access rights to interact with GPIO pins without encountering permission errors.
GPIO Pin Configuration Problems
When GPIO pin configuration errors occur on your Raspberry Pi, they often manifest as unresponsive pins or incorrect signal readings.
To resolve these issues, first verify your pin numbering system using ‘gpio readall’ to confirm the correct GPIO pin mapping for your model.
Check if you’ve initialized the pins correctly in your code using either GPIO.setmode(GPIO.BCM) or GPIO.setmode(GPIO.BOARD).
For persistent permission issues, add your user to the ‘gpio’ group with ‘sudo usermod -a -G gpio $USER’. You’ll need to log out and back in for changes to take effect.
Run ‘gpio -v’ to verify your GPIO utility version and ascertain it’s compatible with your Raspberry Pi model.
If pins remain unresponsive, reset them using ‘gpio reset’ to clear any lingering configurations from previous programs.
Resolving Memory and CPU Resource Conflicts
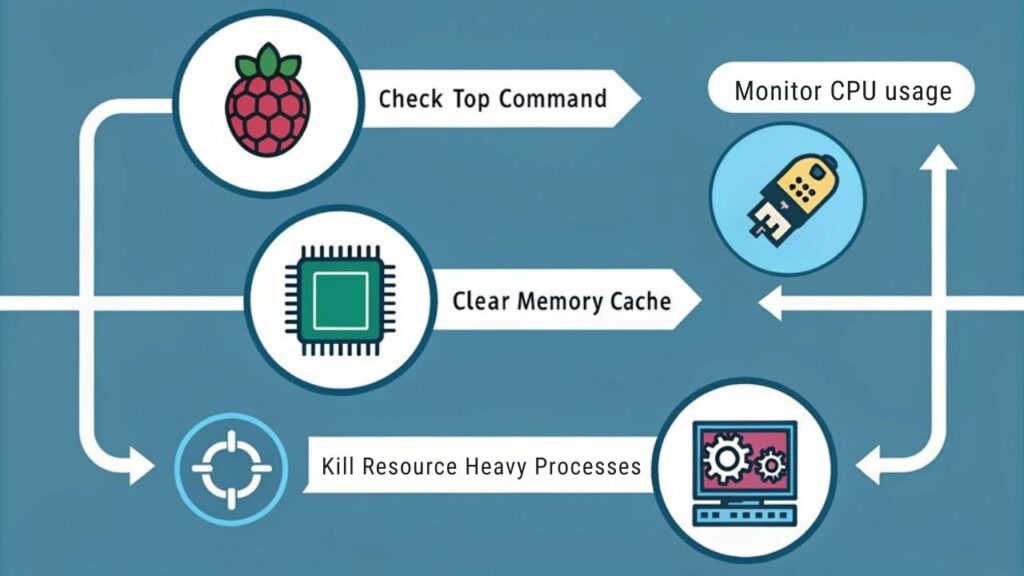
Resource conflicts on your Raspberry Pi can severely impact system performance and stability. When you’re experiencing sluggish operation or system freezes, proper memory management and cpu optimization become critical.
Monitor your system resources using tools like ‘top’ or ‘htop’ to identify processes consuming excessive resources.
- Run ‘sudo raspi-config’ and adjust your memory split between CPU and GPU to optimize for your specific workload.
- Use ‘nice’ and ‘renice’ commands to adjust process priorities, ensuring critical tasks get sufficient CPU time.
- Implement ‘swap’ management by editing /etc/dphys-swapfile to increase virtual memory when needed.
Clean up zombie processes with ‘kill’ or ‘pkill’, and consider using ‘cgroups’ to set resource limits for specific applications.
Remove unnecessary background services to free up system resources for essential operations.
Frequently Asked Questions
Why Does My Raspberry Pi Show a Rainbow Screen During Boot?
You’re seeing a rainbow screen because your Pi can’t supply enough power to boot correctly. Check your power supply’s voltage output and verify it’s delivering stable 5V during the boot sequence.
How Can I Change My Raspberry Pi’s Default Password?
Promptly protect your Pi by accessing terminal and typing ‘passwd’. You’ll need to enter your current password (default is ‘raspberry’), then create and confirm your new password for enhanced security.
What’s the Difference Between Sudo Reboot and Sudo Shutdown?
‘sudo reboot’ immediately restarts your system, while ‘sudo shutdown’ powers it off completely. For system administration, you’ll use reboot for updates and shutdown when you’re done using the device.
Why Does My Raspberry Pi Feel Hot While Running?
Your Pi’s overheating causes can include intensive CPU tasks, insufficient ventilation, or high ambient temperatures. You’ll need cooling solutions like heatsinks, fans, or improved airflow to maintain peak performance.
How Do I Backup My Entire Raspberry Pi SD Card?
You’ll need SD card cloning backup software like Win32DiskImager or Etcher to create a complete image of your Pi’s card. Connect a card reader and clone your entire system.
Conclusion
You’ve now mastered the essential tools for conquering Raspberry Pi’s trickiest command line errors. While complex issues may still arise, you’re equipped with the debugging strategies needed to overcome them. Remember to check permissions, monitor system resources, and verify network connectivity. By following these troubleshooting methods systematically, you’ll resolve command line challenges efficiently and keep your Pi running smoothly.

I am a retired software engineer with experience in a multitude of areas including managing AWS and VMWare development environments. I bought a relative a mini-PC a year ago and have become passionate about the technology and its potential to change how we deploy software.