What do you Need for Raspberry Pi Home Automation Tools?
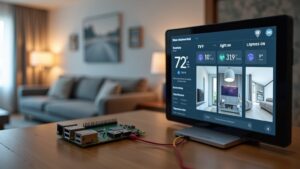
By connecting a $35 Raspberry Pi to your lights, thermostat, and security sensors, you couls cut your energy bill by 30%. You’ll find similar benefits by building your own Pi-powered smart home system. The tiny computer’s GPIO pins connect directly to sensors while its Linux environment supports robust automation platforms like Home Assistant. With proper configuration, you can create Raspberry Pi home automation tools. Tools that can automate routines, monitor energy usage, and control devices from anywhere—all without subscription fees or privacy concerns.
Key Takeaways
- Choose the right Raspberry Pi model (Pi 4 or 5 for complex systems, Pi Zero for simpler projects).
- Install Home Assistant OS via Raspberry Pi Imager and connect through Ethernet for reliable setup.
- Select appropriate sensors (temperature, motion, environmental) with direct GPIO compatibility for automated responses.
- Implement networking protocols like Zigbee, Z-Wave, or 433.92MHz to connect smart devices into a cohesive ecosystem.
- Build custom automations with Node-RED for visual programming and MQTT for seamless device communication.
Getting Started With Raspberry Pi Home Automation
When starting on a home automation journey with Raspberry Pi, you’ll need to select appropriate software that aligns with your technical expertise and automation goals. Home Assistant stands out for beginners with its intuitive interface and broad device compatibility, while openHAB offers deeper customization options for those willing to tackle its learning curve. You can also consider Domoticz as it includes an MQTT plugin that simplifies adding your own devices to the system.
Following smart home trends, most users begin by installing Home Assistant OS via Raspberry Pi Imager, connecting via Ethernet for reliable initial setup. Navigate to http://homeassistant:8123 to complete configuration, setting up user accounts and location data essential for precise automations.
One of the primary automation challenges you’ll face is maintaining regular system updates for security and performance. Establish a maintenance routine early to guarantee your smart home remains responsive and secure as you expand your system. The implementation process may require six months for basic setup, though with community resources you could potentially achieve results faster.
Essential Hardware Components for Your Smart Home
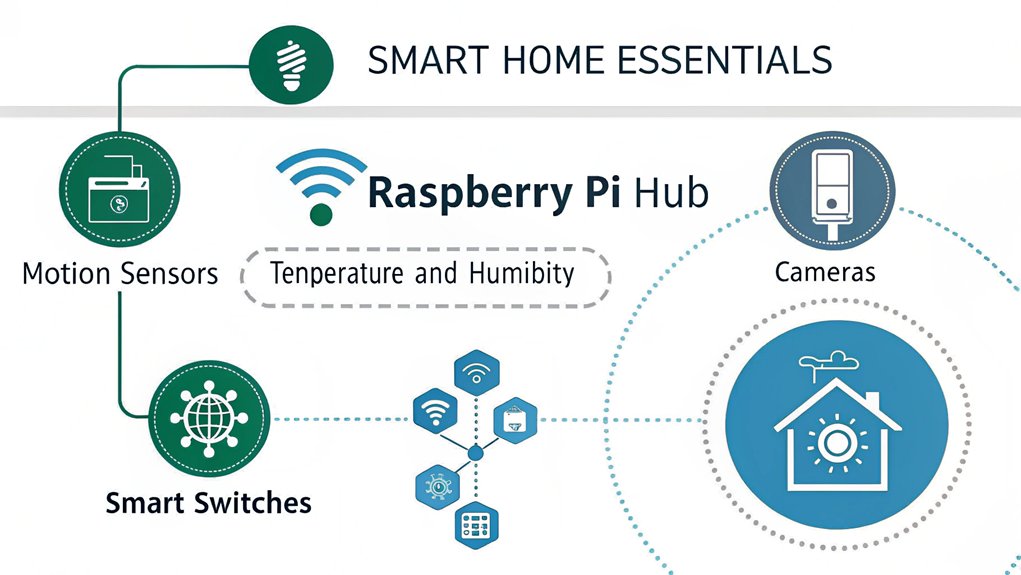
Your Raspberry Pi home automation setup requires three fundamental hardware components to function effectively: a processing unit (such as the Pi itself), appropriate sensors, and reliable networking interfaces.
Temperature, motion, and environmental sensors will provide the data necessary to trigger automated responses throughout your home. Smart sensors can automatically adjust settings based on room occupancy and enhance your home’s security by alerting you to potential threats.
Wi-Fi connectivity remains the standard choice for most setups, though you’ll achieve more stable connections with Ethernet or specialized protocols like Zigbee when handling critical automation tasks. A Raspberry Pi 4 or 5 is recommended for performance-intensive tasks, while a Raspberry Pi Zero works well for simpler projects.
Core Processing Units
At the heart of any effective smart home automation system lies the processing hardware that powers your intelligent environment. For peak performance, consider the Raspberry Pi 5 with its Broadcom BCM2712 SoC featuring a quad-core ARM Cortex-A76 processor clocked at 2.4 GHz. This unit delivers impressive processor capabilities, with performance benchmarks showing 2-3 times improvement over the Pi 4 for CPU-intensive tasks. The Raspberry Pi 5’s open-source nature makes it ideal for customizing your home automation setup to meet your specific needs. With over 60 million Raspberry Pi devices sold worldwide as of 2024, you’re joining a vast community of makers and developers creating innovative solutions.
You’ll benefit from the VideoCore VII GPU and 32-bit LPDDR4X memory interface providing up to 17GB/s bandwidth. The Pi 5 supports dual 4Kp60 displays with enhanced video scaling.
For reliable operation, pair your system with a stable power supply, minimum 32GB microSD storage, and appropriate cooling solutions. When implementing your smart home hub, these core specifications guarantee smooth handling of multiple automation protocols like MQTT, Zigbee, and Z-Wave simultaneously.
Sensors Worth Installing
Building upon a powerful Raspberry Pi foundation, the right sensors transform your automated home from a concept into a responsive ecosystem.
For essential environmental monitoring, consider the DHT22 for temperature and humidity tracking, and capacitive ground moisture sensors for precise irrigation control.
Security demands PIR sensors for motion detection and magnetic door sensors to monitor entry points.
When selecting sensors, prioritize those with direct GPIO compatibility like the DS18B20 temperature probe. The DHT22 sensor requires specific connections to GPIO4 (pin 7) for proper functionality with your Raspberry Pi setup.
For healthier living spaces, PM2.5/PM10 and CO2 sensors provide critical air quality data to trigger ventilation systems.
Installation best practices include positioning PIR sensors at ideal height and angle for detection coverage, and placing air quality sensors away from direct contaminant sources for accurate readings.
Integrate WS2801B LED strips with motion sensors for automated, energy-efficient lighting solutions.
Connecting these sensors through your Raspberry Pi creates a central hub for comprehensive security monitoring that can detect and respond to potential threats in real-time.
Networking Interfaces Required
While establishing a robust home automation system with Raspberry Pi, reliable networking interfaces become the critical backbone that connects your smart devices into a cohesive ecosystem.
Your Pi offers both Wi-Fi connectivity for flexible placement and Ethernet stability for consistent performance.
For peak networking performance, you’ll need:
- Ethernet cable – Provides a wired connection with minimal latency for mission-critical automation tasks
- Network Manager tools – Configure using ‘nmcli’ for streamlined command-line management
- Secure remote access – Enable SSH (sudo raspi-config nonint do_ssh 0) and VNC for headless operation
When configuring network settings, consider assigning a static IP by modifying ‘/etc/dhcpcd.conf’ to guarantee your automation hub remains consistently accessible. You can also set a custom network hostname for easier identification of your Pi on the local network. Installing the robust Home Assistant platform provides a centralized interface for controlling all your smart devices from a single dashboard.
Regular security updates are essential to protect your connected home ecosystem.
Setting Up Home Assistant on Raspberry Pi

Setting up Home Assistant on your Raspberry Pi provides a powerful foundation for your smart home ecosystem. For peak performance, choose a Raspberry Pi 4 or 5, though model 3 works adequately. You’ll need a 32GB A2-rated microSD card and appropriate power supply.
Begin by downloading Raspberry Pi Imager from the official website. Select your Pi model, then locate Home Assistant OS under “Other specific-purpose OS” options. Choose your microSD card and start the writing process.
The first boot takes approximately 20 minutes. Once running, you’ll create a user account, configure location settings, and watch as Home Assistant automatically detects compatible network devices. Home Assistant operates entirely locally, keeping your smart home data private and secure. For reliable connectivity, an Ethernet cable connection is recommended over Wi-Fi when possible.
After setup, you can customize the dashboard, configure integrations, and implement security measures to protect your automated environment.
Creating Custom Automation Routines
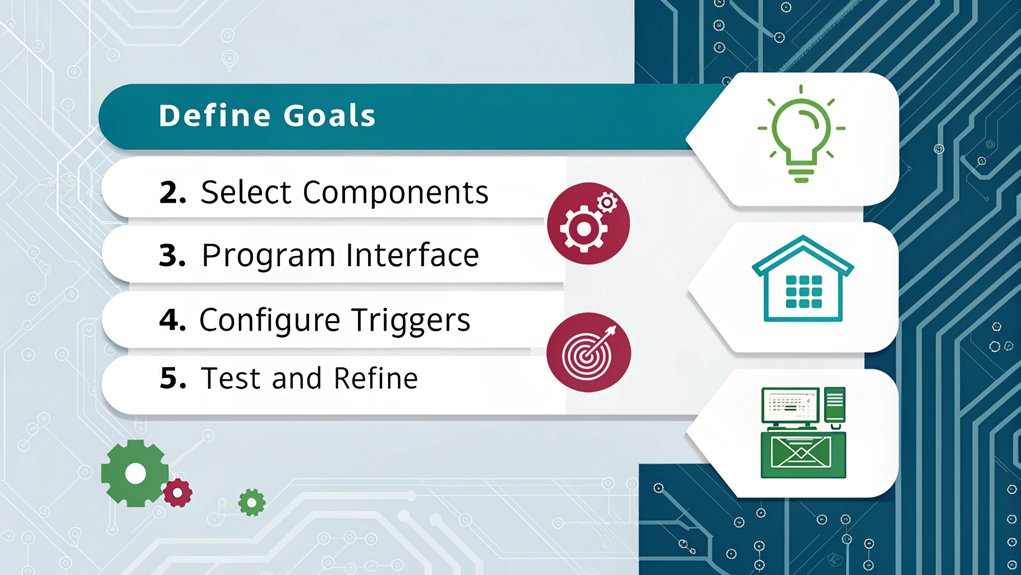
With Home Assistant successfully installed on your Raspberry Pi, you can now harness its full potential by creating custom automation routines that truly personalize your smart home experience.
Lighting control is easily managed through time-based triggers, allowing for dynamic adjustments that mimic natural daylight patterns and improve sleep quality. By integrating weather data, your lights can automatically respond to external conditions. The affordable nature of Raspberry Pi makes implementing these GPIO interface connections simple and cost-effective. The abundant tutorials and resources available make implementing these advanced lighting features straightforward even for beginners.
Sensor integration forms the backbone of sophisticated automation:
- Connect motion sensors to trigger lighting sequences when you enter specific rooms
- Implement temperature sensors to enhance HVAC operation based on occupancy patterns
- Utilize humidity sensors in bathrooms to automatically activate ventilation systems
Custom scenario-based routines like “movie mode” or “cooking mode” transform your living environment instantly, adjusting multiple parameters simultaneously for ideal comfort and functionality.
Integrating Voice Control With Your Pi System

Voice control integration with your Raspberry Pi offers two primary approaches: connecting with Amazon’s Alexa ecosystem or building your own speech recognition solution.
You’ll need specific hardware components including a quality microphone, speaker, and potentially a USB sound card to guarantee reliable voice capture and feedback.
For DIY speech recognition projects, you can leverage a Raspberry Pi Model B with appropriate USB connectivity to handle both input devices and internet access for API communication.
For DIY speech recognition projects, you can utilize Google’s Voice and Speech APIs alongside specialized software like Steven Hickson’s voice control suite to create customized command structures for your home automation system. Steven’s solution provides superior accuracy and performance compared to alternatives like Jasper or Oscar Liang’s software.
Alexa Integration Methods
Integrating Alexa with your Raspberry Pi home automation system opens powerful voice control capabilities that can transform how you interact with your smart home.
By combining Node-Red for visual programming and Flask-Ask for alexa skill development, you can create customized voice command automation workflows that control your home appliances.
For best integration, implement these methods:
- Custom Skill Development – Utilize the Amazon Developer Portal to create personalized skills that interact directly with your Raspberry Pi GPIO pins.
- Relay Board Configuration – Connect your relay board to GPIO pins and configure Node-Red flows to translate Alexa commands into physical actions.
- HTTP Tunneling – Deploy ngrok to establish secure connections between your local Raspberry Pi server and Alexa’s cloud infrastructure. This creates the necessary public endpoint URL that Alexa services require to communicate with your local Raspberry Pi.
This approach enables seamless communication between your voice commands and physical devices without proprietary hubs. The simplified process avoids extensive AWS setup while still allowing complete control of your connected devices.
DIY Speech Recognition Projects
While Alexa integration offers powerful capabilities, creating your own DIY speech recognition system provides complete control and customization for your Raspberry Pi home automation setup.
You’ll need a Pi, microphone, and speaker as the foundation.
For implementation, you have two paths: online systems using Google’s Speech API for superior accuracy, or offline options like Jasper or DeepSpeech for internet-independent operation.
Python scripts efficiently process voice commands and trigger corresponding actions through GPIO pins to control lights and appliances.
Test your microphone with ‘arecord -l’ and verify recording quality with ‘aplay’ before configuring custom commands.
For complex automation scenarios, consider upgrading to a Banana Pi for enhanced processing power.
Speech synthesis capabilities provide interactive feedback, creating a seamless voice-controlled environment tailored precisely to your specifications.
Setting up voice control for your system requires installing essential software packages including SpeechRecognition library and PyAudio to enable proper voice command interpretation.
Using SOPARE can provide offline speech recognition functionality that works reliably without internet connectivity, making it ideal for dedicated projects like automated sliding doors.
Building Energy Monitoring Solutions
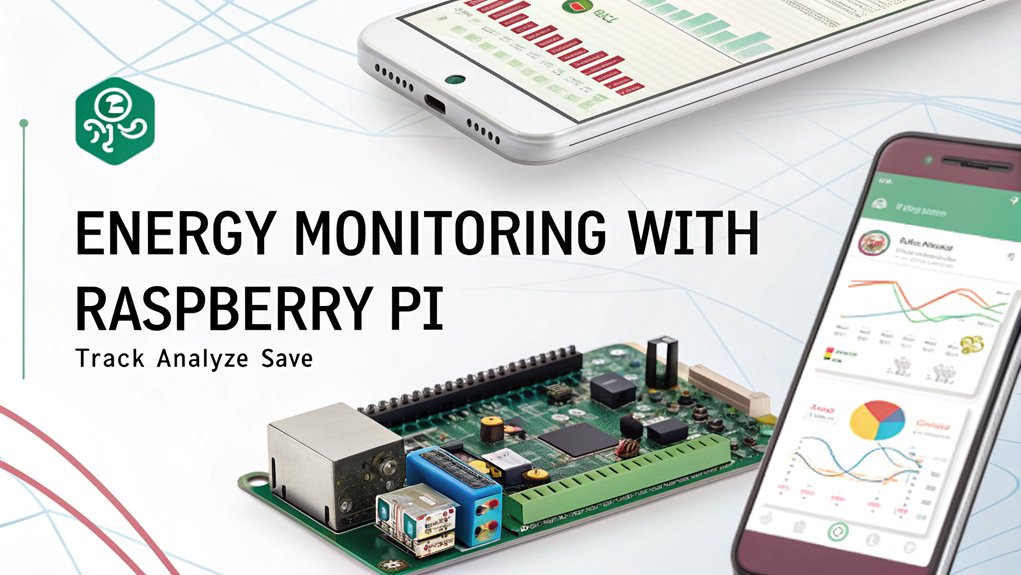
When building a thorough energy monitoring solution with Raspberry Pi, you’ll need both specific hardware components and software tools to create an effective system. Select a Raspberry Pi 4 or 5 as your central hub, paired with current transformers and voltage sensors connected through an MCP3008 ADC for precise measurements.
For ideal energy efficiency monitoring, implement these core components:
- EmonCMS software – Provides extensive data logging and visualization capabilities
- Current transformers (CTs) – Measure electrical current without direct circuit connection
- Grafana dashboards – Create customizable data visualization interfaces for real-time analysis
The system calculates real power, apparent power, and power factor, sampling thousands of times per second.
Store this data locally or remotely, then integrate with platforms like Home Assistant for automated responses based on energy consumption patterns.
Expanding Your System With Wireless Protocols
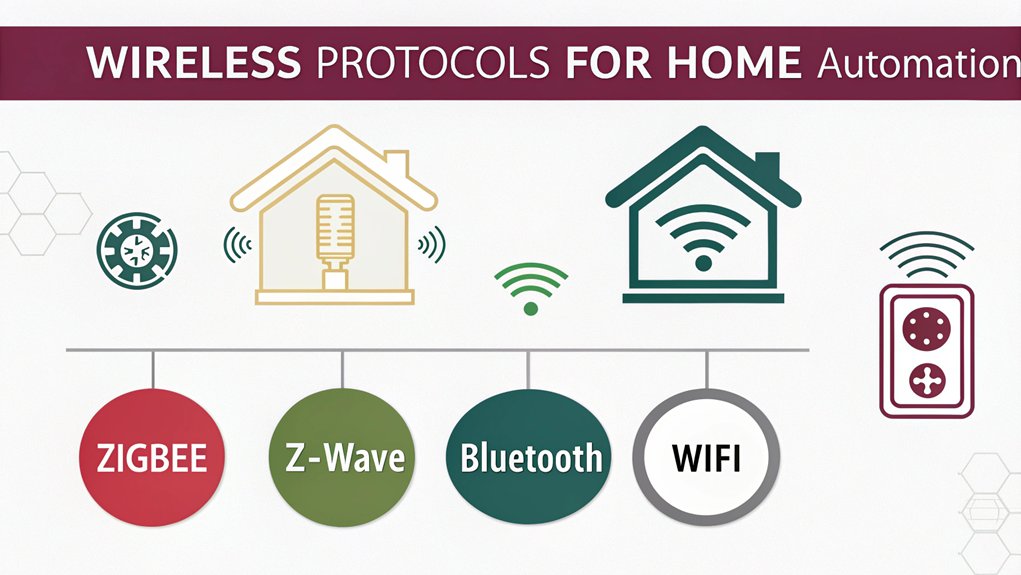
How effectively you implement wireless protocols can determine the reach and flexibility of your Raspberry Pi home automation system.
Consider your specific needs when selecting protocols—Bluetooth for short-range control, Zigbee for power efficiency, Z-Wave for reliable long-range management, 433.92MHz for cost-effective signals, or Wi-Fi for broader coverage.
Each protocol requires specific hardware support. You’ll need USB sticks for Zigbee and Z-Wave, or modules from Adafruit or Sparkfun for adding capabilities without extensive modifications.
Execute these diverse protocols through platforms like Node-RED or Home Assistant, using MQTT for seamless device interoperability.
Don’t overlook security—execute TLS encryption, configure firewalls, use SSH key authentication, and maintain regular updates.
This modular approach guarantees your system remains scalable while maintaining robust protection against unauthorized access.
Frequently Asked Questions
Can I Run Multiple Automation Platforms Simultaneously on One Pi?
Yes, you can run multiple automation platforms simultaneously on one Pi. Guarantee proper resource management and monitor multi-platform compatibility to maintain performance while executing your diverse automation tasks concurrently.
How Do I Troubleshoot Connection Issues Between Pi and Smart Devices?
Billions of connection problems vanish when you check network settings and eliminate signal interference! Verify Bluetooth profiles are enabled, update drivers, and systematically tackle pairing errors by removing old connections before re-pairing devices.
What’s the Typical Power Consumption of a Pi-Based Automation System?
Your Pi-based automation system typically consumes 2-5 watts depending on connected peripherals. You’ll achieve power efficiency by disabling unused features and experience energy savings compared to traditional smart hubs.
Are There Waterproof Enclosures for Outdoor Pi Automation Projects?
Yes, you’ll find IP67-rated enclosures made from waterproof materials like polycarbonate or ABS for your outdoor Pi projects. These protect your outdoor sensors while allowing customized cable entries and ventilation options.
How Often Should I Back up My Automation Configuration?
Back up your automation configuration weekly at minimum. Implement incremental backup frequency for critical systems and after significant changes. Proper configuration management requires automated, verified backups with off-site storage.
Conclusion
Your Raspberry Pi home automation journey isn’t just about convenience—it’s your digital Prometheus moment, bringing technological fire into everyday life. You’ll continue expanding your system as your skills evolve, adding Z-Wave devices, refining your automation scripts, and optimizing power consumption. With proper GPIO management and regular security updates, you’ve created not merely a collection of smart devices, but a cohesive, adaptable ecosystem that’s truly yours to command.

I am a retired software engineer with experience in a multitude of areas including managing AWS and VMWare development environments. I bought a relative a mini-PC a year ago and have become passionate about the technology and its potential to change how we deploy software.