Embarking on a journey with the Raspberry Pi Imager CLI? Let’s dive in! First things first, ensure you’ve got the latest version installed. This is your gateway to a world of innovation and creativity.
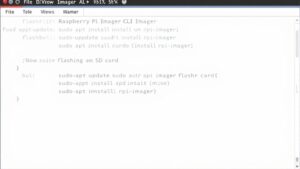
Kickstart your adventure by running sudo apt update and sudo apt install rpi-imager. This sets the stage for a seamless experience.
Next, explore the vast array of operating systems at your fingertips with rpi-imager --list-os.
Identify your SD card using lsblk, and you’re ready to write your chosen OS image with rpi-imager --cli --device /dev/sdX.
Customize your setup with a config.txt file for settings like Wi-Fi and SSH, tailoring your Raspberry Pi to your unique needs.
Throughout the process, keep an eye on the imaging progress to ensure everything runs smoothly. There’s a world of possibilities waiting for you to optimize your Raspberry Pi experience. So, let’s get started and bring your ideas to life!
Equipment and Prerequisites
To get started with Raspberry Pi Imager, you’ll need a few key pieces of equipment.
First, you’ll require either a Raspberry Pi device or a compatible computer. If you’re using a Raspberry Pi, any model that supports the Imager will suffice. For computers, verify they can run the necessary operating system, whether it’s Windows, macOS, or Linux.
Next, you’ll need a reliable internet connection. This isn’t just for downloading the Imager, but also vital for accessing OS images and keeping everything updated. Confirm you have a stable network connection for a smooth experience. Many users find that using a Raspberry Pi Desktop Kit can significantly simplify their initial setup process.
A microSD card is an essential part of your setup, as it’s where the OS image will be written. Verify it has sufficient storage capacity and that you can connect it to your computer with an SD card reader. Additionally, ensure you have access to the command-line interface for managing and identifying devices, which is one of the installation prerequisites you can’t overlook.
Finally, access to a command-line interface will help you manage and identify devices effectively, which is one of the installation prerequisites you can’t overlook.
Updating and Installing Imager

Before installing the Raspberry Pi Imager, you should update your system to guarantee it’s running the latest software packages. Start by using the commands ‘sudo apt update’ and ‘sudo apt upgrade’ to refresh your package list and upgrade any installed packages. This ensures compatibility with the features of Imager you plan to utilize. It is essential to note that the imager is optimized for Mac computers with M1 or M2 chips, particularly when copying images to microSD cards. Additionally, ensuring your system is compatible with high-speed storage options like M.2 NVMe SSDs can enhance the overall performance of your Raspberry Pi setup. Once your system is up to date, you can proceed with the installation of the imager using the appropriate methods for your operating system.
System Update Process
Updating the Raspberry Pi Imager and your system is a straightforward process that guarantees you have access to the latest features and fixes. First, confirm you’re using version 1.6.2 or later, which includes the Raspberry Pi Imager CLI interface. On Windows, invoke the ‘rpi-imager-cli.cmd’ file, and run ‘rpi-imager –help’ to explore available commands. Next, if you need to update the Imager, simply download the latest version from the official Raspberry Pi website. Regular updates not only enhance Raspberry Pi performance but also maintain firmware stability, essential for making sure your device runs smoothly. It is important to note that the current Raspberry Pi Imager CLI limitations may prompt you to explore alternative tools for more advanced functionalities. Ensuring your Raspberry Pi has the latest firmware updates is crucial for optimal performance.
When you’re ready, prepare an empty micro-SD card for the updates. Insert it into your PC, confirming it’s properly formatted with a fast SD card for better performance. It’s wise to back up any important data first, as this process will overwrite existing content. To update the firmware, use the Imager by selecting “Misc utility images > Bootloader.” Choose the boot type that suits your needs, and the Imager will handle the rest. Finally, after writing the new image, reboot your Raspberry Pi to apply all updates, guaranteeing optimum functionality and reliability moving forward. This process ensures compatibility with various applications such as home automation and security setups.
Imager Installation Steps
Starting with the installation of the Raspberry Pi Imager is simple and efficient. You can choose from several installation methods based on your operating system and preferences. Here’s a quick guide:
- Download the latest version from the official Raspberry Pi website for Windows, macOS, or Linux.
- Run the installer and follow the prompts for setup. For Linux, use the terminal command: ‘sudo apt install rpi-imager’.
- Update your package manager before installation to guarantee you’re using the latest version, especially if you’re on Linux or Raspberry Pi OS. Additionally, ensure your boot media is ready for the OS installation. Installing the Imager allows for a quick setup enabling immediate Raspberry Pi use.
- Launch the Imager by clicking its icon or typing ‘rpi-imager’ in the terminal.
Make sure you have the necessary user permissions when executing commands, especially in the terminal.
Once installed, verify that the application is present in your system’s application list or that the command is recognized in the terminal. Testing the Imager by writing an OS image to an SD card will confirm everything’s working as intended.
Stay connected to the internet for downloading any necessary operating system images.
Listing Available Operating Systems
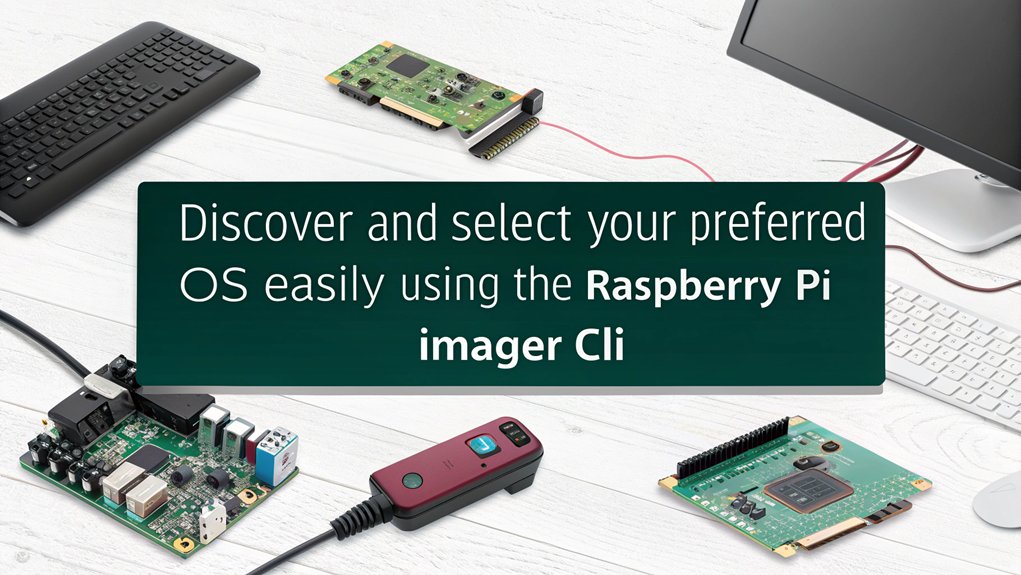
When you’re ready to choose an operating system for your Raspberry Pi, listing the available options first is essential. You can easily accomplish this by using the ‘rpi-imager –list-os’ command. This command will display a text-based list of the available operating systems, making it simpler for you to identify which one you’ll want to install.
Here’s a visual representation of potential output you might see:
| OS Name | Architecture |
|---|---|
| raspios_lite_armhf | ARMHF |
| raspios_armhf | ARMHF |
| raspbian_arm64 | ARM64 |
| ubuntu_server_arm64 | ARM64 |
These OS names and their variants are formatted for easy identification. Some may be specialized for specific Raspberry Pi models or feature community-supported versions. Additionally, it’s advisable to use the Raspberry Pi Imager utility as it enhances the overall installation process. Before running the list command, verify your system is updated by executing ‘sudo apt update’ and ‘sudo apt upgrade’. This verifies you’ll see the most current options for installation, preventing any confusion down the line. Knowing these operating systems ahead of time sets the stage for a smoother installation experience. Furthermore, using the sdm tool can streamline the installation process even further with its additional features.
Writing OS Image to SD Card
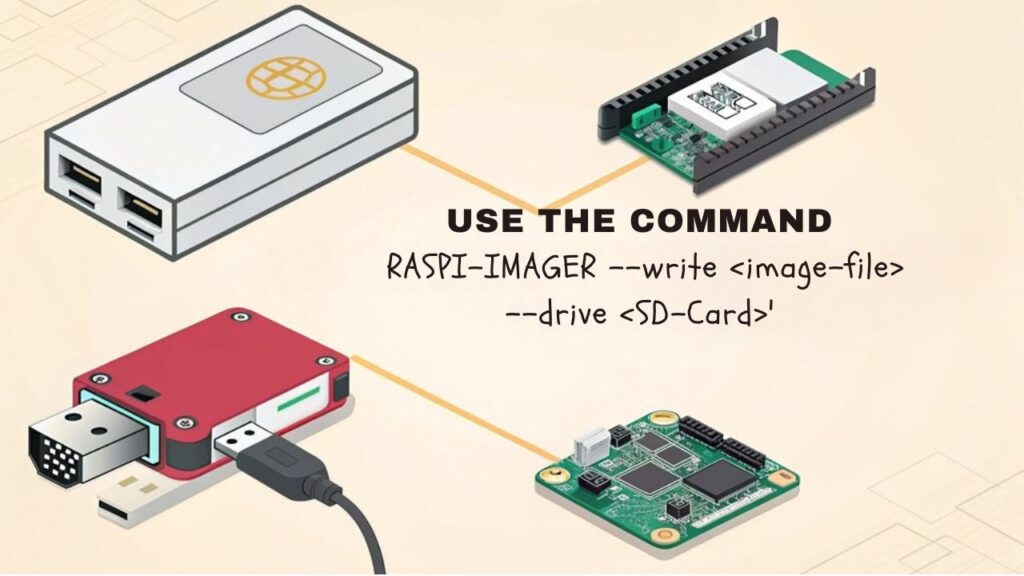
To write the OS image to your SD card, you’ll need to ascertain you’ve accurately identified the correct device. This step is essential to prevent data loss by mistakenly targeting the wrong drive. Here’s how to do it effectively:
- Use the ‘lsblk’ command to list all block devices.
- Identify your SD card, typically labeled as ‘/dev/sdX’ or ‘/dev/mmcblk0’.
- Verify the compatibility of the OS image with your chosen card, ensuring it supports ARMv7 feature sets.
- Confirm your SD card formatting is appropriate for the OS image. Additionally, using the Raspberry Pi Imager tool simplifies this process, as it automatically handles OS installation on SD cards.
Once you’ve confirmed all details, utilize the Raspberry Pi Imager CLI using the ‘rpi-imager’ command with the ‘–cli’ option to write the image. For example, run ‘sudo rpi-imager –cli raspios_lite_armhf –device /dev/sdX’. This command can also include options like ‘–debug’ for detailed output or ‘–sha256’ to verify the image beforehand. Additionally, be sure to check if the OS image is compatible with the SD card size before flashing.
Don’t overlook monitoring the terminal output for progress updates and ensuring you have adequate resources, as high memory usage can lead to increased swap usage.
After the imaging process completes, safely eject the SD card to prevent data corruption.
This careful approach guarantees you’ve got a properly formatted, compatible OS on your SD card, ready for innovative projects
Customizing the Installation
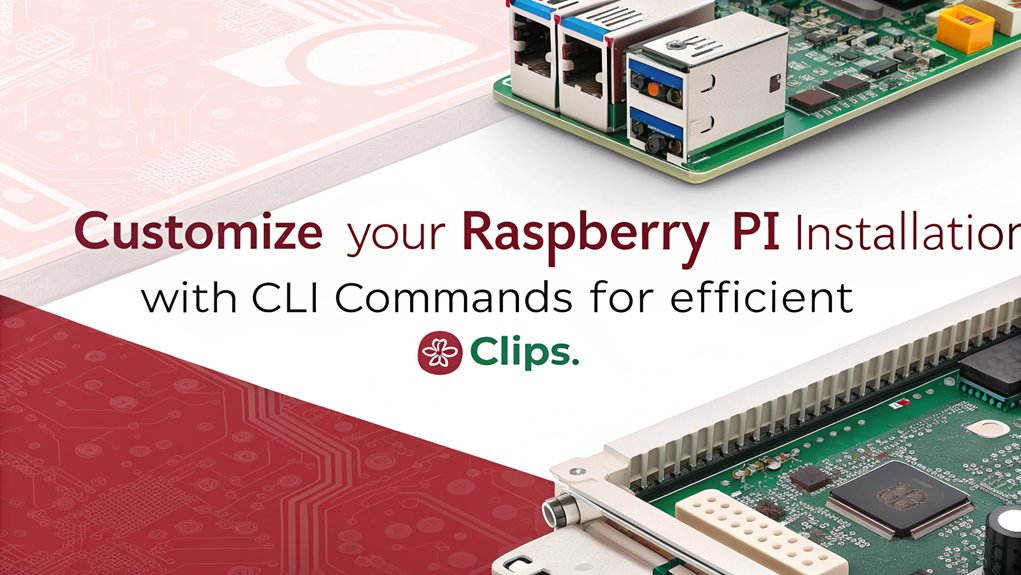
Customizing the installation of your Raspberry Pi OS can greatly enhance your experience, allowing you to tailor the setup to fit your specific needs. One effective way to achieve this is by creating a configuration file, such as ‘config.txt’, where you can set various advanced configurations. You can easily specify settings like hostname, SSH access, and Wi-Fi configuration in this text file. Moreover, due to the limitations of Raspberry Pi Imager CLI customization options, implementing a configuration file becomes essential for users relying solely on command line interfaces. Additionally, the release of the latest version includes enhanced support for the newly released Raspberry Pi 5 model, making it easier to incorporate into your setups.
When you’re ready to pass the configuration file, simply use the ‘–config’ option in the rpi-imager command. For example, you can run: the Raspberry Pi Imager CLU using this command: ‘sudo rpi-imager –cli raspios_lite_armhf –device /dev/sdX –config config.txt’. This integration streamlines the imaging process and allows for automated setups, giving you substantial automation benefits.
You can further enhance customization using first-run scripts, which enable you to execute commands the moment your Raspberry Pi boots up, saving you time on post-installation tasks.
For advanced users, cloudinit configurations and SSH public key setups provide additional layers of flexibility and security. By leveraging these options, you can create a personalized and efficient Raspberry Pi installation that meets your innovation goals.
Configuring Network Settings

Building on the previous customization options, configuring network settings is fundamental for guaranteeing your Raspberry Pi can connect to the internet and communicate effectively. Here’s how to do it:
- Verify you’ve installed the latest version of the Raspberry Pi Imager and open it.
- Press ‘Ctrl + Shift + x’ (or ‘CMD + Shift + x’ on Mac) to access the advanced settings menu.
- Check the box for “Configure Wifi” and enter your WiFi credentials, confirming you select the correct country code for WiFi security.
- Save your settings to apply them during the boot process. Remember that compatible WiFi adapters are important to ensure proper function in case you are using an older Raspberry Pi model that lacks built-in WiFi. Understanding the importance of networking protocols will further enhance your ability to troubleshoot connectivity issues.
If you have multiple networks, use the ‘wpa_supplicant.conf’ file to manage them effectively. Prioritizing networks is vital; by editing this file, you can set which connections your Raspberry Pi should try first.
Once your setup is complete, boot your Raspberry Pi and verify the connection by using the command ‘ifconfig wlan0’ to view the assigned IP address. This guarantees your projects are seamlessly integrated into your network infrastructure, releasing the full potential of your Raspberry Pi for innovative applications.
Monitoring the Imaging Process
Monitoring the imaging process is essential for guaranteeing a successful SD card setup with Raspberry Pi Imager. By utilizing the ‘–debug’ option in your command, you can gain detailed output as the image writes to the SD card.
Although there’s no built-in progress bar, the command line will display progress updates, helping you gauge imaging efficiency. This is similar to the way gcp functions as a file copy tool, which also provides updates on progress during operations. For performance monitoring, consider using system tools like ‘top’ to watch CPU usage and other key metrics while the imaging is underway; this can help you identify any resource bottlenecks that could impact the speed or efficiency of the process. Additionally, tracking CPU temperature, usage, and frequency can provide insights into system health during the imaging process.
If you want more visual feedback, you might incorporate external tools like ‘pv’ in your scripts, allowing you to track file copy progress, although they’re not directly integrated with Raspberry Pi Imager.
Keeping an eye on these elements guarantees that you’re not only aware of each step but also optimizing performance throughout the imaging process.
Completing the Setup

After the imaging process wraps up, you’ll want to verify everything is set for your Raspberry Pi to boot properly. Follow these essential steps to finalize your setup:
- Check Success Message: Look for any success message indicating the OS image has been written correctly.
- Safely Eject the SD Card: Confirm you eject the SD card from your computer properly to avoid data corruption.
- Insert the SD Card: Place the SD card into the Raspberry Pi, ready for initializing boot. Ensure you are using a compatible power supply to prevent damage and ensure performance.
- Power It On: Turn on your Raspberry Pi and, if you haven’t preconfigured settings, you’ll see prompts for hostname, SSH, and Wi-Fi during the first boot. This is crucial because the Raspberry Pi Imager functionality enables seamless installation of operating systems.
Once powered on, your Raspberry Pi will begin the boot process.
If you’ve set up the config.txt file earlier, it’ll streamline your setup by automatically applying your preferences such as setting up language settings.
If not, accessing the console during boot will lead you through the necessary configurations manually.
Troubleshooting Common Issues

When using Raspberry Pi Imager, you might encounter connection problems or issues with the device name. Ensuring you have the correct device name and checking your configuration files can save you a lot of time. Raspberry Pi documentation provides authoritative guidance on software installation and can also help you troubleshoot these common issues efficiently. Additionally, ensuring that your microSD card is of sufficient capacity, such as a Class 10 microSD card, is crucial for smooth OS installation. Let’s explore how to resolve these common stumbling blocks efficiently.
Connection Problems Resolution
Dealing with connection problems can be frustrating, especially when setting up your Raspberry Pi using the Imager tool.
Here are some steps to help you troubleshoot common issues:
- Verify WiFi credentials: Double-check your WiFi settings for accuracy. Incorrect entries can prevent connection.
- Check compatibility: Confirm you’re using the latest version of rpi-imager, which is essential for new hardware and software releases.
- Use manual configuration: If WiFi settings aren’t applied correctly, boot your Pi with a monitor and keyboard to run ‘sudo raspi-config’, allowing you to set up your network properly.
- Enable SSH access: Headless setups require SSH to be configured at the first boot. If it fails afterward, use local login to initialize the Network Manager.
Incorrect Device Name
Connection issues can often lead to another frustrating challenge: identifying the correct device name for your SD card. To avoid inadvertently writing to the wrong device, use the ‘lsblk’ command to perform device verification. The SD card will typically appear as ‘/dev/sdX’ or ‘/dev/mmcblk0’. Make sure you verify the size and details listed in the output.
| Command | Description | Notes |
|---|---|---|
| ‘lsblk’ | List all block devices | Shows the device names |
| ‘lsblk -d’ | Detailed view | Provides file system info |
| ‘udev rules’ | Custom device labeling | Helps distinguish devices |
| ‘lsblk -o’ | Custom output options | View specific columns |
| Document | Log device names | Keeps track of device paths |
Pay close attention to naming conventions; incorrect paths can lead to major mishaps. If your SD card isn’t showing, check your connections or try a different card reader. By following these steps and verifying the device names carefully, you’ll streamline your Raspberry Pi imaging process while minimizing risks.
Configuration File Errors
Configuration file errors can be a major headache during the Raspberry Pi imaging process. If you’re not careful, you might run into several common configuration pitfalls that can derail your project.
To help you troubleshoot these issues efficiently, keep an eye out for these points:
- Check Required Sections: Confirm your file contains the necessary sections like ‘[pi]’.
- Verify Key Names and Values: Double-check that you’re using correct key names (e.g., ‘hostname’ instead of ‘host_name’) and valid values (like the correct Wi-Fi password).
- Avoid Typos: Any typographical errors in the configuration file syntax can lead to failure.
- Review File Path: The configuration file must be specified correctly in your rpi-imager command and be a plain text file.
If you face issues, always verify that your configuration file syntax is accurate. Use a simple text editor to eliminate hidden characters and compare with a known working file.
Avoid unnecessary sections, and you’ll save yourself time and frustration during the imaging process. Stay vigilant, and embrace innovation!
Frequently Asked Questions
Can I Use Raspberry Pi Imager on Windows or Mac?
Imagine building a bridge: you can use Raspberry Pi Imager on Windows or Mac, but verify your system meets the requirements. Both platforms offer functionality for flashing Raspberry Pi OS and compatible Linux distributions efficiently.
Is There a Graphical Interface for Raspberry Pi Imager?
Yes, there’s a graphical interface for Raspberry Pi Imager. It simplifies installation with an intuitive user interface, allowing you to choose software options easily. This makes your image flashing experience efficient and innovative.
How Do I Check the Integrity of the OS Image?
To guarantee your OS image’s integrity, perform image verification through checksum validation. Compute the SHA-256 hash of your image, then compare it with the provided signature; ascertain they match for reliability and security.
What Should I Do if the SD Card Is Not Detected?
If your SD card isn’t detected, try troubleshooting by checking connections and verifying it’s properly inserted. You might also need to perform SD card formatting with an appropriate tool to confirm it’s ready for use.
Can I Create a Bootable USB Drive Instead of an SD Card?
Yes, you can create a bootable USB drive instead of an SD card. Just use the Raspberry Pi Imager to write the OS image onto your flash drive, ensuring it’s correctly set up for booting.
Key Takeaways
- Monitor the imaging process with the ‘–debug’ option for detailed output and system performance using commands like ‘top’.
- Use ‘rpi-imager –list-os’ to display available operating systems for installation after updating your system with ‘sudo apt update’.
- Identify the target SD card using the ‘lsblk’ command before writing the OS image to avoid data loss.
- Execute the command ‘rpi-imager –cli –device /dev/sdX’ to write an OS image directly to the SD card.
- Customize installation settings by creating a ‘config.txt’ file for hostname and network configurations.
Conclusion
To sum up, using the Raspberry Pi Imager CLI makes setting up your Raspberry Pi smoother than a hot knife through butter. Whether you’re installing an OS or customizing your setup, these steps guarantee a hassle-free experience. Don’t hesitate to troubleshoot any hiccups you might face—most issues are easily resolved. With your Pi up and running, plunge into endless projects that release your creativity! You’re now ready to explore the exciting world of Raspberry Pi.

I am a retired software engineer with experience in a multitude of areas including managing AWS and VMWare development environments. I bought a relative a mini-PC a year ago and have become passionate about the technology and its potential to change how we deploy software.