
There are various innovative Raspberry Pi projects for digital art skills. Start with an AI-Enhanced Digital Art Display using Stable Diffusion and DALL-E to generate diverse art styles every 30 minutes. Utilize Openframe for managing and displaying digital artwork in different formats, including images and videos. Explore fractal generation with projects like Mandelbrot Sets and Julia Set Visualization using Python scripts and e-Paper displays. Engage in interactive art installations with Raspberry Pi, such as origami flowers triggering sounds or interactive light displays with Unicorn HAT. For beginners, try generating Mandelbrot Sets or Conway’s Game of Life on an LED matrix. Efficient power management strategies will help you optimize your projects for sustainability. Continuing to explore these projects will uncover even more creative and technical possibilities.
Key Takeaways
- AI-Enhanced Digital Art Display: Use Raspberry Pi to host AI-generated art with algorithms like Stable Diffusion and DALL-E, updating every 30 minutes.
- Fractal Generation: Generate Mandelbrot and Julia sets using Raspberry Pi Pico or Zero, leveraging Micropython and TFT or E-ink displays.
- Interactive Art Installations: Create dynamic installations with Raspberry Pi, incorporating sensors, Unicorn HAT lights, and physical buttons for multi-sensory experiences.
- Beginner-Friendly Projects: Start with projects like Mandelbrot sets and Conway’s Game of Life to learn foundational programming and digital art concepts.
- Community Collaboration: Engage in collaborative art projects using Raspberry Pi, promoting creative coding and interactive art displays for exhibitions.
AI-Enhanced Digital Art Display
When you commence creating an AI-Enhanced Digital Art Display using a Raspberry Pi, you’re about to bring a dynamic and evolving art gallery into your home or office. This project leverages AI algorithms like Stable Diffusion and DALL-E to generate high-quality art from textual descriptions.
The beauty of this setup is that it can be hosted locally on the Raspberry Pi, eliminating the need for an internet connection or subscription services. Using local processing, you can diversify your art styles and topics beyond traditional subjects, guaranteeing constant image diversification. Ensure you have a stable power supply, such as a 5V power supply with specific current needs, to maintain reliable operation.
You can program the system to fetch and display new AI-generated art automatically, creating a continuously evolving display. This project encourages creative coding and allows for interactive feedback, making it a great tool for community collaborations and art exhibitions.
With tools like OnnxStream optimizing AI models for less powerful hardware, even a Raspberry Pi Zero 2 W can handle the task. The e-ink display, such as the Inky Impression 7.3-inch 7-color e-ink display, guarantees low power consumption while maintaining persistent images. For instance, each new image takes approximately 30 minutes to generate.
This integration of technology with art redefines creative expression and offers a unique blend of innovation and flexibility, making it perfect for those interested in pushing the boundaries of digital art. By following basic programming steps in Python using an IDE like Thonny or mu, you can start with simple scripts to learn basic syntax and data types before diving into more complex projects.
Using Openframe for Digital Art
Using Openframe for Digital Art
To elevate your digital art experience, consider using Openframe on your Raspberry Pi. This platform is designed to streamline the display and management of digital artwork, making it an ideal choice for artists and enthusiasts alike. Openframe supports various formats including images, videos, web artwork, and shaders. The Raspberry Pi, with its support for technologies like OpenGL ES2, makes it an excellent hardware choice for this application.
Setting Up Openframe
To get started, download and write the preinstalled Openframe image to an SD card using balenaEtcher.
Insert the SD card, WiFi dongle, and connect your monitor, keyboard, and mouse to the Raspberry Pi. Connect to the internet via WiFi or ethernet and configure the necessary settings, including timezone and SSH if needed.
Execute the install shell script to install Openframe; this process takes about 20 minutes. After installation, restart the Pi to proceed with setup.
Key Features of Openframe
– Frame Configuration: Login with default credentials (username: pi, password: raspberry) unless changed during setup.
Start Openframe by typing ‘openframe’ in the command line and follow prompts for username, password, and frame name.
– Artwork Management: Log in to the Openframe web app to access public streams or personal artwork collections.
Select and push artwork formats like images, videos, shaders, and websites.
– Remote Control: Use the web app to control the frame remotely and switch between artworks.
You can also add curators to manage artwork without editing frame settings.
– Custom Extensions: Install extensions for new artwork formats or interactivity via the command line.
Verify to install dependencies using ‘npm install’ in each repository directory.
With Openframe, you can enjoy seamless art streaming, user authentication, and the ability to create custom extensions, making it a powerful tool for digital art enthusiasts.
Projects With E-Ink Displays
Key Features of E-Ink Display Projects
| Feature | Details |
|---|---|
| Display Choice | Pimoroni Inky Impression 7-color e-ink display, Waveshare e-ink display |
| Raspberry Pi Model | Raspberry Pi Zero 2 W, other Raspberry Pi models |
| Power Efficiency | Retains images without power; low power consumption |
| Display Size and Resolution | 7.3-inch to 7.5-inch, resolutions like 640×384 pixels |
| Color Capabilities | Supports multiple colors, such as seven separate colors on Inky Impression |
E-ink displays are renowned for their power efficiency and aesthetic appeal. Powered by Raspberry Pi models, these displays can showcase AI-generated art using algorithms like DALL-E or Stable Diffusion. The art can be generated locally on the Raspberry Pi, eliminating the need for an internet connection. With Python scripting, you can automate the process of fetching and displaying new art periodically.
The e ink aesthetics are enhanced when housed in picture frames or custom enclosures, making them perfect for home decor. Additional features such as weather forecasts and calendar entries can also be integrated, adding functionality to the display. The ecological benefits of e-ink displays, including low power consumption and image retention without power, make them a compelling choice for digital art projects.
Moreover, these projects can leverage Face Recognition technologies to personalize the content displayed on the e-ink screen, ensuring that only authorized users can view or interact with the digital art.
These displays are particularly useful because they retain images without power, which is a significant advantage in terms of energy efficiency and display longevity.
Digital Art With Processing
Using the Processing development environment, you can create interactive and dynamic digital art that leverages the capabilities of your Raspberry Pi. This powerful combination allows you to push the boundaries of digital aesthetics and coding creativity.
With Processing, you can design full-screen sketches that run seamlessly on your Raspberry Pi, creating immersive art installations.
Here are some key aspects to take into account:
- Integrate Physical Controls: Add physical buttons or sensors to enable user interaction without needing attached peripherals.
- Optimize Performance: Confirm your Raspberry Pi is optimized to handle the demands of running interactive and dynamic art.
- Custom Scripts: Use basic Linux scripting to automate and customize the art display process.
- AI-Generated Art: Combine Processing with AI art generation services like DALL-E or Stable Diffusion for unique and evolving art displays.
By incorporating E-Paper Display technology, you can enhance the energy efficiency and readability of your digital art installations, making them suitable for well-lit areas and reducing eye strain.
Additionally, using platforms like Openframe, which supports images, videos, web artwork, and shaders, can further expand your creative possibilities by offering a versatile framework for displaying digital art on your Raspberry Pi. Openframe encourages experimentation with new media formats and provides tools for reaching wider audiences.
Customizing Art Displays
Customizing art displays on your Raspberry Pi opens up a world of creative possibilities, allowing you to tailor your digital art installations to precise specifications. For instance, if you’re interested in AI-generated art, you can use a Raspberry Pi 4 Model B to connect to services like DALL-E or Stable Diffusion. By acquiring API keys and writing scripts in Python, you can fetch and display AI-generated images on a high-resolution E-Paper display, guaranteeing an ideal visual experience.
To make your art display more interactive, you can integrate sensors such as light and motion sensors. Connect these sensors to the GPIO pins on your Raspberry Pi and program them using Python or Scratch. This allows you to automate LED lighting based on room brightness or trigger animations and sound effects when motion is detected. Calibration of these sensors is essential to guarantee accurate responses, especially when using a photoresistor as the light sensor.
For animated and pixel art, consider using Adafruit’s RGB Matrix Bonnet with your Raspberry Pi. Configure the matrix using Python and enhance for power efficiency by using black backgrounds and selective LED activation. This setup can be further optimized with a 32×32 RGB Matrix module for detailed pixelated images.
You can also create custom enclosures that match your desired aesthetic, ensuring proper ventilation and cooling for the Raspberry Pi. This thorough approach to art display customization enables you to create unique and engaging interactive installations that showcase your digital art skills.
Beginner-Friendly Software Projects
To start your journey into beginner-friendly software projects on the Raspberry Pi for digital art, you can begin by generating Mandelbrot sets. This involves writing a program to visualize these complex mathematical sets, which can be both visually stunning and educational.
Additionally, running Conway’s Game of Life is another engaging project that introduces you to simple yet complex rule-based systems, making it an excellent way to learn programming concepts while creating interesting digital art.
You can also use Python, a language well-supported by Raspberry Pi, to create these projects and explore the capabilities of the device’s ARM architecture. For more advanced projects, you might consider using Processing sketches with physical button controls, which can enhance the interactive nature of your digital art installations.
Generating Mandelbrot Sets
Generating Mandelbrot sets is a fascinating and accessible project that leverages the capabilities of Raspberry Pi Pico boards, making it an ideal beginner-friendly software project. This project involves calculating the Mandelbrot set, a complex fractal, which is perfect for exploring parallel computation and fractal exploration.
To get started, you’ll need to set up your Raspberry Pi Pico boards with Micropython and specific drivers like ILI9341 for TFT displays. You’ll also need to wire up your hardware components such as TFT displays, buttons, and potentiometers according to the code definitions. Connecting multiple Picos via an I2C network allows you to distribute the workload, greatly speeding up the computation process.
The use of dual-core RP2040 microcontrollers in each Pico enhances performance significantly.
Here are some key aspects to enjoy about this project:
- Parallel Computation: Distribute the workload across multiple Raspberry Pi Picos to achieve a fourfold speedup compared to using a single Pico.
- Visual Feedback: Immediate visual feedback through VGA or TFT displays lets you see the computed fractals in real-time.
- Educational Value: This project teaches parallel computing, distributed systems, and Micropython programming in a practical way.
- Ease of Setup: Detailed guides are available for setting up both the hardware and software components.
This project not only enhances your digital art skills but also demonstrates the power of parallel computation in a compact, distributed system.
Running the Game of Life
After exploring the intricate world of Mandelbrot sets, you’re now ready to commence another engaging project: running the Game of Life on your Raspberry Pi.
This beginner-friendly project involves setting up a hardware configuration and writing some Python code to bring Conway’s Game of Life to life on an LED matrix. Ensure you have the necessary materials, including a Raspberry Pi 3B+ or higher, as this model includes built-in Wi-Fi for easy internet access internet connectivity.
Start by connecting your LED grids to the Raspberry Pi and using NeoPixel drivers for smooth and controlled LED changes. Verify all USB connections are secure. This project operates in an infinite grid space, allowing for endless patterns to emerge.
Next, implement the Game of Life rules in Python, using libraries like Open Pixel for LED control. The rules are straightforward: cells can be alive or dead, and their status evolves based on the number of live neighbors they have.
Initialize your grid with live and dead cells, then apply the Game of Life rules in each iteration. Watch as grid patterns emerge and evolve over time, displaying cell evolution in a mesmerizing animation.
You can customize this project further by adding features like pattern selection or a web interface to enhance your digital art skills. Observing these grid patterns can be both educational and visually engaging, making this project an excellent way to boost your digital art skills.
Generating Fractals and Sets
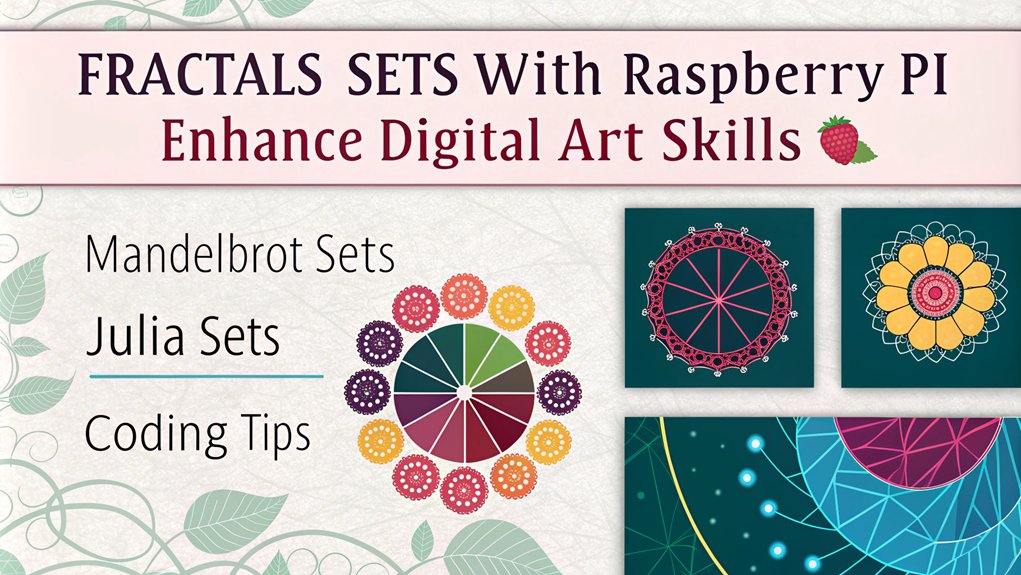
When generating fractals and sets with your Raspberry Pi, you can create stunning Mandelbrot Set visuals, visualize intricate Julia Sets, and craft unique fractal art pieces.
By leveraging the low power and high resolution of a Waveshare 7.5″ E-ink display, you can generate black and white images that showcase the intricate details of these mathematical wonders. This project is made possible by using a Raspberry Pi Zero as the main processing unit.
With Python scripts and support from projects like Omni-EPD, you can easily configure and update your fractal art to change every few hours. The fractals exhibit complex detail at any level of magnification, characterized by self-similarity.
Additionally, these fractals are commonly found in nature, such as in fern leaves and frost patterns, making them a fascinating subject for digital art.
Mandelbrot Set Generation
To explore the fascinating world of fractal generation, you’ll start with one of the most iconic sets in mathematics: the Mandelbrot set. This complex and visually stunning set is a cornerstone of digital art, and generating it on your Raspberry Pi can be a rewarding project.
Setting Up Your Project
- Install Necessary Packages: Use ‘pip’ to install Python packages like SciPy, Pillow, NumPy, and tqdm. These libraries are essential for numerical computations and image processing.
- Configure Your Display: Enable the SPI interface for e-Paper displays or set up OLED displays via I2C. This guarantees your Raspberry Pi can communicate with the display effectively. For more advanced projects, consider using OpenGL ES 3.1 for enhanced graphics rendering.
- Generate the Mandelbrot Set: Utilize SciPy and NumPy for numerical computations to generate the Mandelbrot set. You’ll need to implement color mapping to visualize the set in a compelling way. The process involves evaluating divergence using an iterative function mandel(c, maxiter).
- Enhance Iterations: Iterate over each pixel in the complex plane and adjust the maximum number of iterations for the best rendering. Iteration enhancement is key to achieving detailed and efficient fractal generation.
Julia Set Visualization
Generating the Julia Set on your Raspberry Pi is a fascinating project that explores the intricate world of fractal visualization. To get started, you’ll need a few key components: a Raspberry Pi Zero for its compact size and efficiency, a Waveshare 7.5″ E-ink raw display for its compelling visual output, and the corresponding Waveshare E-Ink display HAT to promote communication between the display and the Raspberry Pi.
You can find the necessary code for generating Julia Set fractals on GitHub, which often includes step-by-step guides. Using Python scripts, you can automate the rendering process to optimize it for your display’s dimensions and capabilities. These scripts allow you to customize fractal parameters such as color mapping and iteration limits, guaranteeing display optimization that brings out the full beauty of the fractals.
Assembly involves simple modifications to a picture frame to accommodate the display HAT’s ribbon cable. After installing the required software and configuring the E-ink display, you can test your setup to verify smooth generation and display of the fractals. With proper troubleshooting, you’ll be able to address common issues like connectivity problems or display errors.
The E-ink display provides a clear and detailed view of the fractals, even in low-light conditions. You can also create animations by varying the parameters of the Julia Set over time, adding an interactive element to your project.
This project not only enhances your digital art skills but also explores complex mathematical visualizations in an engaging way.
Fractal Art Creation
Creating fractal art with a Raspberry Pi is an exciting venture that combines mathematics, programming, and visual creativity. You can harness the power of these small computers to generate stunning fractal patterns, such as the famous Mandelbrot set. Here’s how you can get started:
To create fractal art, you’ll typically use a Raspberry Pi model like the Pi Zero, Pi 3B, or Pi 4, which are favored for their form factor and low power consumption. For display, e-Ink or e-Paper displays like the Waveshare e-Paper Display HAT are ideal due to their low power usage and persistent image display.
Here are some key points to evaluate:
- Fractal Algorithms: Use Python to implement fractal algorithms like the Mandelbrot set. Libraries such as Pillow and NumPy are essential for image processing and numerical computations.
- Display Options: Choose between 7.5-inch or other-sized e-Paper displays, and decide whether to use black and white or color displays.
- Power and Control: Power your project via USB or a power bank, and include buttons and potentiometers for added functionality.
- Cluster Computing: For faster generation times, think about using multiple Raspberry Pi Pico boards connected over an I2C network to leverage parallel computation.
Interactive Art Installations
Interactive art installations, powered by the Raspberry Pi, offer a dynamic and engaging way to experience digital art. One compelling example is the interactive origami installation, where visitors can interact with origami flowers trigger soothing sounds. This setup utilizes a Raspberry Pi and Bare Conductive’s Pi Cap for capacitive sensing, allowing electric paint and copper tape to connect the origami flowers to the Pi Cap.
With 64 origami flowers mounted on a canvas, this installation is both lightweight and transportable.
For a multi-sensory experience, you can combine the Raspberry Pi with the Unicorn HAT and Python to display pixel art and interactive light installations. React and React-Native can be used to develop web apps that allow users to generate their own art. This integration guarantees seamless communication between hardware components through established libraries and HATs.
In public spaces, Raspberry Pi can run full-screen Processing sketches controlled by physical buttons. Using 3D-printed materials, basic wiring, and Linux scripting, these installations remain clean and unobtrusive.
They can even incorporate real-time environmental data to influence the art display, making user interaction through physical buttons and sensors truly dynamic.
Efficient Power Management

When designing Raspberry Pi projects for digital art, efficient power management is essential to guarantee your installations run smoothly and sustainably. This is particularly important if your project is intended to operate continuously or in environments where power resources are limited.
To achieve this, you can implement several hardware and software optimizations. Here are some key strategies:
- Disable Unused Hardware: Turn off unused hardware components like Wi-Fi, Bluetooth, and HDMI output by modifying the ‘/boot/config.txt’ file. This reduces unnecessary power draw.
- Use Energy-Efficient Accessories: Select power-efficient accessories such as low-power peripherals, efficient power supplies, and Raspberry Pi HATs designed for energy savings.
- Optimize Software and Scripts: Minimize background processes and services, use lightweight alternatives for common tasks, and implement sleep or idle modes in your scripts to reduce power consumption during inactivity.
- Employ Power Management Tools: Utilize tools like ‘vcgencmd’ and ‘cron’ to schedule shutdowns and startups, and configure custom power profiles to optimize energy efficiency.
Frequently Asked Questions
How Do I Ensure Stable Internet for AI Art Generation?
To guarantee stable internet for AI art generation, focus on internet connectivity solutions like fiber optic or high-speed Wi-Fi. Implement bandwidth optimization techniques such as Quality of Service (QoS) settings and traffic management to prioritize data transfer.
What Are the Best Practices for Securing API Keys?
To safeguard your API keys, treat them like gold in a fortress Use environment variables for secure storage, implement strict access control, rotate keys every 30 days, and monitor usage meticulously to prevent any breaches.
Can I Use Other Single-Board Computers Besides Raspberry Pi?
You can definitely use other single-board computers besides Raspberry Pi. Alternative platforms like Orange Pi 5, ODROID N2+, and Asus Tinker Board S offer different single board comparisons, each with unique features and capabilities suited to various projects.
How Can I Optimize Power Consumption for Continuous Display on a Raspberry Pi?
To optimize power consumption for continuous display, think of your Raspberry Pi as a thrifty artist, painting with energy efficiency. Use low-power displays like e-ink, manage power to peripherals, and implement smart power management to reduce energy draw. Underclock the CPU and adjust voltage settings to save power without compromising performance. Disable unnecessary interfaces like HDMI, USB, and LEDs, and automate display on/off times using cron jobs. This meticulous approach will transform your project into a masterpiece of energy efficiency.
What Are the Legal Considerations for Displaying Ai-Generated Art?
When displaying AI-generated art, consider copyright issues and fair use. Guarantee human involvement in the creative process to qualify for protection. Be transparent about AI use and respect existing copyrights to avoid violations.
Conclusion
As you explore these top Raspberry Pi projects, you’ll not only enhance your digital art skills but also investigate the fascinating world of tech and creativity. From AI-enhanced displays to interactive installations, each project offers a unique learning experience. So, are you ready to transform your ideas into stunning digital art pieces? With the right tools and a bit of curiosity, the possibilities are endless. Immerse yourself and let your creativity shine.

I am a retired software engineer with experience in a multitude of areas including managing AWS and VMWare development environments. I bought a relative a mini-PC a year ago and have become passionate about the technology and its potential to change how we deploy software.