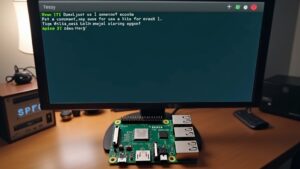
Taking a screenshot with Raspberry Pi OS is simple. You can use tools like Scrot, GNOME Screenshot, or Grim. To install Scrot, run ‘sudo apt-get install scrot’ in your terminal. For GNOME Screenshot, update your system with ‘sudo apt update’ and then install it using ‘sudo apt install gnome-screenshot’. Scrot captures the entire screen with a default command, while GNOME Screenshot allows you to select specific areas or windows. Grim offers flexibility for custom captures. If you want to enhance your screenshot experience, explore more features and techniques that these tools offer.
Key Takeaways
- Install Scrot with ‘sudo apt-get install scrot’ for quick and efficient full-screen captures from the terminal.
- Use GNOME Screenshot by updating and installing with ‘sudo apt install gnome-screenshot’ for interactive capture options.
- Capture specific areas or windows using the interactive features of GNOME Screenshot, accessible from the Accessories menu.
- For flexible screenshot management, use Grim with the command ‘grim ‘ for regional or complete screen captures.
- Organize and label screenshots systematically to ensure easy retrieval and efficient access for future use.
Using Scrot for Screenshots
Note: If you are using the latest UI for Raspberry Pi, Wayland, Scrot no longer seems to work. I and others are seeing just a black image. The recommendation is to switch to grim.
To grab a screenshot on your Raspberry Pi, you can use Scrot, a lightweight and efficient tool. First, you’ll want to install it by running ‘sudo apt-get install scrot’. With a package size of only 800kB, it’s compatible with Raspbian and other Linux distributions. Additionally, Scrot is designed to manage screenshots effectively in a Linux environment.
One of its main advantages is that the installation process is quick and simple. By default, your screen captures save to the ‘/home/pi’ directory, using filenames that include the date, time, and resolution. For basic usage, simply type ‘scrot’ to capture the entire screen. You can specify the file name and format using ‘scrot filename.png’, while different file formats like JPEG or GIF can be indicated by changing the extension.
Scrot also offers advanced options, such as adding a delay (‘-d X’), capturing a selected area (‘-s’), or the current window (‘-u’). You can tweak image quality with the ‘-q X’ command.
For efficient screenshot organization, consider using post-capture commands by appending ‘-e command’.
Need more help? Use ‘scrot -h’ for detailed guidance or ‘man scrot’ for an extensive list of features and command combinations.
Installing GNOME Screenshot

Before you install GNOME Screenshot, you’ll want to make sure your system is up-to-date. Start by running the commands to update and upgrade your package list. This ensures you have the latest software available, similar to how Raspberry Pi OS is regularly updated for stability and performance. Command line offers a quick installation method for many users. Once that’s done, you can easily install GNOME Screenshot and access it from the system menu. Additionally, using VNC connections can simplify the process of capturing screenshots from remote sessions, enhancing accessibility for users.
Update Your System
While your Raspberry Pi is connected to the internet, it’s important to start by updating your system to confirm you have the latest features and security patches. This system maintenance is essential for improving software reliability and making certain a smooth experience, particularly when installing new applications like GNOME Screenshot. Regularly performing system updates ensures that you receive important bug fixes and enhancements that can improve overall performance. Additionally, keeping your system updated is crucial for utilizing the latest screenshot tools, which can enhance your capturing capabilities.
Begin by opening the terminal. Use the command ‘sudo apt update’ to refresh your package lists. This step retrieves the latest information from the repositories but doesn’t install new packages just yet.
After that, execute ‘sudo apt full-upgrade’ to upgrade all installed packages to their latest versions. This command is thorough, updating dependencies and even removing unnecessary packages.
Once that’s complete, clean up your system by running ‘sudo apt autoremove’, which helps reclaim disk space by eliminating unneeded packages.
If the kernel has been updated, it’s good practice to reboot your Raspberry Pi with ‘sudo reboot’. This assures all changes take effect and maintains system stability.
After the reboot, check to confirm all updates were successfully applied and you’re ready to move on!
Accessing GNOME Screenshot
Installing GNOME Screenshot enhances your ability to easily capture visuals on your Raspberry Pi. To get started, you’ll want to install the utility via the command line. Simply run ‘sudo apt install gnome-screenshot’ after updating your package list. This utility is compatible with Pi 3, Pi 4, and Pi 5, and works well on both 32-bit and 64-bit versions of Raspberry Pi OS. Additionally, it offers various screenshot options, allowing users to choose between selecting a specific area or capturing the entire screen. Scrot, the built-in screenshot tool on Raspbian, also provides command-line flexibility for users who prefer that method.
After installation, access GNOME Screenshot through the Raspberry Pi system menu by directing yourself to Accessories > Screenshot. Using this menu direction not only grants you easy access but also offers various accessibility options for capturing images.
Here’s a quick overview of GNOME Screenshot’s features:
| Feature | Description |
|---|---|
| Screen Capture Mode | Captures full screen by default |
| Save Location | Screenshots are stored in the home directory |
| Customization Options | Set up keyboard shortcuts for easy access |
With GNOME Screenshot, capturing your screen becomes an effortless experience tailored to your needs. Enjoy innovating with your visuals!
Features of GNOME Screenshot
GNOME Screenshot offers a versatile set of features that simplifies image capturing on your Raspberry Pi OS. With its robust capabilities, you’ll experience great screenshot flexibility and advanced options that cater to your specific needs.
Here are some of its standout features:
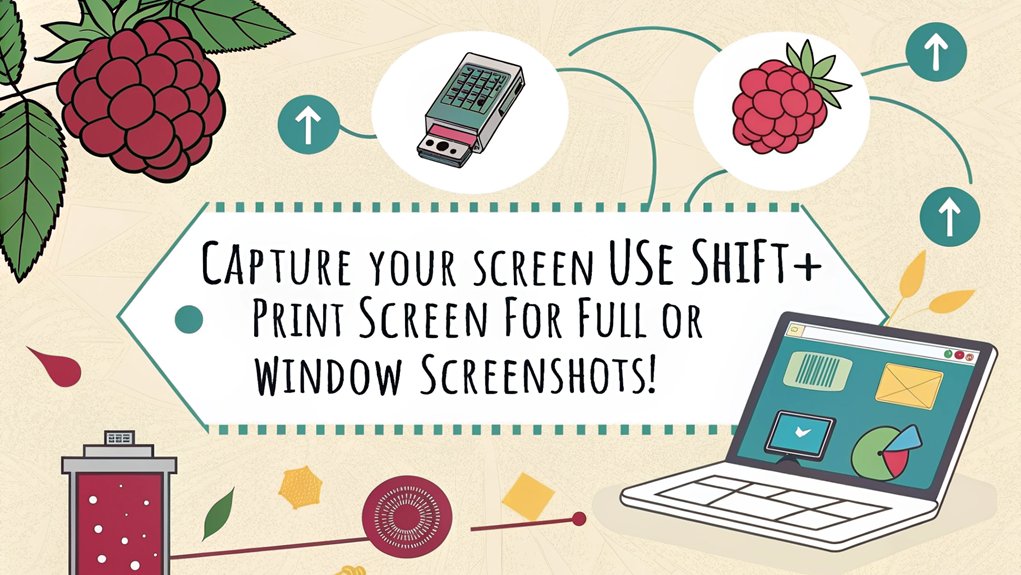
- Full Screen Capture: Hit the ‘Print Screen’ key or use the command without options.
- Specific Window Capture: Use the ‘Alt + Print Screen’ combo for an active window.
- Selected Area Capture: Want a section? Just press ‘Shift + Print Screen’.
- Include Mouse Pointer: You can capture your mouse too with the ‘-p’ option.
- Interactive Mode: Enable runtime adjustments using the ‘-i’ option. The default command to open the application is ‘gnome-screenshot’.
These features not only streamline your screenshot tasks but also enable innovative ways to document your work. Additionally, the integration of screencasting features allows for dynamic screen recording, making it even easier to share your processes.
Plus, with options like a delay before capturing and the ability to automate actions with external tools, you’ll have complete control over your screenshot experience.
Whether you’re creating tutorials or keeping track of your projects, GNOME Screenshot empowers you to capture and manage images effortlessly.
Capturing With Grim
When you want to capture your screen using Grim, the command syntax is straightforward: simply type ‘grim ‘ to save your screenshot. This tool can be easily integrated with Raspberry Pi OS to enhance your screenshot-taking capabilities. You’ve got options for both entire screens and specific regions, making it flexible for your needs. This command-line tool is especially useful for remote usage, as you can take screenshots via SSH and VNC access to your Raspberry Pi. If you’re working remotely, remember to set the ‘DISPLAY’ variable to avoid errors during capture. Additionally, ensure your Raspberry Pi is connected to a stable network using its dual-band wireless LAN for uninterrupted remote operations.
Command Syntax Overview
Capturing your screen on Raspberry Pi OS is straightforward with the Grim command. This powerful tool simplifies the process of taking screenshots, enabling you to capture your display exactly as you see it. One of the benefits of using screenshot tools like Grim is that they help create effective tutorials by providing visual aids for better understanding. Additionally, using tools like Grim helps maintain compliance with data policies as your projects evolve.
Here’s a quick overview of the command syntax you’ll use with Grim:
- Command: Run ‘grim ‘ to capture the entire screen.
- Default Format: Your screenshot will automatically save as a PNG file.
- Example: Typing ‘grim test.png’ captures your screen and saves it in PNG format.
- Remote Access: You can use Grim over SSH; just remember to set the DISPLAY variable first.
- Flexibility: Grim can easily integrate into scripts for automated screenshots or remote management.
Make sure you’re familiar with these screenshot commands, as they’re the backbone of your screen capturing experience.
If you’re unsure about additional options, typing ‘man grim’ in the terminal will provide you with detailed guidance on various image formats and advanced features.
With Grim, you’re set to capture your screen efficiently and innovate in your projects.
Options for Capture
Several options enhance your screenshot experience with Grim on Raspberry Pi OS. As the preinstalled screenshot tool, Grim allows you to capture your screen through the command line, making it easy to use the “Prnt Screen” key for a quick capture. By default, it saves images in PNG format, but you also have the option to adjust image quality for optimization.
When you want to customize your captures, Grim offers several advanced features. You can set a delay before taking a screenshot, ensuring you’re ready for the perfect moment. If you need a specific area of your screen, simply specify that region.
One of the standout features is the ability to freeze the screen, preventing any unwanted artifacts, which is especially useful for creating polished presentations.
Given that Raspberry Pi is known for its low power consumption and suitability for continuous operation low power consumption, this makes it an ideal choice for running screenshot tools like Grim without significant resource drain.
Keep in mind that Grim works primarily on the X11 display server. If you’re using it via SSH, make sure to set the DISPLAY variable to avoid errors.
These options not only streamline your workflow but also make your screenshots shine, perfect for those seeking innovation in their Raspberry Pi projects.
Remote Usage Setup
To capture screenshots remotely with Grim on Raspberry Pi OS, you’ll first need to set up your environment correctly. Here’s what you need to do:
- Set the ‘DISPLAY’ variable by executing ‘export DISPLAY=:0’ in your terminal.
- Maintain a stable SSH connection from your remote machine to the Raspberry Pi.
- Use the command line interface to run your commands effortlessly.
- Prepare to transfer files using SCP or SFTP.
- Specify a directory for saving the captured screenshots on both machines.
Once your setup is ready, you’re all set to use the Grim command. Run the command as follows: ‘grim test.png’, maintaining your ‘DISPLAY’ variable is correctly set first. Enabling SSH is crucial for ensuring that you can access your Raspberry Pi remotely. Additionally, using tools like screenshot utilities can help enhance your workflow and improve your screenshot management experience. If you want to add features like delay or image quality, explore Grim’s options! Should you encounter errors, like connection issues or file permissions, double-check your SSH configuration and directory settings.
Finally, transfer your screenshot to your remote machine with SCP: ‘scp test.png @’. This powerful setup maximizes innovation while allowing seamless remote usage.
Setting Up Flameshot

Setting up Flameshot on your Raspberry Pi OS is a straightforward process that enhances your screenshot capabilities. Start by installing Pi-Apps via terminal with the command: ‘wget -qO- https://raw.githubusercontent.com/Botspot/pi-apps/master/install | bash’. Once installed, launch Pi-Apps from your start menu, navigate to the Tools category, and select Flameshot for installation. It is particularly important to note that Flameshot is compatible with Raspberry Pi models 3, 4, and 5. Additionally, you can choose the Distro-Specific Installation options that suit your setup to ensure you’re using the best method for your needs.
After installation, access Flameshot from the Graphics menu: Menu -> Graphics -> Flameshot. You can also run it from the terminal using the command ‘flameshot’. To maximize efficiency, configure Flameshot for easy access by replacing the default screenshot tool. Edit the ‘/etc/xdg/openbox/lxde-pi-rc.xml’ file and substitute ‘scrot’ with ‘flameshot.’ Create a script named ‘scrot’ to ensure Flameshot launches if necessary, and then reboot your system.
Finally, utilize Flameshot by clicking the tray icon and selecting “Take screenshot” for specific area captures. Consider adding a symlink to the AppImage executable for command-line shortcuts. With these Flameshot configurations and screenshot shortcuts, you’ll elevate your Raspberry Pi experience significantly.
Remote Screenshots With SSH

With Flameshot set up for local screenshots, you can also capture images remotely using SSH. This opens doors to innovative remote screenshot techniques that let you manage your Raspberry Pi effortlessly from another computer.
Here’s how to do it:
- Install Scrot if it’s not pre-installed (‘sudo apt install scrot’).
- Capture the entire screen using the command: ‘DISPLAY=:0 scrot screenshot.png’.
- Use secure file transfer with ‘scp’ to send the screenshot to your desired computer.
- Set a delay before capturing with ‘scrot -d 4’ if needed.
- For efficiency, automate the screenshot process with a single SSH command. Remember, SSH (Secure Shell) provides a secure protocol for accessing your Raspberry Pi remotely.
For a seamless experience, consider using passwordless SSH access by setting up public/private keys. This way, you eliminate password prompts, speeding up your workflow.
Whether capturing a moment for documentation or monitoring your Pi’s activities, mastering these remote screenshot techniques guarantees you stay on top of tasks without being tethered to your Raspberry Pi.
Just remember to specify the correct directory when transferring files, and you’ll be set to capture and share screenshots with ease.
Tips for Effective Screenshots
When you want to capture the perfect screenshot on your Raspberry Pi, a few simple tips can make all the difference.
Start by using the built-in tools like Scrot and GNOME Screenshot. With Scrot, you can capture the entire screen using the PrintScreen key or a custom command. If you’d like more control, GNOME Screenshot allows you to select specific areas or windows, enhancing your screenshot organization by giving you exactly what you need. Ensure your Raspberry Pi is properly configured with a stable power supply, such as a 5V adapter, to avoid interruptions during the capture process, similar to ensuring reliable power for a Raspberry Pi Music Server.
Consider adding a delay with the ‘-d’ option to prepare your screen before capturing. To refine your images further, exploring image editing tools like Flameshot can add effects such as borders and drop shadows, elevating the visual appeal of your screenshots. Additionally, using tools like ffmpeg for dynamic content enables you to capture high-quality video recordings of your screen activity, perfect for tutorials.
Don’t overlook the importance of proper storage and organization of your screenshots for easy access later. Label your files clearly or create specific folders to categorize them based on projects or themes. This way, you maintain an efficient workflow similar to how you would set up and organize files in a Raspbian environment using tools like Thonny IDE for coding projects.
By following these tips, you’ll not only create stunning screenshots but also streamline your overall process, making it easier to share your innovative Raspberry Pi projects with the world.
Frequently Asked Questions
Can I Change the Default Screenshot Filename Format on Raspberry Pi OS?
Yes, you can change the default screenshot naming conventions. By modifying the ‘scrot’ command in configuration files, you can specify custom file names and default file types, enhancing your screenshot organization and flexibility.
What Image Formats Are Supported for Screenshots on Raspberry Pi OS?
Sleek, stylish screenshots support various formats! You’ll find PNG support standard, JPG compatibility for flexibility, BMP format for simplicity, GIF options for animations, and TIFF usage for high-quality captures. Choose what fits your needs!
How Do I Access Screenshots Taken Earlier on Raspberry Pi OS?
To access your earlier screenshots, navigate to the ‘/home/pi’ directory. Utilize screenshot management tools for file organization, ensuring easy retrieval. Use commands like ‘ls’ to list files or customize scripts for better organization.
Can Screenshots Be Edited After Capturing on Raspberry Pi OS?
You might think you can’t edit screenshots after capturing, but that’s not true. Explore screenshot editing options and utilize screenshot annotation tools like GIMP or Pinta for enhancement, ensuring your images stand out brilliantly!
Is It Possible to Set a Custom Keyboard Shortcut On Raspberry Pi OS?
Yes, you can set custom shortcuts by mapping specific keys to commands. Editing the configuration files allows you to create innovative keyboard mappings that suit your workflow, enhancing your efficiency and user experience.
Conclusion
In the digital landscape, capturing moments on your Raspberry Pi can feel like painting with light. With tools like Scrot, GNOME Screenshot, and Flameshot, you’re armed for creativity and efficiency. Whether you’re snapping a quick image or orchestrating a remote session, these methods guarantee you get the perfect shot every time. So, release your inner artist and let your screen tell your story—one screenshot at a time. Your Raspberry Pi journey awaits!

I am a retired software engineer with experience in a multitude of areas including managing AWS and VMWare development environments. I bought a relative a mini-PC a year ago and have become passionate about the technology and its potential to change how we deploy software.