
Transform Your Raspberry Pi Into a Powerful Network Guardian
Imagine having an eagle-eyed security guard monitoring every packet of data flowing through your home network, detecting threats before they cause damage, and all of this running on a device smaller than a deck of cards. That’s exactly what you’ll achieve when you set up Snort on a Raspberry Pi.
Snort on a Raspberry Pi combines the power of enterprise-grade intrusion detection with the affordability and flexibility of the world’s most popular single-board computer. This powerful duo creates a dedicated security appliance that works tirelessly to protect your digital domain while consuming minimal power and space.
Whether you’re a cybersecurity enthusiast looking to strengthen your home network or an IT professional seeking a cost-effective solution for small business security, this guide will walk you through transforming your humble Pi into a sophisticated threat detection system. You’ll discover how to leverage Snort’s real-time packet analysis, custom rule creation, and comprehensive logging capabilities—all running on hardware that costs less than a typical dinner for two.
Ready to elevate your network security without breaking the bank? Let’s dive into the essential steps for deploying Snort on a Raspberry Pi and put your network’s protection on autopilot.
Key Takeaways
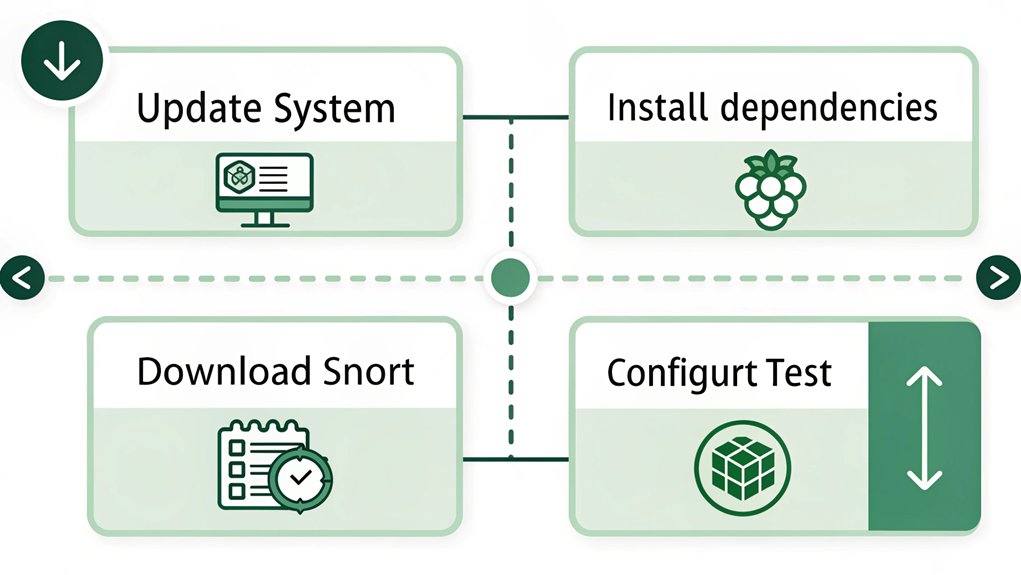
- Install Raspbian OS on your Raspberry Pi using the official Raspberry Pi Imager and ensure system packages are updated.
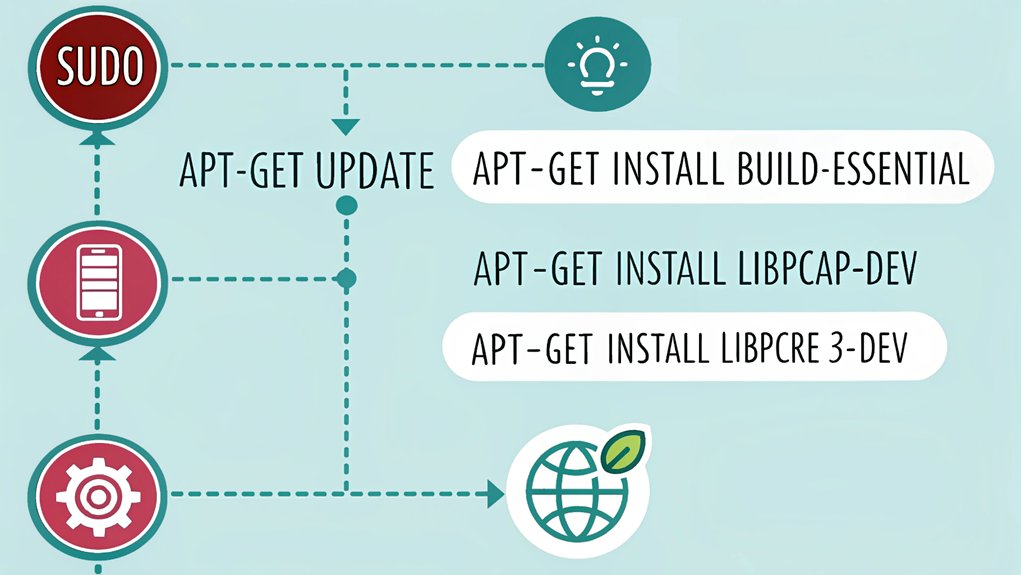
- Install required dependencies including build-essential, libpcap-dev, and libpcre3-dev using apt-get package manager.
- Download and install Snort from the official website, then configure snort.conf with appropriate network settings and rules.
- Start Snort service using systemctl command and enable automatic startup at boot time.
- Test installation by running ‘snort -T -c /etc/snort/snort.conf’ and monitor network traffic in real-time using console mode.
What Is Snort and Why Use It on Raspberry Pi
Snort is a powerful open-source intrusion detection and prevention system (IDS/IPS) that analyzes network traffic in real-time to detect potential security threats. You can leverage Snort on a Raspberry Pi to monitor network packets, detect malicious activities, and protect your home network from cyber attacks.
The system allows you to create custom rules and alerts while maintaining detailed logs of suspicious activities.
Running Snort on a Raspberry Pi offers unique benefits, including low power consumption, compact size, and cost-effectiveness. You’ll get a dedicated security appliance that operates 24/7 without significant overhead.
The Raspberry Pi’s capabilities perfectly match Snort’s requirements, making it an ideal platform for home network security. You can position this lightweight setup anywhere in your network, ensuring thorough traffic monitoring without impacting your existing infrastructure.
Required Hardware and Software Components
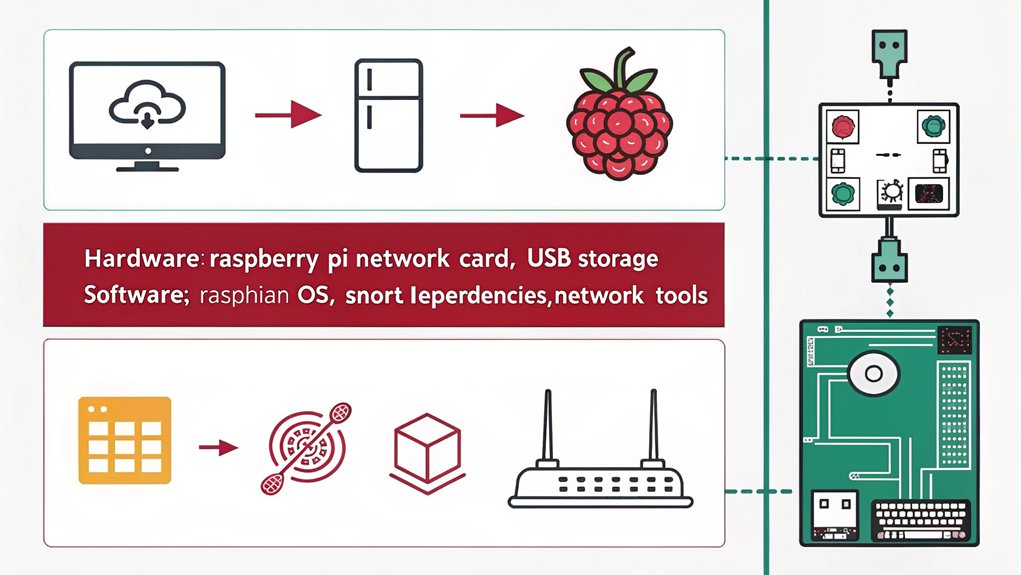
You’ll need a Raspberry Pi 3 or newer with at least 1GB RAM and 16GB storage capacity to run Snort effectively.
The essential software components include Raspbian OS (Debian-based), build tools like gcc and make, plus the libpcap packet capture library.
Before starting the Snort installation, you should update your system’s package manager and install dependencies using apt-get commands.
Raspberry Pi Device Requirements
Before installing Snort on your Raspberry Pi, you’ll need several essential hardware and software components.
The Raspberry Pi’s capabilities make it an ideal platform for network security monitoring when properly equipped.
Your Raspberry Pi must meet these minimum requirements:
- Raspberry Pi 3 Model B or newer for adequate processing power to handle network packet inspection
- At least 2GB RAM to support Snort’s memory-intensive operations
- 32GB or larger microSD card with class 10 speed rating for peak performance
- Ethernet port for direct network connection monitoring
A newer Raspberry Pi model will provide better performance when running Snort, especially in high-traffic environments.
The device should be dedicated solely to network security monitoring to guarantee consistent and reliable operation.
Essential Software Installation Tools
Installing Snort requires several essential software tools and packages to function properly on the Raspberry Pi operating system.
You’ll need to start with a package manager like apt-get to handle dependencies and installations efficiently. Install build-essential, libpcap-dev, and libpcre3-dev as your core development tools.
For peak performance, you should include tcpdump for packet capture analysis and iptables for firewall configuration.
When considering essential software alternatives, you might opt for Suricata or Zeek if Snort doesn’t meet your specific needs.
If you encounter issues during setup, apply installation troubleshooting techniques like checking system logs, verifying package versions, and ensuring proper repository configurations.
Keep your system updated with the latest security patches and maintain adequate storage space for log files and rule updates.
Setting Up Your Raspberry Pi Operating System
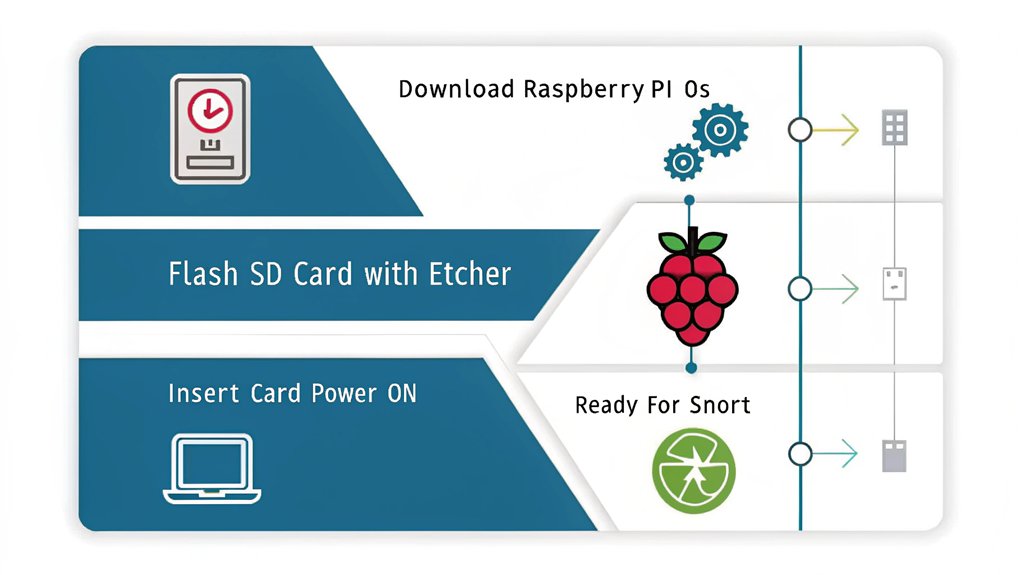
To begin setting up Snort on your Raspberry Pi, you’ll need to install a fresh copy of Raspberry Pi OS using the Raspberry Pi Imager tool on your computer.
After downloading and launching the imager, select the latest version of Raspberry Pi OS and write it to your microSD card.
Once your Pi boots up with the new OS, you’ll need to guarantee it meets the minimum system requirements by running ‘sudo apt-get update’ and ‘sudo apt-get upgrade’ to update all packages.
Installing Raspbian From Scratch
The foundation for running Snort begins with a fresh installation of Raspbian on your Raspberry Pi.
Before diving into the Raspbian basics, you’ll need to download the latest Raspbian image and prepare your microSD card for installation.
Here’s what you’ll need to get started:
- Download the official Raspbian image from the Raspberry Pi website
- Install a reliable SD card writing tool like Etcher or Win32DiskImager
- Format your microSD card (minimum 8GB) to guarantee a clean installation
- Write the Raspbian image to your microSD card using your chosen tool
Once you’ve written the image, insert the microSD card into your Raspberry Pi.
On first boot, Raspbian will expand to utilize your card’s full capacity and prompt you through initial configuration settings.
Configuring System Requirements
Before diving into Snort installation, you’ll need to configure your Raspberry Pi’s operating system with several critical requirements. Start by running system compatibility checks to verify your hardware meets the minimum specifications for running Snort effectively.
Update your package repositories and upgrade existing software packages to their latest versions.
Next, implement key performance optimization techniques to maximize your Pi’s capabilities. Adjust your memory split settings to allocate more RAM to the CPU rather than GPU.
Configure your swap file size according to your available RAM, typically a 2:1 ratio. Enable SSH for remote management and modify your network interface settings to support promiscuous mode.
Finally, install essential development tools and libraries that Snort depends on, including libpcap and daq packages.
Installing Dependencies for Snort
Several essential dependencies must be installed to guarantee Snort runs properly on your Raspberry Pi. Efficient dependency management guarantees your system has all the required components before installation.
You’ll need to handle library installations through your package manager to set up the necessary framework.
Key dependencies to install:
- libpcap-dev for packet capture capabilities
- libpcre3-dev for pattern matching functionality
- libdumbnet-dev for network interface handling
- libdaq-dev for data acquisition modules
After confirming these core dependencies, run the package manager’s update command to guarantee you’re working with the latest versions.
This preparation streamlines the main Snort installation process and prevents common errors that occur from missing libraries. Your Raspberry Pi will then have the foundation needed for Snort’s network monitoring capabilities.
Downloading and Installing Snort
Downloading Snort requires accessing the official Snort website (snort.org) to obtain the latest stable release version.
When you’ve located the download link, you’ll need to verify the package’s checksum to guarantee file integrity before proceeding with the installation.
Execute the installation by running the configuration script with appropriate flags to enable specific snort features you’ll need.
Common installation challenges include missing dependencies, incompatible library versions, and architecture-specific issues with the Raspberry Pi. You’ll need to resolve these by installing additional packages or compiling from source.
Configure Snort’s initial setup by creating necessary directories, setting permissions, and generating a default configuration file.
Test the installation by running Snort in console mode to verify it’s working correctly on your Raspberry Pi.
Basic Snort Configuration Steps

After installing Snort, you’ll need to configure your rules and variables in the snort.conf file to establish detection parameters and network settings.
You can modify existing rules or create custom ones to match your security requirements, while also setting critical variables like HOME_NET and EXTERNAL_NET.
Once your configuration is complete, you’ll start the Snort service using systemctl commands to begin monitoring your network traffic.
Configure Rules and Variables
The initial step in configuring Snort involves setting up essential rules and variables in the snort.conf file.
You’ll need to focus on rule management and variable customization to establish an effective intrusion detection system on your Raspberry Pi.
To properly configure your Snort installation:
- Set your HOME_NET variable to define your internal network range
- Configure EXTERNAL_NET to specify networks you want to monitor
- Establish RULE_PATH variables to point to your custom rule locations
- Define your NO_PROXY networks to prevent false positives
You’ll find these configuration settings in the main snort.conf file.
Remember to uncomment only the rules you need, as enabling too many rules can impact your Raspberry Pi’s performance.
After making changes, validate your configuration using ‘snort -T’ to test for syntax errors.
Start Snort Service Running
Starting Snort requires launching the service with proper configuration parameters and verifying it runs correctly.
To start the Snort service, you’ll need to run the start command with your configuration file specified. Use “sudo systemctl start snort” or “/etc/init.d/snort start” depending on your system configuration.
Verify that the Snort service is running by checking its status with “systemctl status snort”. You’ll see active status information and recent log entries if it’s operating properly.
If you encounter any errors, review your configuration file and system logs for troubleshooting. Once running, Snort will begin monitoring network traffic according to your defined rules and generate alerts based on detected threats.
You can also configure Snort to start automatically at boot time using “sudo systemctl enable snort”.
Creating Custom Snort Rules
Monitoring network traffic effectively requires well-crafted custom Snort rules that match your security needs.
You’ll need to understand rule syntax and management to create targeted detection capabilities for your Raspberry Pi implementation.
To develop your custom rule examples, follow these essential steps:
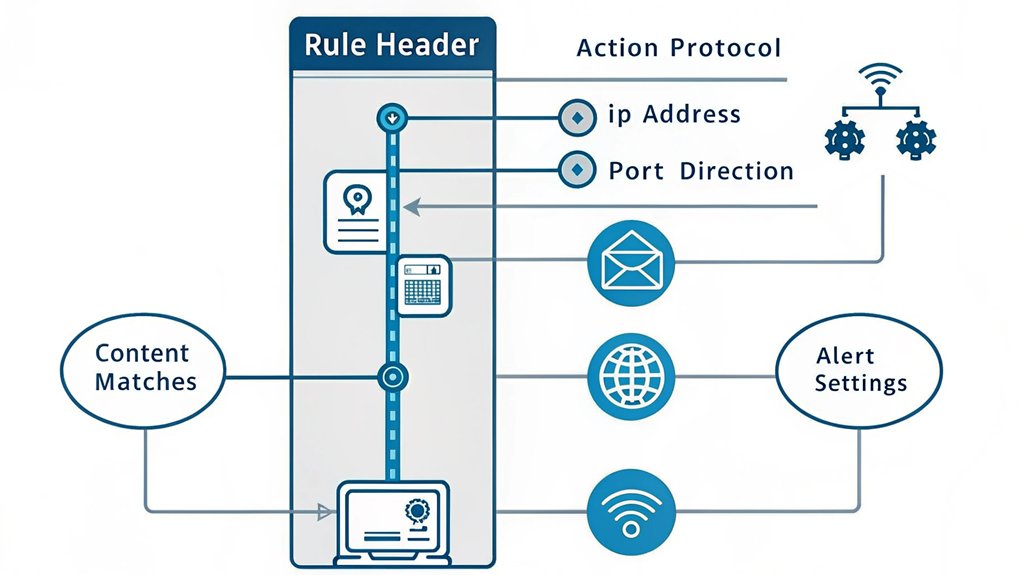
- Place your rules in /etc/snort/rules/local.rules file
- Format each rule with required elements: action, protocol, IP addresses, port numbers, and direction operators
- Include specific detection options using keywords and regular expressions
- Test your rules thoroughly using pcap files before deployment
Remember to organize your rules logically and maintain proper documentation for future reference.
Keep your rule set lean by removing redundant entries and optimizing performance through careful rule placement and ordering within your configuration.
Testing Your Snort Installation
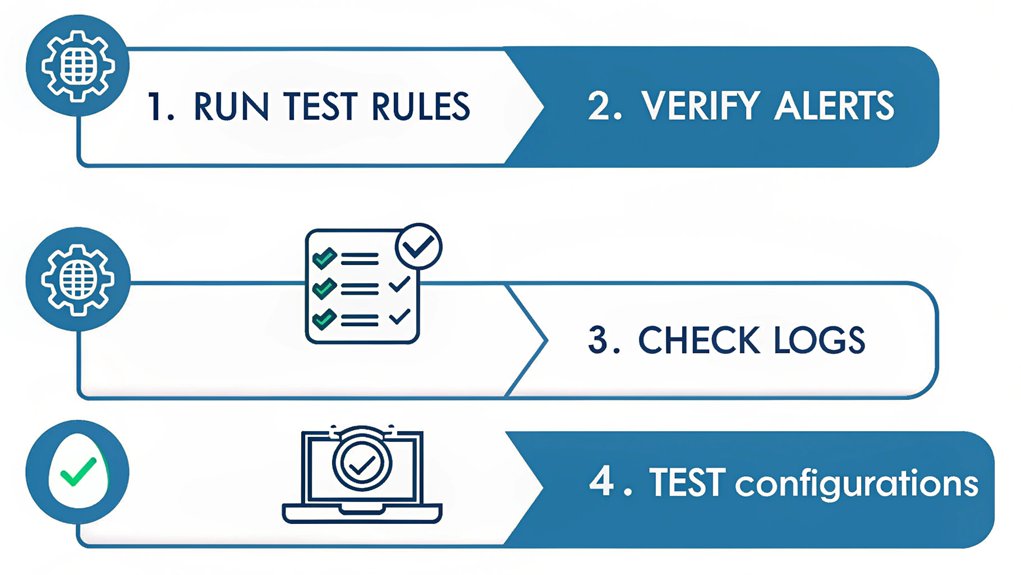
After setting up your custom rules, verifying your Snort installation’s functionality becomes the next logical step. You’ll need to conduct systematic tests to confirm peak snort performance and accurate network analysis.
| Test Type | Command | Expected Result |
|---|---|---|
| Config Check | ‘snort -T -c /etc/snort/snort.conf’ | No errors reported |
| Live Capture | ‘snort -v -i eth0’ | Packet headers display |
| Alert Test | ‘snort -A console -q -c /etc/snort/snort.conf’ | Alerts trigger correctly |
| Performance | ‘snort -p -c /etc/snort/snort.conf’ | Resource usage stats |
Run each test sequentially to validate your configuration. Monitor system resource consumption during these tests, as the Raspberry Pi has limited processing power. Adjust your rule sets if you notice performance degradation or false positives. Document any anomalies you encounter for future troubleshooting and enhancement.
Monitoring Network Traffic With Snort

Once you’ve verified your Snort installation, real-time network traffic monitoring becomes your next critical task. Effective network security depends on your ability to analyze and respond to potential threats in real-time. Traffic analysis through Snort gives you deep visibility into your network activities.
Real-time monitoring and analysis of network traffic is essential for maintaining strong security and identifying threats as they emerge.
To maximize your monitoring effectiveness:
- Configure Snort’s network interface to promiscuous mode for capturing all packets
- Set up custom rules to detect specific threats relevant to your environment
- Enable real-time alerts through syslog or a dedicated console
- Implement log rotation to manage storage efficiently
You’ll want to focus on analyzing suspicious patterns in your traffic logs and fine-tuning your detection rules based on observed behaviors.
Consider using visualization tools to help identify anomalies and potential security incidents more quickly.
Troubleshooting Common Snort Issues
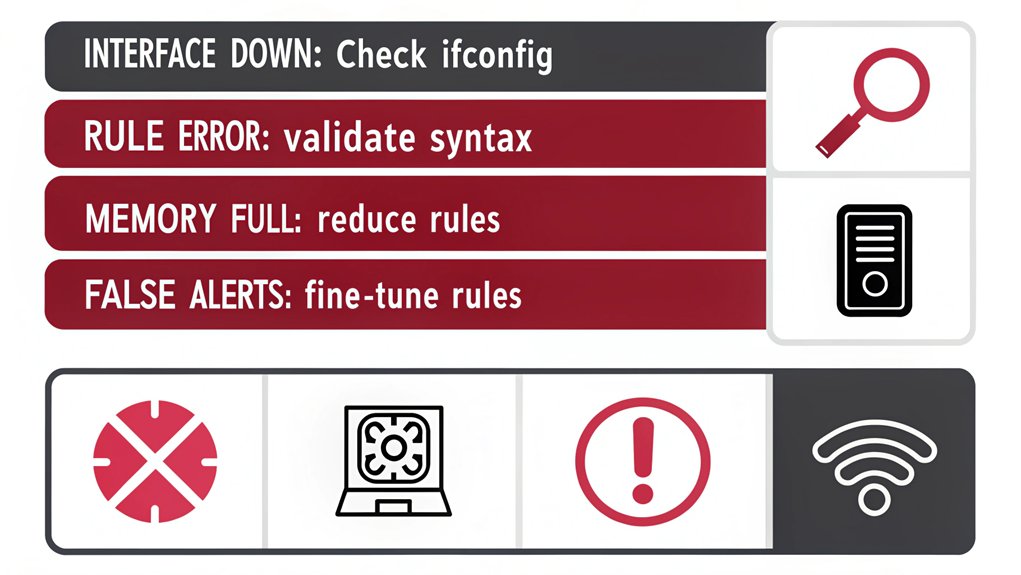
When running Snort on a Raspberry Pi, you’ll likely encounter several common technical issues that can affect performance and reliability. To address common errors, first check your configuration files for syntax mistakes and confirm that your rule sets are properly formatted.
Monitor your CPU and memory usage, as resource constraints can lead to packet drops and missed detections.
Performance issues often stem from overtaxed system resources. You’ll need to optimize your rule sets by removing redundant rules and fine-tuning your preprocessor settings.
If you notice high CPU usage, consider adjusting your packet capture settings or implementing hardware acceleration.
Check your log files regularly for error messages and unexpected behaviors.
When troubleshooting network connectivity problems, verify your network interface settings and ascertain Snort has proper permissions to access your network devices.
Frequently Asked Questions
Can Snort Run Simultaneously With Other Network Monitoring Tools on Raspberry Pi?
Picture your Pi as a skilled juggler. You can run Snort alongside other network tools by adjusting your Snort configuration and hardware resources, but you’ll need proper network tool compatibility settings.
How Much Network Traffic Can a Raspberry Pi Handle With Snort?
Your Pi’s network capacity for Snort depends on your model, but you’ll typically handle 10-50 Mbps effectively for traffic analysis before experiencing performance degradation. Consider hardware limitations for ideal monitoring.
Will Running Snort Significantly Impact My Raspberry Pi’s Performance?
You’ll notice performance impact, but with proper Snort optimization and Raspberry Pi settings, you can minimize slowdown. Focus on essential rules, tune processor priorities, and monitor resource usage regularly.
Can I Access Snort Alerts Remotely From My Smartphone?
You can configure remote access to Snort alerts through smartphone notifications using tools like Barnyard2 with a web interface or by setting up PushBullet/IFTTT integration for real-time monitoring.
How Long Does Snort Typically Store Logs Before Needing Archive Management?
You’ll need to manage log retention based on your storage capacity, but typically Snort logs should be archived every 7-14 days using automated archive strategies to maintain peak performance.
Conclusion
Like a vigilant guard dog protecting your home, you’ve now equipped your Raspberry Pi with Snort’s powerful intrusion detection capabilities. You’ll find that your network’s security has transformed from a simple fence into an intelligent perimeter defense system. By following these configuration steps, testing procedures, and monitoring protocols, you’ve created a professional-grade security solution that actively safeguards your digital infrastructure.

I am a retired software engineer with experience in a multitude of areas including managing AWS and VMWare development environments. I bought a relative a mini-PC a year ago and have become passionate about the technology and its potential to change how we deploy software.