
To build a solar-powered Raspberry Pi, start by selecting a compatible solar panel rated between 1W to 10W and a battery with at least 6600mAh capacity, like Li-Po or Li-ion. Integrate a DC-DC boost converter to output stable 5V. Wire the solar panel to a charge controller, connect the battery, and then link it to the voltage regulator for the Raspberry Pi. Monitor energy flow with a charge controller and optimize power management using a PiJuice HAT. Regularly analyze performance for efficiency. By adjusting connections and components, you’ll maximize your solar setup’s capability. You’ll uncover even more valuable insights ahead.
Key Takeaways
- Select solar panels rated between 1W to 10W, ensuring they provide at least 5V output for effective Raspberry Pi operation.
- Use a Li-Po or Li-ion battery around 6600mAh for energy storage, enabling operation during low sunlight periods.
- Integrate a DC-DC boost converter, like the Adafruit PowerBoost 1000, to regulate output voltage to 5V for the Raspberry Pi.
- Implement power-efficient coding practices and select low-power peripherals to maximize energy conservation.
- Regularly monitor the system’s performance and adjust solar panel angles to optimize sunlight exposure throughout the year.
Components Required
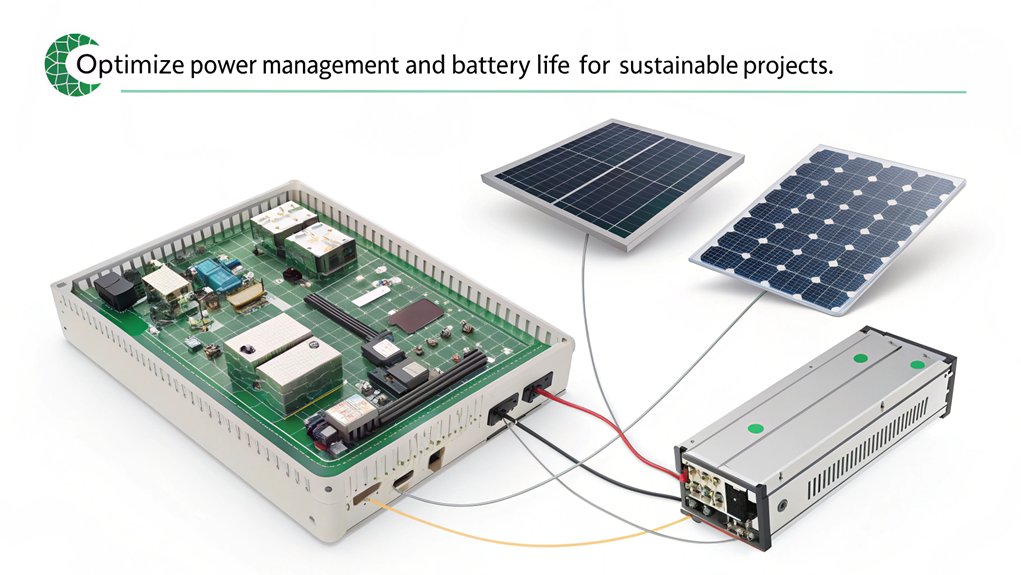
When building a solar-powered Raspberry Pi, you’ll need several key components to secure a successful and efficient setup. First, focus on solar panel selection. A typical panel for DIY projects should have a power rating between 1W and 10W, with voltage compatibility at 5V to 9V. Verify the panel can connect directly to your solar charger module, as efficiency will hinge on proper compatibility and sufficient light exposure. It’s essential to consider using multiple solar panels to provide adequate power, especially during cloudy conditions.
Next, consider battery capacity. A common choice is a Li-Po or Li-ion battery, usually boasting a nominal voltage of 3.7V. For continuous operation, opt for batteries with around 6600mAh capacity, so they’ll energize your Raspberry Pi during off-peak sunlight hours. Using renewable energy for your power source enhances sustainability and reduces reliance on traditional electricity.
Remember, the battery needs to be charged by the solar charger module during the day and discharged safely when the solar power is unavailable.
To achieve the necessary voltage for your Raspberry Pi, a DC-DC boost converter is essential. Choose a reliable option, like the Adafruit PowerBoost 1000, to raise the output voltage to 5V.
Don’t forget to gather switches and connectors to streamline your wiring, verifying your setup functions seamlessly.
Power System Design
A well-designed power system is fundamental to guarantee your solar-powered Raspberry Pi operates effectively and efficiently. Start by evaluating the power requirements of your Raspberry Pi model, with the Raspberry Pi Zero consuming about 160mA and the Raspberry Pi 4B requiring more.
Verify your solar panel outputs at least 5V; ideally, higher wattage and current ratings will charge your battery faster. For efficiency, size your system for at least 8 hours of sunlight at 70% capacity. Consider using multiple solar panels—such as four 2W cells for a Raspberry Pi Zero—to meet demands. The system could use two Voltaic 3.4W solar panels to enhance energy capture.
System efficiency will also depend on proper solar panel orientation, maximizing energy capture throughout the day.
Choose a suitable battery, such as a 6600mAh LiPo, to maintain operation during nighttime, taking advantage of a charge controller to regulate charging and prevent damage. Ensure your charge controller provides a constant voltage and includes features for brownout protection, allowing safe shutdowns.
Wiring and Connections
Wiring and connections are critical to guaranteeing your solar-powered Raspberry Pi functions reliably. Start by connecting the solar panel to the charge controller—identify and link the positive and negative terminals securely to prevent disconnections. Next, connect the battery to the charge controller, guaranteeing your battery cables are appropriately gauged and insulated. The battery acts as a buffer against power supply fluctuations. For effective power management, consider using a PiJuice Hat to control charging and discharging effectively with your Raspberry Pi. Additionally, the system’s capabilities are enhanced by its ability to monitor 20 different environmental variables.
For the voltage regulator, use a charge controller like the TP4056, connecting its OUT+ and OUT- pins to a suitable DC/DC converter that outputs 5V.
Finally, wire the voltage regulator to the Raspberry Pi, paying close attention to guarantee that the positive terminal connects to the 5V pin and the negative to the GND pin. Guarantee all connections are secure before exposing the system to sunlight.
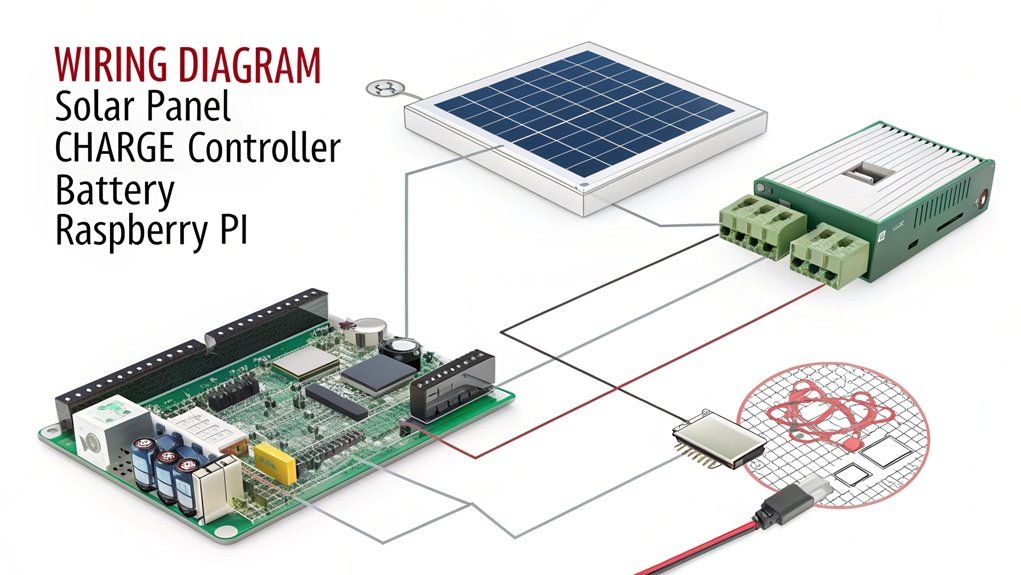
Here’s a simple wiring diagram to guide you:
| Component | Connection |
|---|---|
| Solar Panel | Charge Controller |
| Charge Controller | Battery |
| Battery | Voltage Regulator |
| Voltage Regulator | Raspberry Pi |
For effective connection troubleshooting, maintain a clean and organized workspace.
Safety and Power Management
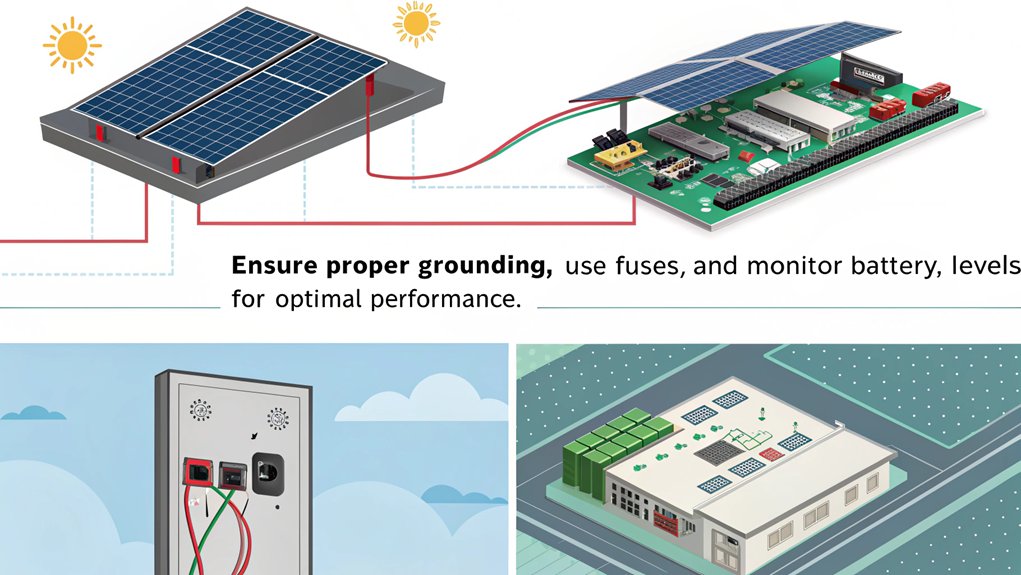
To guarantee your solar-powered Raspberry Pi operates safely and efficiently, it’s crucial to implement proper safety precautions and power management strategies. Start by identifying the positive (+) and negative (-) terminals on the battery and charge controller to avoid incorrect connections. Confirm all connections are secure before exposing the solar panel to sunlight, and use a battery cable to minimize the risk of short circuits. Incorporating a UPS can also protect against power abnormalities like surges and spikes, ensuring hardware safety and data integrity.
Select a battery with adequate capacity to store energy for nighttime use, matching your Raspberry Pi’s voltage requirements, typically 5V or 12V, with a voltage regulator. Additionally, remember that sufficient sunlight exposure is essential for reliable battery charging. Monitor your battery voltage throughout the day to verify it’s charging correctly. If power consumption is a concern, opting for lower consumption peripherals can facilitate power optimization. Additionally, leveraging the latest commit updates ensures ongoing maintenance and enhancements to your solar management system.
Incorporate safety features like a PiJuice HAT, which enables automatic safe shutdowns based on battery charge percentage, preventing over-discharge. Set minimum charge thresholds to avoid data corruption and use scripts to disconnect power-hungry devices when they’re not needed. This approach also helps in minimizing downtime and costs associated with unexpected shutdowns, enhancing overall reliability and security through continuous operation.
With diligent attention to safety and effective battery management practices, you’ll confirm your solar-powered Raspberry Pi remains both reliable and efficient.
Performance Testing and Optimization
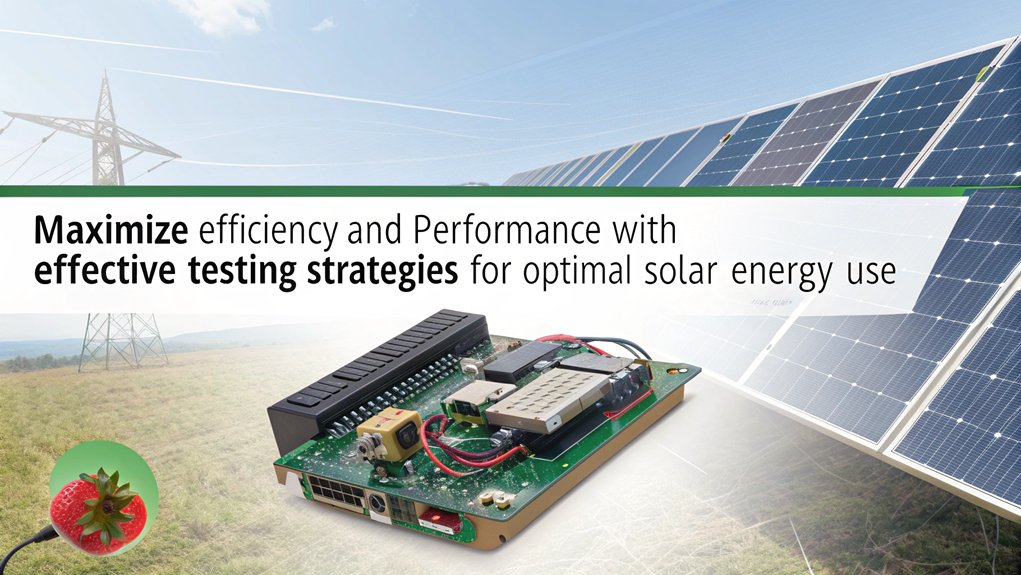
While the initial setup is essential, continuous performance testing and optimization are what keep your solar-powered Raspberry Pi functioning at its best. Start by tracking power consumption using tools like the charge controller. This helps you monitor the current flowing from the solar panel to both the battery and the Pi.
Recording usage patterns allows you to identify inefficiencies, which can lead to adjustments that enhance overall performance. Evaluate your solar panel’s efficiency by calculating average peak sunlight hours, particularly during winter. Verify the panel can provide sufficient power during these critical times and adjust its angle for ideal exposure. The system utilizes a 50-watt solar panel to ensure adequate energy production for the Raspberry Pi. Additionally, utilizing efficient peripherals is vital to minimizing power draw and enhancing effectiveness.
Battery longevity considerably hinges on proper sizing; factor in enough capacity to sustain your system during periods of low sunlight. To maximize your setup’s efficiency, use peripherals with lower power consumption and implement power-efficient coding practices.
Disabling unused features on the Raspberry Pi and utilizing sleep modes during idle periods can drastically reduce power load. By monitoring these elements and refining your approach, you’ll verify your solar-powered Raspberry Pi maintains peak functionality and reliability throughout its operation.
Frequently Asked Questions
Can I Use a Raspberry Pi Zero Instead of a Raspberry Pi 4?
You can use a Raspberry Pi Zero instead of a Raspberry Pi 4, but consider the Raspberry Pi comparison regarding power requirements. The Zero’s lower consumption makes it ideal for projects needing efficiency and less power draw.
What Types of Solar Panels Are Most Efficient for This Project?
Imagine powering your innovative device with energy-efficient solar panels. Monocrystalline panels, offering 18-24% efficiency, excel in compact spaces. Polycrystalline panels, while slightly less efficient, provide a cost-effective alternative without sacrificing sustainability. Choose wisely for best results.
How Do I Estimate My Energy Consumption Accurately?
To estimate your energy consumption accurately, implement energy monitoring tools and calculate your average usage. Factor in battery sizing based on this data, ensuring you can meet your energy needs efficiently and sustainably.
Can I Use My Raspberry Pi While Charging the Battery?
Yes, you can use your Raspberry Pi while charging the battery, as long as your power management and charging circuits are designed effectively. This setup guarantees continuous operation while maintaining energy efficiency and safeguarding device longevity.
What Programming Language Can I Use for Data Logging?
For data logging, you can use Python scripts for their simplicity and extensive libraries. C++ libraries are also available for more performance-demanding tasks, offering flexibility for various applications while keeping your projects innovative and efficient.
Conclusion
In summary, as you harness the sun’s energy to power your Raspberry Pi, you’ll not only reduce your carbon footprint but also gain valuable insights into renewable energy systems. It’s fascinating how a simple project can lead to a deeper understanding of both technology and sustainability. With careful design and testing, you can optimize performance while ensuring safety. The result is not just a functional setup; it’s a demonstration of innovation, efficiency, and your commitment to a greener future.

I am a retired software engineer with experience in a multitude of areas including managing AWS and VMWare development environments. I bought a relative a mini-PC a year ago and have become passionate about the technology and its potential to change how we deploy software.