
Using Raspberry Pi Imager effectively requires some thought. Start with its intuitive interface to easily navigate OS options like Raspberry Pi OS and Ubuntu. Access advanced settings by pressing ‘CTRL + SHIFT + X’ for quick configurations like SSH and WiFi. Utilize built-in OS options for smoother installations and keep your microSD cards updated for peak performance. Always shut down your Raspberry Pi before power-off to maintain the file system. Handle your GPIO pins with care and use USB2 ports for better card reading. Activating automation features can save you time during setups. There’s even more to explore that can enhance your experience.
Key Takeaways
- Utilize the ‘CTRL + SHIFT + X’ shortcut to access advanced options for configuring SSH, WiFi, and disabling overscan efficiently.
- Make use of pre-configuration settings to save time by entering WiFi credentials and hostname during initial setup.
- Opt for high-performance microSD cards and USB 3.0 readers to significantly speed up the image writing process for headless setups.
- Keep essential OS images cached within the Imager for quick reinstallation, reducing downtime when switching between different operating systems.
- Regularly update your software with ‘sudo apt update’ and ‘sudo apt upgrade’ to maintain security and optimal performance on your Raspberry Pi.
Using the Intuitive Interface
The Raspberry Pi Imager greets you with its user-friendly interface, making the process of selecting and writing an operating system to your SD card seamless. It features a clean design with a simple button structure, including three main options: Choose OS, Choose Storage, and Write. To maximize your experience, keep these interface navigation tips in mind. When you click the “Choose OS” button, you’ll see a variety of operating system options—everything from Raspberry Pi OS to other alternatives like Ubuntu and Manjaro ARM Linux. It’s straightforward to explore these options.
Once you select your OS, use the “Choose Storage” button to target your SD card. The Raspberry Pi Imager supports various operating systems, making it convenient for users to find the right OS for their project. Additionally, the latest version of the Imager enhances support for the newly released Raspberry Pi 5 model, which includes features like dual-band Wi-Fi. The Imager also ensures compatibility with different architectures, including ARMv7 feature sets, ensuring older models can be supported as well. The “Write” button initiates writing the selected OS to your card, so make certain you’re confident in your choices. This button functionality overview allows you to quickly grasp how to efficiently configure your setup. With tabbed navigation also introduced in recent versions, it’s even easier to customize your experience.
Accessing Advanced Options
To open powerful customization features in Raspberry Pi Imager, you can access the advanced options by pressing ‘CTRL + SHIFT + X’.
This hidden menu lets you configure essential settings like SSH and WiFi, making it easier to set up your Raspberry Pi, especially for headless projects. The Advanced Options Menu provides enhancements that allow you to modify settings before writing the OS to the micro SD card, ensuring a more tailored experience. Additionally, you can disable overscan for HDMI monitors to enhance your display quality.
With these options, you’ll streamline your setup process and tailor your device to fit your specific needs.
Secret Menu Access
If you’re looking to reveal advanced features in Raspberry Pi Imager, accessing the secret menu is a game changer. By pressing ‘CTRL + SHIFT + X’ after selecting your OS and storage device, you unseal a world of customization options that aren’t visible in the main interface.
This keyboard shortcut works seamlessly across Windows, Mac, and Linux, allowing you to personalize your setup with ease. Additionally, this secret menu enhances user experience by offering additional customization options to tailor your Raspberry Pi project further. Users have reported success with setup options when creating images using version 1.6.x of Raspberry Imager.
The tool also ensures that the OS images are downloaded directly from trusted sources, eliminating the need for manual file management.
Here’s what you can accomplish with the secret menu features:
- Configure WiFi settings: Set your SSID, password, and WiFi country for instant connectivity.
- Adjust locale settings: Match your device’s language and region for a more personalized experience.
- Skip the first-run wizard: Jump right into using your Raspberry Pi without the setup hassle.
- Ensuring proper cooling solutions can also be pre-configured to prevent overheating issues.
The secret menu benefits are immense. You gain control over your interface and streamline your experience by defining persistent settings, like audio notifications and media ejection after imaging.
By utilizing these advanced options, you can set up your Raspberry Pi in record time, reducing the need for additional peripherals.
Embrace the hidden power of Raspberry Pi Imager and elevate your projects today.
SSH Configuration Options
Accessing the advanced options in the Raspberry Pi Imager not only lets you customize settings but also gives you control over SSH configuration. To access this menu, simply press ‘CTRL + SHIFT + X’ while in the Imager.
Here, you can pre-configure SSH settings before writing the OS to your SD card. By checking the “Enable SSH” checkbox, you activate remote access, enhancing your Raspberry Pi’s usability. Additionally, remember that the SSH server is disabled by default on new Raspberry Pi OS installations, so enabling it during setup is crucial for remote management. Also, leveraging the Raspberry Pi Imager to set these configurations can significantly streamline your setup process.
You’ll want to set a custom username and password for your device, bolstering SSH security right from the start. Modifying the default user account streamlines user management across multiple Raspberry Pi devices, helping you maintain order and efficiency.
Remember to save your changes before proceeding with the OS write.
Additionally, configuring the hostname, language settings, and other options simultaneously not only saves time but guarantees a seamless integration upon boot. This setup negates the need for manual configurations later, making your Raspberry Pi ready for action out of the box.
Embracing these advanced SSH options puts you in charge of a secure and efficient start for your Raspberry Pi projects.
WiFi Setup Guide
When you’re ready to set up WiFi on your Raspberry Pi, accessing the advanced options in the Raspberry Pi Imager is an important step. This hidden menu allows you to customize vital settings before the OS is written to the SD card. You can activate this menu by pressing CTRL + SHIFT + X.
Here are a few key features you can configure:
- WiFi Credentials: Enter your SSID and password directly, boosting your WiFi setup’s security and performance. Additionally, ensure that Wi-Fi capabilities of your Raspberry Pi model are enabled to support seamless connectivity. For instance, models like the Raspberry Pi Zero W offer built-in Wi-Fi and Bluetooth.
- Country Code: Choose the correct country code to guarantee peak WiFi performance and compliance with local regulations. Additionally, ensure that DHCP is enabled on your router for automatic IP assignment, which facilitates easier network connection.
- Locale and Time Zone: Set adjustments for language, location, and time zone to further customize your Raspberry Pi experience. This is particularly useful if you plan to use your Raspberry Pi for tasks requiring precise timing or region-specific settings, such as home automation projects using the Raspberry Pi 3.
Handling Operating Systems
When you use Raspberry Pi Imager, you’ll find a variety of built-in OS options to choose from, making it easy to get started with your projects. Popular distributions like Raspberry Pi OS and Ubuntu Mate cater to different needs, whether you’re looking for a full desktop experience or a lightweight command-line system. Additionally, the Raspberry Pi community continually shares valuable resources and projects that can enhance your learning and experimentation. Furthermore, selecting stable OS versions is crucial for ensuring the reliability of your Raspberry Pi as you explore various setups. It’s also important to consider the performance enhancements of newer models, such as the Pi 5 improvements. If you have specific requirements, you can also load custom images from third-party sources to tailor your setup even further. Ensuring strong programming proficiency is essential for effectively utilizing these operating systems in diverse projects.
Built-in OS Options
Typically, you’ll find that Raspberry Pi Imager simplifies the process of managing various operating systems for your Raspberry Pi. With its built-in options, you can effortlessly explore and install the latest image versions without the usual hassle.
The Imager features include:
- Automated Image Handling: It automatically downloads and installs the OS you choose, eliminating the tedious manual steps.
- Cached Image Storage: The program stores a local copy of the selected image for quick access during future installations.
- Variety of Options: You can choose from a diverse array of OS options, including general purpose distros like Manjaro and RISC OS, as well as 32-bit and 64-bit versions of Raspberry Pi OS, Lite editions, and tailored pre-built images for specific purposes. Additionally, you can flash custom images, enabling even broader access to supported distributions.
You’ll also appreciate the user-friendly interface, which guides you through selecting your Raspberry Pi model and compatible OS options.
Once you’ve made your choice, the Imager handles everything from formatting the storage to writing the OS onto the SD card or USB drive. This guarantees you’re always working with the latest versions, enhancing your Raspberry Pi experience and keeping it secure.
Popular Distributions Available
Raspberry Pi Imager offers a wide range of popular distributions, guaranteeing you have plenty of options to suit your specific needs. Among these, the Raspberry Pi OS variants lead the pack, providing you with performance metrics that highlight their versatility.
You can choose from the standard 64-bit version, the resource-efficient Lite option, or even the legacy version for older hardware compatibility. Notably, Raspberry Pi OS (64-bit) is currently the most downloaded distribution, with 34.08% of today’s downloads highlighting its popularity among users. Additionally, this tool makes the installation process free and straightforward for various systems. This efficiency in installation aligns well with cost efficiency principles seen in other miniature computing solutions.
When exploring distribution comparisons, consider specialized options like RetroPie and Recalbox, both tailored for an engaging user experience in retro gaming. However, you may face installation challenges with less mainstream distributions. Ensure your microSD card meets the minimum capacity requirements of at least 8GB capacity to guarantee smooth operation.
Keep an eye on their resource requirements to guarantee smooth operation on your Raspberry Pi device. Community feedback is invaluable; it often reveals insights regarding compatibility issues and overall user satisfaction.
For broader applications, Ubuntu options offer reliable desktop and server experiences, while distributions like Home Assistant OS enable seamless home automation. These versatile uses are similar to how mini PCs can be customized for different department-specific needs.
In the end, the right choice hinges on your unique needs and desired projects. Embrace the Raspberry Pi advantages by thoroughly evaluating these distributions and aligning them with your innovative aspirations.
Custom Image Usage
Selecting the right distribution for your Raspberry Pi opens up the possibility of using custom images tailored to specific needs or projects.
Custom images provide unique benefits, such as optimized performance, additional features, or specific software setups. However, they also come with potential pitfalls, like settings not being retained after installation or compatibility issues. To effectively manage custom images, follow these steps:
- Download the Image: Get the custom image file from the official distribution website, verifying compatibility with your Raspberry Pi.
- Use Raspberry Pi Imager: Launch the Imager, select “Use Custom Image,” and choose the appropriate file.
- Prepare the Media: Verify your SD card or USB drive has enough capacity before starting the writing process.
When working with custom images, remember that no extraction of compressed files is necessary, and the Imager supports various formats. Additionally, ensure the image is based on Raspberry Pi OS for optimal compatibility with your device. To streamline the process, consider using command-line tools to download images if you’re facing internet connectivity challenges. This can be particularly useful when working on projects that require low power consumption.
Keep in mind that common issues, like forgetting settings for WiFi or hostname, can lead to manual reconfiguration.
Automating the download and imaging process with scripts can save you time and effort, allowing you to focus on your innovative projects.
Troubleshooting and Maintenance
Troubleshooting common issues with the Raspberry Pi Imager can save you time and frustration. One key area to check is version compatibility. If you encounter problems, consider rolling back to a previous version, like 1.7.1 or 1.7.4.1, since some users have found success with older releases after newer ones have failed. Especially problematic is version 1.7.2, which has caused several documented frustrations among users regarding performance.
Next, assess your system and hardware compatibility. The Imager may not work seamlessly on certain operating systems, including Windows 11, or specific card readers known to cause frequent verification failures. If issues arise, try running the Imager on a different OS or with a different card reader. In particular, running the Imager on Windows 8 is recommended, as many users have reported better performance on that operating system. While evaluating options, keep in mind that using USB2 ports may help improve performance compared to USB3. Ensuring your system has the necessary Bluetooth support can also aid in resolving connectivity issues.
Another effective step in error resolution is to uninstall, clean the registry quickly using tools like CCleaner, and reinstall the Imager. Rebooting your system after uninstalling helps in ensuring a fresh start.
Lastly, employ debugging and diagnostic steps. Running the Imager in debug mode can provide insights into where the process is failing. Pay close attention to debug output messages, as they can guide you in optimizing performance and resolving errors more effectively. Regularly updating your system using commands like ‘sudo apt update’ and ‘sudo apt upgrade’ can also ensure you have the latest patches and improvements.
Customizing and Automating
When using the Raspberry Pi Imager, customizing and automating your setup can greatly streamline the initial configuration process. By taking advantage of custom settings, you can fine-tune your Raspberry Pi for your specific needs right from the start. Here’s how you can optimize your experience:
- Activate the Secret Menu: Hold down ‘CTRL + SHIFT + X’ to access advanced options.
- SSH and WiFi Configurations: Preconfigure these for immediate remote access and connectivity.
- Hostname and Locale Settings: Set a custom hostname and configure your desired time zone right away.
- Ensuring proper network settings is crucial for seamless connectivity.
The automation benefits can’t be overstated. You can skip the first-run wizard, save your configurations, and guarantee they’re applied every time you use the Imager.
Additionally, configuring settings for headless setups allows you to manage your Raspberry Pi without a monitor, which is especially useful for IoT projects.
These steps help create a smoother, more efficient deployment process, allowing you to focus on innovation rather than spending time on repetitive configurations.
Embrace the customization and automation possibilities to make your Raspberry Pi journey even more enjoyable
Best Practices for Safety
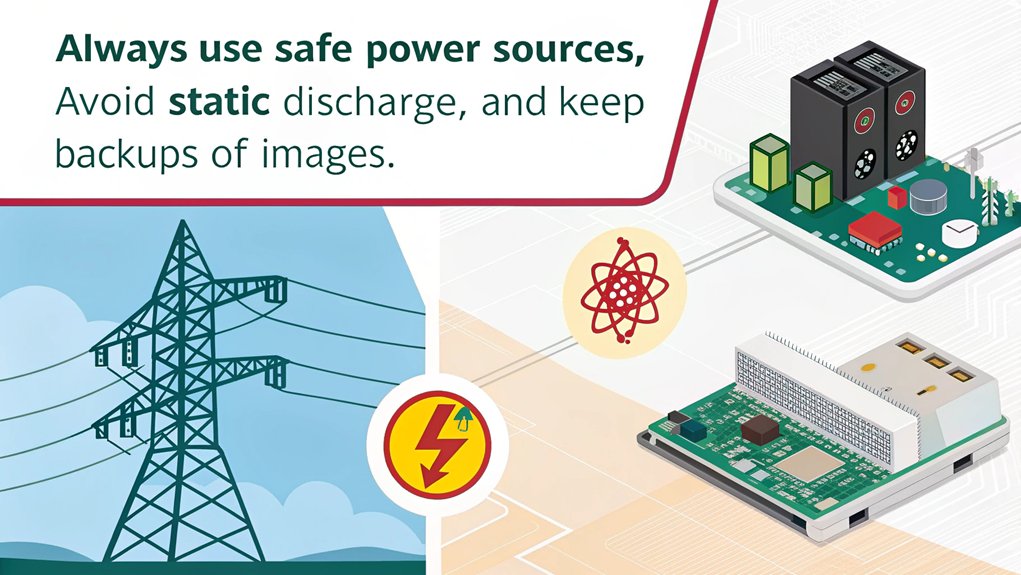
Safety should always be a top priority when working with your Raspberry Pi. By following essential safety precautions, you can help protect both yourself and the hardware integrity of your device. Here are some best practices to keep in mind:
| Action | Why It’s Important | Next Step |
|---|---|---|
| Shut down before powering off | Prevents file system corruption | Use the menu’s shutdown option |
| Connect hardware before powering up | Guarantees recognition of devices | Check connections before plugging in |
| Handle GPIO pins with care | Avoids irreversible damage | Refer to a GPIO guide |
Additionally, be cautious of static electricity. Use anti-static bags for storage and avoid walking on carpets when handling your Pi. A good quality power supply is crucial; it prevents overheating and instability. Always confirm voltage and polarity with a DVM before connecting components to prevent damage. Regularly updating your software can also help protect against unpatched software vulnerabilities.
Enhancing Efficiency With Features
To make the most of your Raspberry Pi experience, consider leveraging its various features designed to enhance efficiency. By utilizing these tools, you’ll not only streamline the imaging process but also improve your overall user experience.
Here are some key features to focus on:
- Advanced Options: Press CTRL + SHIFT + X to access the advanced menu, allowing you to change overscan settings, set a hostname, enable SSH on boot, and configure WiFi without hassle.
- Image Optimization: Direct the imager to use pre-downloaded OS images to save time, and utilize the pre-configuration feature to set WiFi and other settings before first boot.
- Hardware Usage: Opt for USB 3.0 card readers and high-performance microSD cards for faster writing speeds, ensuring your image transfers are done in under 12 minutes.
Frequently Asked Questions
What File Formats Are Supported for Custom Images on Raspberry Pi Imager?
You’ll find that supported formats for custom images include .img, .zip, .tar, .gz, and other compressed files. Make certain you choose the correct format to guarantee your image works seamlessly with Raspberry Pi Imager.
Can I Use Raspberry Pi Imager on Windows?
Yes, you can use Raspberry Pi Imager on Windows. The installation process is straightforward, enhancing your user experience. It’s compatible with Windows 10 or later versions, making it easy to set up and start innovating.
Is There a Version of Raspberry Pi Imager for MacOS?
Yes, the Raspberry Pi Imager’s features are compatible with macOS 11 and later. For ideal use, guarantee your macOS version meets this requirement to enjoy seamless image downloading and writing experiences.
How Do I Check the Image Validation After Writing for Raspberry Pi Imager?
After writing, you can check image verification by allowing Raspberry Pi Imager to verify the SD card. This process guarantees file integrity, confirming the image matches the original and identifying potential issues with the card.
Can I Resize Partitions After Flashing an Image of Raspberry Pi Imager?
You can resize partitions after flashing an image, releasing the full potential of your device. Immerse yourself in partition management and image optimization for a streamlined experience that maximizes both performance and storage efficiency!
Conclusion
To sum up, by mastering these methods, you’ll maximize your Raspberry Pi experience. You’ll confidently navigate the intuitive interface, explore advanced options, and customize your system seamlessly. Staying safe and troubleshooting efficiently will keep your projects running smoothly. So, immerse yourself in these delightful tips to develop your skills and discover the endless possibilities with your Raspberry Pi. With practice, patience, and passion, you’ll be well on your way to becoming a Raspberry Pi pro!

I am a retired software engineer with experience in a multitude of areas including managing AWS and VMWare development environments. I bought a relative a mini-PC a year ago and have become passionate about the technology and its potential to change how we deploy software.