
To get started with Mini PC Icecast streaming, make certain your hardware meets the minimum requirements: at least an Intel Core i5 processor, 4GB RAM, and 128GB of SSD storage. Install Icecast on your device, then configure the ‘icecast.xml’ file, setting parameters like listen-socket and mount points. Verify your network settings and confirm your source connections. Monitor your server performance through the admin interface and adjust timeout and queue settings as necessary. Proper stream management and security configurations are essential for a smooth operation. Keep exploring to uncover advanced techniques for peak streaming performance.
Key Takeaways
- Ensure your Mini PC has at least an Intel Core i5 or AMD equivalent, with 8GB RAM for smooth Icecast streaming operations.
- Configure your Icecast server by verifying ‘icecast.xml’ settings such as hostname, port, and source password for effective management.
- Use dedicated mountpoints for different streams to avoid conflicts and enhance your broadcasting capabilities.
- Regularly check server stats and logs to monitor performance, connection issues, and optimize settings like timeout and queue size.
- Implement security measures such as SSL and user authentication to protect your Icecast server and manage access effectively.
Understanding Mini PCs for Streaming
Understanding mini PCs for streaming involves recognizing their essential hardware requirements and capabilities. To achieve ideal streaming performance, you’ll want a mini PC equipped with at least an Intel Core i5 or its AMD equivalent and a minimum of 4GB of RAM, although 8GB is recommended for smoother multitasking.
Storage is critical too; a minimum of 128GB is necessary, and SSDs greatly boost loading speeds. One of the mini PC advantages is their ability to support 4K streaming even with integrated graphics, guaranteeing high-quality output. Multi-core processing allows you to handle encoding tasks effectively while maintaining responsiveness. Moreover, models like the NUCXi7 achieve 191 FPS in gaming scenarios, enhancing the overall streaming experience. Connectivity options, including multiple USB ports, HDMI, and Wi-Fi, enable seamless integration with your existing setup. Furthermore, mini PCs are energy-efficient and can reduce power consumption during long streaming sessions, making them a sustainable choice.
The compact design guarantees that these devices fit easily into various environments, from home theaters to workstations. Additionally, their portability offers versatility, making them suitable for streaming on the go. For optimal performance, consider models with advanced cooling systems to prevent overheating during intensive use.
Keep in mind that while integrated graphics can suffice for basic streaming, a dedicated GPU can enhance your performance, especially for gaming streams. Models like the TOPGRO T-1 Pro with NVIDIA RTX 4060 can significantly improve graphics rendering. Ultimately, understanding these factors will help you select the right mini PC for your streaming needs.
Icecast Installation Process
To install Icecast, you’ll start by downloading the software compatible with your operating system. Additionally, it’s essential to ensure that source clients are compatible with Icecast 2 for a smooth streaming experience. Next, you’ll configure the icecast.xml file to set domain names, passwords, and any specific parameters needed for your stream. Finally, you’ll launch the Icecast server to guarantee it’s ready for broadcasting. This project serves as an ideal way to gain familiarity with Linux systems.
Downloading Icecast Software
When you’re ready to stream with Icecast, the first step involves downloading the software suitable for your operating system. Icecast has different versions tailored to various platforms, so it’s essential to choose the right one.
Follow these steps based on your environment:
- For Linux via Source Download:
- Download the Icecast source package using the command: ‘wget http://downloads.xiph.org/releases/icecast/icecast-2.4.1.tar.gz’.
- Extract the package with ‘tar -zxvf icecast-2.4.1.tar.gz’, then navigate to the directory and run ‘./configure’.
- Using Package Managers:
- For Debian-based systems, update your packages with ‘sudo apt update’ and install Icecast using ‘sudo apt install icecast2’.
- For Windows Users:
- Visit the official Icecast site’s “Download” section, download the ZIP archive, extract it, and launch it from an administrative command prompt. It’s important to verify the installation by accessing the server’s web interface after launching Icecast.
Once you’ve downloaded the appropriate version, you’re one step closer to implementing Icecast’s streaming protocols effectively. It’s also crucial to ensure that all required libraries are properly installed before proceeding with the installation.
Configuring Icecast.Xml File
Configuring the Icecast.XML file is essential for guaranteeing your streaming server operates smoothly and efficiently. Start by specifying your hostname, which can be a DNS name or an IP address. Set the source and admin passwords to secure your stream and administrative functions. It’s also important to ensure that your two computers are well-connected to establish a reliable streaming setup.
In the ‘
Next, focus on the paths and directories. Typically, the ‘icecast.xml’ file resides in ‘/usr/local/etc’, ‘/etc/’, or ‘/etc/icecast2/’ for UNIX, or the ‘etc’ folder for Windows. Properly configure your log directory with the ‘
Prioritize configuration best practices like backing up your initial file and checking for XML validation issues with ‘xmllint icecast.xml’. Remember, avoid empty XML tags to prevent Icecast from malfunctioning.
Starting the Icecast Server
Starting the Icecast server involves executing specific commands that guarantee its functionality and accessibility.
To initiate the Icecast startup, use the following commands in your terminal:
- Start the server: ‘icecast -c /path/to/icecast.xml’
- Enable Icecast to launch at boot time: ‘sudo systemctl enable icecast2’
- Manually start the Icecast service: ‘sudo systemctl start icecast2’
After executing these commands, verify the server’s status for any errors during startup. It’s crucial to ensure that necessary ports are open on the server for external access to streams. Additionally, the Icecast server will be configured to start on boot for convenience.
Review the ‘error.log’ file to confirm that the server started successfully. Additionally, access the server monitoring interface by traversing to ‘http://yourip:port/admin/stats.xml’.
You’ll need to log in with the admin username and password you set earlier.
Ensuring everything runs smoothly includes checking for error messages and monitoring server logs for potential issues.
A healthy startup is vital for maintaining a seamless streaming experience. Once you confirm the server’s operational status, you’re ready to proceed with configuring your source client and sharing your audio streams effectively.
Configuration of Icecast Server
Configuring your Icecast server involves adjusting essential parameters in the ‘icecast.xml’ file to guarantee peak performance and security. You’ll need to set up security and authentication settings, like source and admin passwords, to protect your stream from unauthorized access. Icecast supports multiple mount points allowing you to create diverse streaming options for your listeners without extra costs. Furthermore, Icecast’s versatility means it can efficiently handle both audio and video streaming, enhancing your broadcasting capabilities. Additionally, understanding limitations and performance tuning will help you manage your streaming capacity effectively.
Essential Configuration Parameters
Understanding the essential configuration parameters for your Icecast server is critical for ideal performance and listener experience. These parameters directly influence your server’s responsiveness and its ability to handle multiple listeners effectively. Each Icecast server can host multiple streams via mountpoints, allowing you to customize content delivery. Additionally, it’s important to note that Icecast can host multiple broadcasts identified by distinct mountpoints.
To optimize your setup, pay attention to the following key elements:
- Socket Configuration: Adjust your ‘
‘ settings, including ‘ ‘ and optional ‘ ‘. Typically, port 8000 is used. - Client Settings: Set client limits in the ‘
‘ block, particularly if you anticipate high listener volumes. The ‘ ‘ tag is essential here. - Mountpoints Configuration: Create distinct mountpoints for each stream. Make sure each mountpoint is tailored to specific content and quality, like ‘/stream.ogg’.
When configuring your Icecast, fine-tune server parameters such as ‘
Properly defining ‘
Continuously monitor your server’s performance and be ready to adjust these settings to meet changing demands. This attention to configuration won’t only enhance your server’s robustness but also enrich the listener experience.
Security and Authentication Settings
Security and authentication settings are essential for ensuring the integrity and accessibility of your Icecast server. You need to configure appropriate authentication types, primarily ‘htpasswd’ and ‘url’ authenticators, to manage listener access effectively. The ‘htpasswd’ method stores users and passwords in a file you can manage via the web admin interface, while the ‘url’ method leverages a web server to authenticate listeners, using libcurl for secure requests. Implementing listener authentication helps secure mountpoints requiring verification for listeners, ensuring that only authorized users can access your streams. Additionally, it is important to remember that Icecast does not support chunked transfer encoding, which can influence how you manage data communication.
In your configuration file, make sure to specify ‘
Configuring chroot options and limiting the bind address further fortifies your server. Regular log management is key; specify log levels and file locations to keep track of activities and potential security breaches.
Limitations and Performance Tuning
To optimize your Icecast server’s performance, you’ll need to address limitations stemming from client connections, source streams, and queue management.
Effective performance optimization requires careful configuration of server settings to mitigate streaming limitations and guarantee a smooth experience for all users.
Consider focusing on these key areas:
- Connection Limits: Set appropriate ‘
‘ and ‘ ‘ values to manage the maximum number of simultaneous connections, avoiding strain on server resources. Monitoring connections for uniform behavior to prevent overloads is particularly important if the server experiences excessive concurrent connections. - Timeout Settings: Configure ‘
‘, ‘ ‘, and ‘ ‘ to maintain server responsiveness. These parameters help reclaim resources from inactive clients and sources, enhancing reliability. - Queue Management: Adjust ‘
‘ to optimize how data is buffered. A properly managed queue can prevent data drop-outs during streaming, improving user satisfaction. Regularly reviewing server limits is crucial as it allows for adjustments that align with actual usage patterns.
Regularly review global server stats via ‘http://yourip:port/admin/stats.xml’ to gain insights into your server’s performance, allowing you to make data-driven adjustments.
Running Your Icecast Server
Running an Icecast server requires precise configuration and robust resources to guarantee stable streaming performance. Choosing the right server types—whether Linux, FreeBSD, or Windows—affects your network requirements, facilitating efficiency and uptime. Below are key specifications to evaluate:
| Component | Minimum Requirement | Recommended Requirement |
|---|---|---|
| Operating System | Linux, Windows (Server 2003+) | Latest distros for better support |
| RAM | 1GB | 4GB or more for heavier loads |
| Storage | 120GB SSD | 256GB SSD or larger |
| Processor | 2.0GHz | 2.5GHz or better |
You’ll need to install Icecast and configure the ‘icecast.xml’ file. Set parameters such as ‘
Setting Up Source Clients
Setting up source clients is a crucial step to stream audio effectively through your Icecast server. You’ll find several source client options available, such as Simplecast or Winamp. Here’s how to guarantee a smooth setup:
- Configuration: Edit the client’s configuration file to include your Icecast server’s hostname, port, and source password. Check your ‘icecast.xml’ for these details.
- Network Requirements: Confirm that both your Icecast server and source client are on the same TCP/IP network, allowing seamless data transfer.
- Connection Verification: Access ‘http://yourip:port/admin/stats.xml’ to troubleshoot connections and verify that your source client is streaming correctly.
Make sure the audio source in your client sends properly encoded audio. If you encounter issues, refer to the server logs and validate the mountpoint URL to troubleshoot connections effectively.
Always store your passwords securely and monitor access logs for unauthorized attempts. Following these steps will streamline your streaming process and enhance your Icecast server’s performance.
Managing Streams and Mount Points
Managing streams and mount points in Icecast is crucial for optimizing your audio broadcast and guaranteeing smooth operational flow.
Effective stream management relies on well-defined mount point strategies. Each mount point must have a unique identifier to avoid conflicts, and you can configure default types for consistency across multiple mount points.
Consider the role of username and password for source clients. This not only secures connections but also facilitates better management of your streams. Override global settings as necessary; specific mount settings can help you fine-tune your configuration, allowing for maximum listeners or tailored stream metadata.
Custom HTTP headers are essential for enhancing your broadcasts, while on-connect and on-disconnect scripts can automate critical tasks like logging. Setting accurate content types also guarantees players deliver your audio correctly to listeners.
For advanced users, relay configurations provide robust options for managing mount points across servers. Whether relaying specific streams or integrating with a master server, be meticulous about your configuration file re-reads to apply changes effectively.
Using these strategies, you can greatly elevate your Icecast streaming capabilities, setting the stage for a more innovative audio experience.
Troubleshooting Common Issues
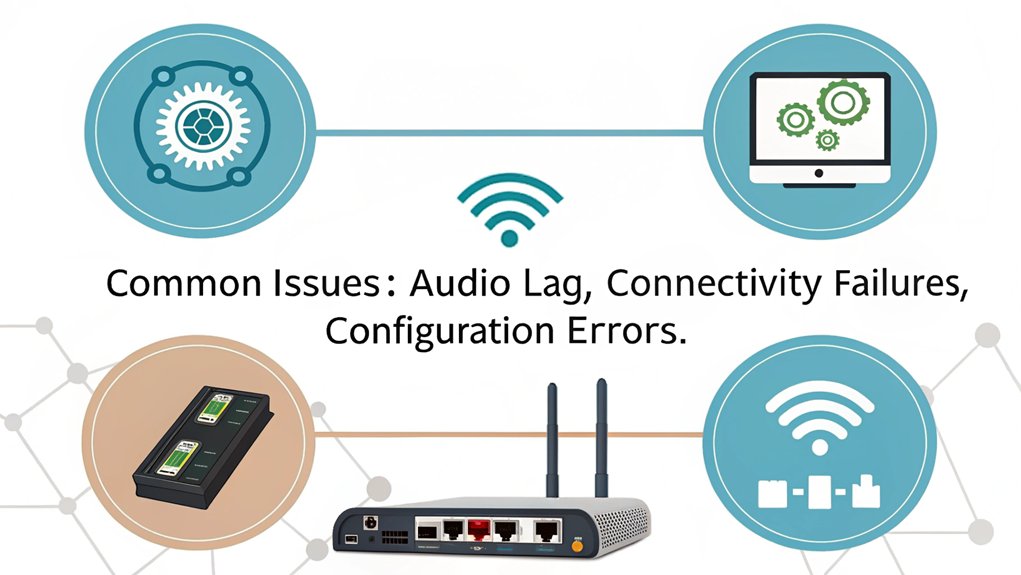
When you encounter issues with your Icecast streaming setup, addressing the root causes swiftly is vital to maintaining a seamless broadcast.
Focus on these critical areas for effective encoder troubleshooting and enhanced Icecast connectivity:
1. Check Encoder Connection: Verify your encoder is connected and operational. Look for status indicators on hardware encoders and review your encoder software logs for any unusual errors. Ensure that your setup adheres to optimal cable management practices to prevent physical obstructions. Regularly updating drivers can also help resolve connectivity issues.
Confirm all network connections are stable.
2. Verify Icecast Status Page: Access the Icecast service status page to confirm your stream is listed. If it’s absent, it likely points to encoder connection issues.
Use the Admin section to monitor listener connections and note any warnings, ensuring you have the latest system updates.
3. Test Network Connectivity: Use tools like PingPlotter to check for local network issues.
Engage your network administrator if connectivity persists, and be vigilant about firewall settings that may disrupt Icecast’s communication. Properly managing background applications can also help ensure stable network performance.
Frequently Asked Questions
What Are the Hardware Requirements for a Mini PC Running Icecast?
For ideal performance, your Mini PC running an Icecast Server should feature a 2.0GHz multi-core processor, 4-8 GB RAM, and at least a 120GB SSD, along with a reliable high-bandwidth internet connection.
Can I Stream Video Using Icecast Instead of Just Audio?
Yes, you can stream video using Icecast, not just audio. Icecast supports video streaming formats like WebM. While alternative software exists, Icecast’s flexibility and configuration capabilities make it a solid choice for video broadcasting.
How Do I Secure My Icecast Server From Unauthorized Access?
Imagine your Icecast server as a fortress. To strengthen its defenses, implement server authentication, utilize robust encryption methods, restrict access to trusted IPs, and regularly audit logs to thwart unauthorized intrusions. Stay innovative and vigilant.
Is It Possible to Use Icecast With Mobile Devices?
Yes, Icecast supports mobile compatibility, allowing you to stream efficiently using various apps. By leveraging these tools, you can achieve impressive streaming performance, mixing audio sources and monitoring real-time data from your mobile device effectively.
What Audio Formats Are Supported for Streaming With Icecast?
Icecast supports various audio codecs, including MP3, AAC, Ogg Vorbis, and Ogg Opus, ensuring excellent streaming quality. Using the right codecs can greatly enhance your audio experience across multiple devices and platforms.
Conclusion
In conclusion, commencing your journey with mini PC Icecast streaming opens a domain of creative possibilities. By mastering the installation and configuration of your Icecast server, you’ve gracefully navigated the intricacies of digital audio broadcasting. As you refine your skills in managing streams and troubleshooting, you’ll find satisfaction in the seamless transmission of your content. With this powerful setup, you’re well-equipped to captivate your audience and elevate your streaming endeavors to a professional level.

I am a retired software engineer with experience in a multitude of areas including managing AWS and VMWare development environments. I bought a relative a mini-PC a year ago and have become passionate about the technology and its potential to change how we deploy software.