Introduction
There are many creative Raspberry Pi projects for hobbyists that you can do. You can transform your living space into a smart home by using it as a central hub for controlling devices like lights and locks, and optimizing energy consumption. You can also build a DIY robot assistant with the Raspberry Pi 4, integrating a camera module and motor system for advanced tasks. Create a weather monitoring station using sensors like DHT11 and BME280, and visualize the data on platforms like ThingSpeak. Set up a retro gaming console with RetroPie to emulate over 50 gaming systems. Develop an AI voice assistant with speech recognition capabilities and secure data locally. Configure a smart TV by flashing Android TV OS onto the microSD card. Finally, capture stunning time-lapse videos using bash scripts and FFmpeg. Each project offers a unique way to harness the power of the Raspberry Pi, and exploring these further will uncover even more innovative possibilities.
Key Takeaways
- Smart Home Automation: Use Raspberry Pi as a central hub to control lights, locks, and optimize energy consumption with voice commands.
- DIY Robot Assistant: Build a robot with Raspberry Pi 4, camera module, and motor system for object detection and environmental interaction.
- Weather Monitoring Station: Create a weather station using Raspberry Pi, various sensors (DHT11, BME280), and MQTT for real-time data monitoring.
- Retro Gaming Console: Transform Raspberry Pi into a retro gaming console with RetroPie, supporting over 50 gaming systems like NES and SEGA.
- Time-Lapse Camera Project: Set up a time-lapse camera using Raspberry Pi, bash scripts, and cron jobs to capture images and compile them into a video.
Smart Home Automation
When you decide to commence on smart home automation, a Raspberry Pi can be your central hub, connecting and controlling various smart devices throughout your home. This setup requires a Relay Module to switch devices like smart light bulbs, smart door locks, and energy meters. You’ll also need software to manage all connected devices; open-source tools are readily available for this purpose.
To automate specific devices, you can use relay modules for controlling water heaters, ventilators, and gate drives. Digital input/output modules can detect states of switches or motion sensors, while analog inputs/outputs modules measure voltage from analog sensors and control external devices like three-way valves or electromotors. Serial communication modules facilitate communication with energy meters. Ensuring efficient operation is crucial, so consider using energy-efficient designs to minimize power consumption. Additionally, mini PCs can serve as effective servers for network-attached storage (NAS) solutions, enhancing your automation setup.
For advanced automation projects, you can build a Blockchain-powered smart lock using a Raspberry Pi Zero W or implement Unipi add-on boards for integrated inputs, outputs, and communication interfaces. Automate lighting, temperature control (using a smart thermostat), shutters, blinds, sunscreens, ventilation systems (enhancing home security), and irrigation systems (automated irrigation).
Measure and optimize energy consumption through effective energy management. Ensure device integration with stackable HATs like the Home Automation V4 for multiple functionalities. Utilize GPIO pins from the Raspberry Pi for various connections and mount components on a DIN rail for organized installation. This setup also benefits from compact design suitable for DIN rail installation in distribution boxes, similar to how mini PCs are designed for compactness.
This setup allows for voice control via APIs and Linux open-source operating systems, providing remote access through user-friendly interfaces. The result is significant cost savings due to optimized energy use and system scalability. Additionally, integrating an IoT Fleet Management system can enhance social interaction among family members by enabling video calls on large screens, fostering a sense of presence IoT Fleet Management. Regular updates and network configurations are essential to maintain optimal performance and security of your smart home setup. Furthermore, these systems often rely on mini PCs as central hubs due to their low energy footprint and quiet operation.
DIY Robot Assistant
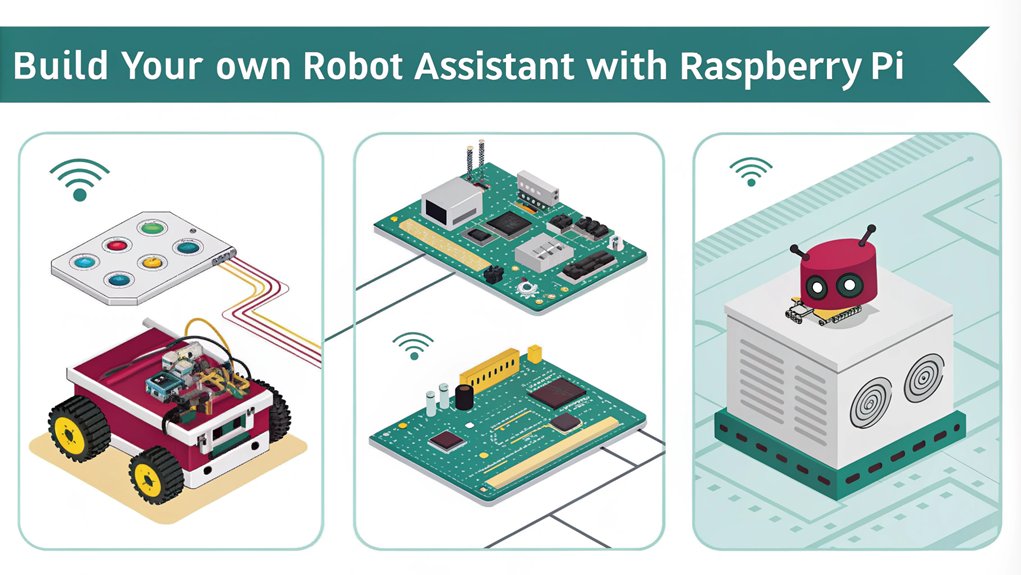
To create a DIY robot assistant, you’ll need a robust foundation, and the Raspberry Pi 4 or the latest generation model is an excellent choice due to its enhanced performance capabilities.
This tiny but powerful device can handle complex tasks such as computer vision, AI model integration, and real-time guidance.
Key Components for Your DIY Robot Assistant
- Camera Module: Essential for vision and object detection tasks, allowing your robot to identify and interact with its environment.
- Ultrasonic Sensors: Important for obstacle detection and guidance, ensuring your robot can move safely around its surroundings.
- Motor and Motor Controller: Necessary for movement, enabling your robot to perform tasks such as delivering items or maneuvering through spaces.
- USB Microphone and Speaker: Crucial for voice interaction, allowing users to communicate with the robot and receive responses.
Using the Viam Python SDK, you can integrate these components with AI models to enable advanced functionalities like object detection via OpenCV and voice interaction through Large Language Models (LLMs) or Mycroft.
ROS (Robot Operating System) can further enhance your project by providing a structured framework for advanced robotics projects.
Weather Monitoring Station
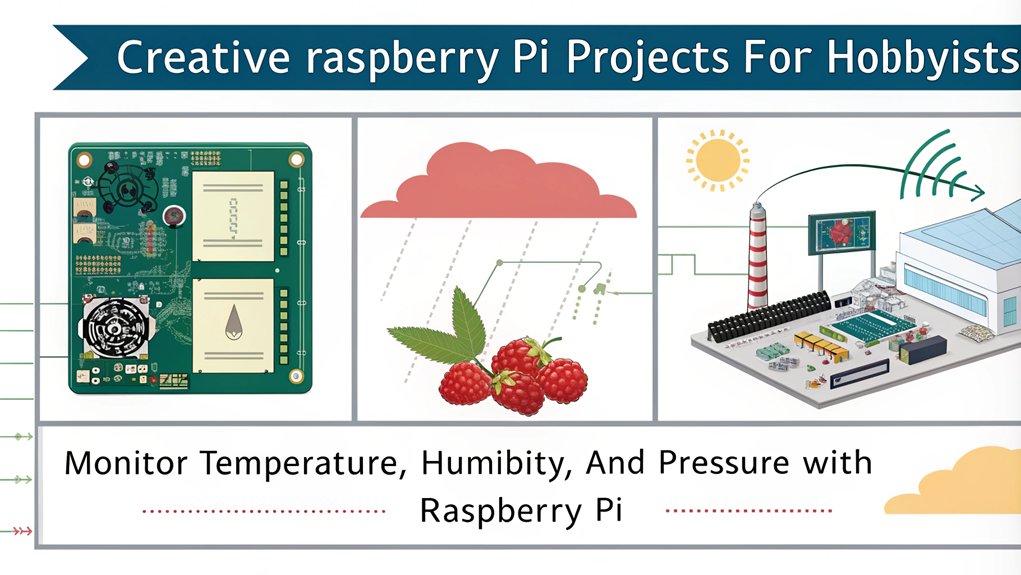
When setting up a weather monitoring station with your Raspberry Pi, you need to carefully select sensors like the DHT11, BM180, or BME280 for accurate temperature, humidity, and pressure readings.
You’ll also need to configure the system to analyze the data effectively, possibly using MQTT for communication between sensors and the base station. Additionally, ensure that your setup sends data to a remote server for real-time monitoring, such as using ThingSpeak.
Finally, guarantee a robust system setup by integrating components like the MCP3008 analog-to-digital convertor and using weatherproof enclosures for outdoor deployment. It is also crucial to use a reliable power supply, such as the Official Raspberry Pi 4 Power Supply, to ensure consistent operation.
Temperature Sensors
For precise temperature readings, the DS18B20 is a top choice due to its digital output and versatility in different environments. The DHT22, while less precise, offers the added benefit of humidity measurement, making it a popular choice for DIY projects. The BME280 integrates temperature, humidity, and air pressure measurements into one sensor.
Other Sensor Types
- Humidity Sensors: The DHT22 and BME280 are both capable of measuring humidity.
- Air Pressure Sensors: The BMP085 and BME280 are options for barometric pressure monitoring.
- Light and Proximity Sensors: The LTR-559 provides additional environmental data.
Key Considerations
Here are four key points to evaluate when selecting sensors for your weather monitoring station:
- Sensor Calibration: Verify that your sensors are properly calibrated to guarantee accurate readings.
- Sensor Fusion: Combining data from multiple sensors (like temperature, humidity, and air pressure) can provide a more all-encompassing view of the weather.
- Power Efficiency: Use ESP32 modules with deep-sleep mode to save power, especially if you’re using battery-powered sensors. This is particularly important when using solar-powered batteries to ensure long-term operation.
- Weatherproofing: Protect your sensors with weatherproof enclosures and materials like clear nail polish to safeguard against outdoor conditions. For instance, mounting sensors on a PVC board in a dry area under the house can help protect them from harsh environmental conditions.
Data Analysis
With your weather monitoring station equipped with a variety of sensors, the next step is to focus on data analysis. This phase is essential for extracting meaningful insights from the continuous real-time data collected by your DHT11, BM180, and BME680 sensors.
To guarantee accuracy, you need to perform initial readings and comparisons with standard equipment, followed by periodic sensor calibration.
For data visualization, you can leverage platforms like ThingSpeak or Grafana. These tools allow you to create customizable dashboards where you can display temperature, humidity, pressure, and indoor air quality data in graph form. Utilizing an IoT device like a Raspberry Pi with a SenseHAT hyper-local weather dashboard can enhance your data capture capabilities.
Real-time monitoring is a key feature, enabling you to track current conditions instantly. Historical data can also be viewed for trend analysis and comparison.
Integrating data from multiple sensors into a unified dashboard provides an all-encompassing view of your environment. You can also integrate Weatherstack API through Initial State to enhance your weather monitoring capabilities.
Local storage options like QuestDB guarantee that your data is securely stored and accessible even without internet connectivity. By utilizing these tools effectively, you can achieve robust data visualization and analysis, making your weather monitoring station highly informative and reliable.
System Setup
To set up your weather monitoring station, you’ll need to carefully assemble and configure the hardware and software components. Start by installing the latest version of Raspberry Pi OS using the Raspberry Pi Imager. Verify you enable SSH, set a username and password, and configure WiFi during the setup process.
Change the hostname to something like ‘weather.local’ for easier network identification. Connect your weather sensors (such as BME280 or DHT22) to the GPIO pins on your Raspberry Pi, following specific wiring diagrams for each sensor. Mount the Weather HAT securely on the GPIO header using standoffs and screws if necessary.
Ensure that the Raspberry Pi is powered off before mounting the Weather HAT HAT Mounting.
Here are some key steps to keep in mind:
- Sensor Connections: Verify all sensors are connected correctly according to their datasheets.
- Sensor Calibration: Calibrate your sensors to verify accurate readings.
- Data Visualization: Set up data visualization tools to display weather readings effectively.
- Weatherproofing: Protect your setup from rain using a weatherproof case or a Stevenson screen.
Update your Raspberry Pi OS and install necessary libraries such as ‘python3-yaml’, ‘python3-paho-mqtt’, and ‘python3-scipy’. Ensure that JavaScript is enabled in your browser settings for any web-based configurations or monitoring tools JavaScript Enabled.
Configure locale settings if required by your application, and set up an MQTT broker if using wireless sensors. Finally, configure autostart settings so your weather station starts automatically on boot.
Retro Gaming Console

Building a retro gaming console with a Raspberry Pi is a project that combines nostalgia with modern technology. This endeavor involves selecting the right hardware, such as a newer Raspberry Pi model for better performance, and choosing an appropriate enclosure like a universal box or a custom casing like an aluminium chassis or a vintage Game Boy enclosure.
For the software, you’ll need RetroPie, which includes EmulationStation and RetroArch, allowing you to emulate over 50 different gaming systems including NES, SNES, SEGA Genesis, and arcade games. You can install RetroPie on top of Raspbian OS or use a pre-configured image. Configuring controllers and setting up the user interface through EmulationStation is vital for a seamless gaming experience. RetroPie also supports a wide range of classic games due to its extensive library of emulators.
Controller customization is key; you can use Super Nintendo controllers or arcade buttons to enhance the arcade experience. Transferring ROMs to the Raspberry Pi is important for gameplay, and managing these ROMs efficiently guarantees smooth system performance. This project also requires careful configuration of relay modules if you’re integrating additional hardware components.
Adding LEDs for status indicators or aesthetic purposes can enhance the gaming aesthetics. Creating DIY enclosures such as mini arcades with LCD screens and speakers or custom-machined chassis to mimic retro CRT TVs can add a unique touch to your console design.
This project allows you to relive nostalgic games while leveraging modern DIY techniques and innovative design.
AI Voice Assistant

After reliving the nostalgia of retro gaming with your Raspberry Pi, you can now leverage this versatile device to create a sophisticated AI voice assistant, similar to how mini PCs can serve as dedicated media servers for home use.
To get started, verify you have the necessary hardware components such as a Raspberry Pi (preferably a Raspberry Pi 3 Model B+ or Raspberry Pi 4), a microphone, speaker or headphones, an SD card, and a compatible power supply.
Load the latest Raspbian OS onto your microSD card and configure your Raspberry Pi with the default credentials. This process involves logging in using default credentials and configuring settings for audio devices. Ensure your setup is energy-efficient, much like mini PCs.
Install essential software like Python, Git, and package managers like pip or pip3. For voice recognition and command execution, integrate a Speech-to-Text (STT) engine such as OpenAI’s Whisper or Mozilla Deepspeech, and a Text-to-Speech (TTS) solution like Piper.
This setup ensures that your personal data remains private and secure on a local network, enhancing data security.
Here are some exciting features you can add to your AI voice assistant:
- Wake Word Detection: Implement a wake word detection mechanism to activate your assistant only when needed.
- Intent Recognition: Use Home Assistant‘s Assist feature for intent recognition to perform specific tasks based on voice commands.
- Additional Actions: Add functionalities like weather reports, web searches, date and time updates, and server reboot commands.
- Advanced Command Interpretation: Utilize large language models like ChatGPT for more complex command interpretation.
The program runs in an infinite loop, continuously listening for voice commands, similar to how Plex media servers support continuous streaming.
With these features, you’ll have a robust AI voice assistant that enhances your home automation and provides seamless interaction.
Smart TV Setup
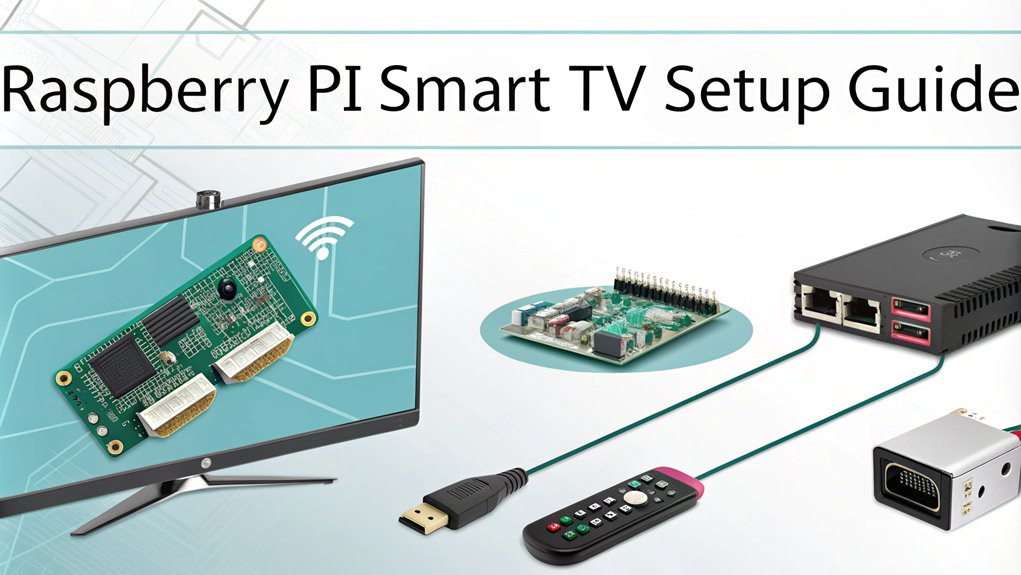
Transforming your living room into a smart entertainment hub is now more accessible than ever with the Raspberry Pi. To set up a smart TV using your Raspberry Pi, you’ll need a few key components: a Raspberry Pi 3 or 4 with at least 2GB of RAM, a microSD card with at least 16GB of free space, an HDMI cable, a keyboard and mouse (a wireless combo is recommended), a power adapter for the Raspberry Pi, and a monitor or TV for setup.
First, download the Android TV OS (a custom build of LineageOS by KonstaKANG) and use Etcher or Raspberry Pi Imager to flash it to the SD card. Verify you extract the image file before flashing. Ensure you have a 5V, 3A power adapter for optimal performance, as proper voltage is crucial for device stability and performance. This setup also ensures energy efficiency to maintain lower operational costs.
Insert the flashed SD card into your Raspberry Pi and connect your mouse, keyboard, and HDMI cable to your monitor/TV. Power on the Raspberry Pi and follow the on-screen instructions for initial setup, including selecting your language and configuring date and time settings.
Connect to a network (Wi-Fi or ethernet) and accept the EULA for LineageOS. Once set up, you can download and install Google Apps (GApps) using TWRP for access to streaming services. This project is suitable for CRT, LED, or OLED models.
Enable “Advanced Reboot” for easier access to recovery mode. You can also configure settings for an IR remote control if desired, enhancing your remote control experience by allowing headless configuration via SSH. This setup allows for seamless integration with various smart home devices.
Finally, customize settings under “Raspberry Pi Settings” in the Android TV menu to personalize your smart TV setup. This configuration allows you to seamlessly enjoy various streaming services with the convenience of a remote control and supports diverse audio and video codecs.
Time-Lapse Camera Project
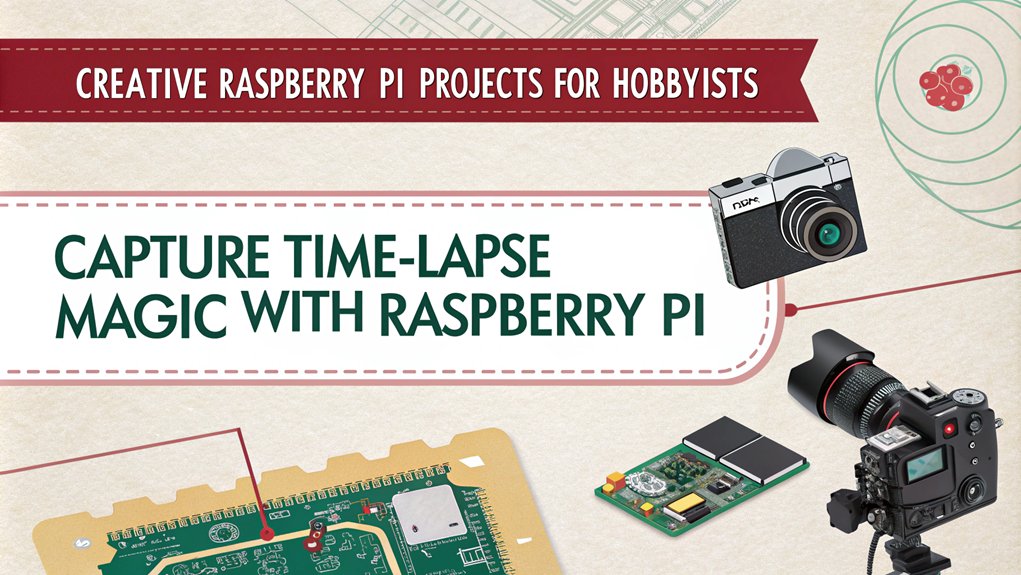
To set up a Time-Lapse Camera Project, you’ll need to guarantee you have the right hardware, including a Raspberry Pi, an official Raspberry Pi Camera or High Quality Camera, a reliable power supply, and a larger Micro SD card for storage.
You’ll also need to configure the camera using ‘raspi-config’ and position it securely on a tripod to maintain stability during filming. Ensure that the camera module connection is crucial for successful operation, requiring a ribbon cable for Raspberry Pi 5.
Once your setup is complete, you can capture images at regular intervals using a bash script and cron jobs, which will later be compiled into a video using FFmpeg.
Hardware Requirements
For a robust Time-Lapse Camera Project, you’ll need several key hardware components. Here are the essentials to get you started:
Hardware Components
- Raspberry Pi Microcomputer: Opt for the Raspberry Pi 4 for better performance.
- Camera: Choose a Raspberry Pi compatible camera like the Raspberry Pi HQ camera or PiCamera V3, which offers features such as autofocus, HDR, and different lens combinations.
- MicroSD Card: Use a high-capacity MicroSD card (preferably V30 or higher) to guarantee smooth performance and ample storage for images.
- Power Supply: Confirm you have a reliable power supply for your Raspberry Pi.
- USB Keyboard and Mouse: These are necessary for initial setup and configuration.
Camera and Mounting
Key Considerations:
- Stable Mounting System: A tripod or stable mounting system is vital to prevent camera movement.
- 3D Printed Case: An optional but recommended 3D printed case can provide stability and accessibility.
- Standard Fixing: Use standard fixing for a tripod and a rotating arm for camera adjustment.
- Alternative Mounting Options: Consider suction caps or brackets for mounting on surfaces like windows.
Capture and Display
With your Raspberry Pi and camera hardware in place, it’s time to focus on the capture and display aspects of your Time-Lapse Camera Project. To start capturing images, you’ll need to configure your camera using commands like ‘libcamera-hello’ to guarantee it’s properly detected and set up.
You can use the ‘libcamera-still’ command or Python scripts to capture photos at repeated intervals, such as every minute or every few seconds, depending on your interval settings.
For image processing and video rendering, you’ll use ‘ffmpeg’ to stitch the captured images into a video file. You can specify the frame rate and other video settings according to your desired output, such as 30 frames per second.
Automated scripts can render the video after capturing all frames, with options for predefined video time or adaptive FPS.
Remote management is essential for system optimization. Use remote desktop connections like VNC Viewer for camera preview and script management. You can access and edit settings files remotely to adjust timelapse parameters as needed.
Display integration involves using a mini display for feedback on the Raspberry Pi, showing the status of the timelapse capture.
Finally, consider storage solutions like erasing captured images after processing to save space, and transfer final video files to a local computer using SSH commands. This setup guarantees efficient capture, display, and management of your time-lapse project.
Frequently Asked Questions
What Is the Minimum Hardware Requirement for a Raspberry Pi Project?
To start a Raspberry Pi project, you need the basic components: a Raspberry Pi, a micro-SD card (at least 8GB), and a 5V DC power supply with 2.5A for stability. These are the minimum hardware requirements to get your project ideas off the ground.
How Do I Troubleshoot Common Errors in Raspberry Pi Projects?
Don’t worry if your Raspberry Pi project hits a snag; troubleshooting is straightforward. Check error messages for clues like boot issues or kernel crashes. Use debugging techniques such as verifying HDMI connections, checking ‘cmdline.txt’, and ensuring the correct root device in the boot partition.
Can I Use Older Raspberry Pi Models for New Projects?
You can use older Raspberry Pi models for new projects, but be aware of performance limitations and guarantee compatibility with legacy projects. Opt for high-performance microSD cards to mitigate these issues.
Are There Any Safety Precautions I Should Take When Working With Electronics?
When working with electronics, guarantee electrical safety by keeping high voltage parts out of reach and using GFCIs. For component handling, protect against static electricity by grounding yourself and using anti-static bags to prevent damage.
Where Can I Find Resources and Communities for Raspberry Pi Project Support?
To find resources and communities for Raspberry Pi project support, check out Raspberry Pi forums, the Element14 community, and online tutorial hubs like RaspberryTips and Science Buddies. These platforms offer guides, tutorials, and project ideas to help you innovate.
Conclusion
With these creative Raspberry Pi projects, you’re hitting the ground running in the world of DIY tech. From smart home automation to AI voice assistants, each project is a stepping stone to more complex and innovative ideas. By diving into these projects, you’re not just scratching the surface; you’re digging deep and uncovering a wealth of possibilities. So, keep tinkering and watch your skills soar to new heights

I am a retired software engineer with experience in a multitude of areas including managing AWS and VMWare development environments. I bought a relative a mini-PC a year ago and have become passionate about the technology and its potential to change how we deploy software.